Raise the vehicle with a lift or place it securely on tripods.
Remove the heat shield (four bolts).
Remove the catalytic converter nuts.
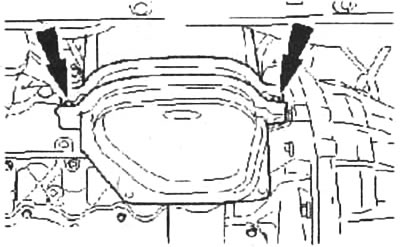
Remove the lower holder.
Lower the car.
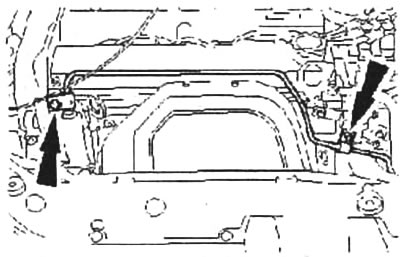
Remove the discharge line (arrows).
Remove the discharge pipe (1.8/2.0L engines)
Remove the heat shield on the exhaust manifold.
Disconnect the connector (arrow) of the lambda probe.
Disconnect the connector (arrow) of the lambda probe (1.8/2.0 l engines)
Remove the lambda probe.
Remove the catalytic converter nuts. Discard the old nuts.
Raise the vehicle or place it securely on tripods.
Remove the catalytic converter. To do this, remove the front mounting tape (arrow) and discard the gaskets. Important: You must support the catalytic converter while removing the mounting tape.
Remove the catalytic converter (1.8/2.0L engines)
Installation
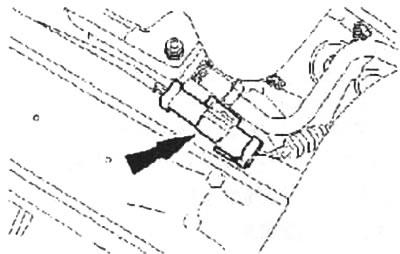
Unscrew the bolts on the rear mounting strip (arrow). In order for the holder to slide easily with the mounting strip, the adjoining surfaces must touch. Important: Otherwise, this may lead to damage to the holders and later to complete failure of the catalytic converter.
Remove the bolts on the rear mounting strap (1.8/2.0L engines)
Install the catalytic converter with new nuts and gaskets - tighten the nuts loosely at first.
Loosely connect the flexible pipe to the catalytic converter (use a new gasket).
Lower the car.
Tighten all nuts.
Install the lambda probe with a new sealing ring.
Connect the lambda probe connector and route the connecting wire so that it does not vibrate.
Install a heat shield.
Lay and connect the pressure pipeline.
Raise the vehicle or place it securely on tripods.
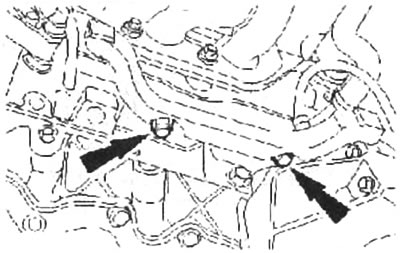
Unscrew the nut (arrow).
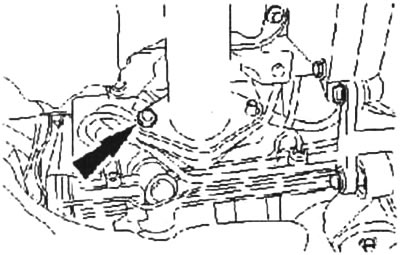
Unscrew the nut (1.8/2.0L engines)
Tighten the front mounting strap to 22 Nm.
Tighten the bolts (arrows) to 47 Nm.
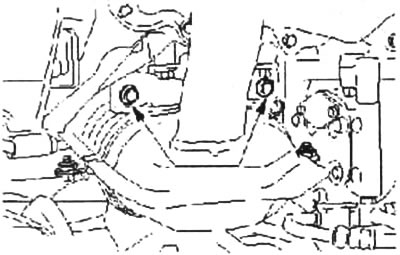
Tighten the bolts (1.8/2.0L engines)
Pre-install the lower bracket without securing it. Tighten the nuts to 4 Nm and the bolts to 22 Nm.
Install a heat shield.
Lower the vehicle and test drive. Tighten the screw connections if necessary.
This way the exhaust system will be sealed
Whenever you repair the exhaust system, you should always use new gaskets and bolts: new gaskets remain flexible and therefore seal better. Leaky systems not only create noise, but also have a negative impact on power. Remember to thoroughly clean all sealing surfaces and lubricate the bolt threads with heat-resistant lubricating paste before installation.