Contents: Removal ↳ Installation ↳
Removal
Mark the position of the front wheel on the hub with paint. This will allow the balanced wheel to be installed again in its previous position. When loosening the wheel mounting nuts, the car must be on the platform. Raise the front of the car onto the support jacks and remove the front wheel.
Remove the swivel support, see next chapter.
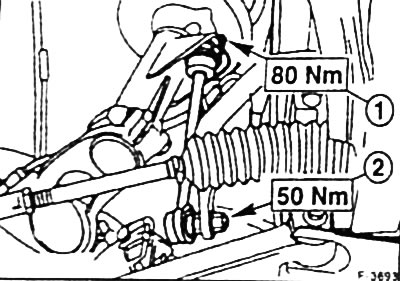
Models from 9/94: unscrew the stabilizer connecting rod fastening. In doing so, first unscrew nut "2", then nut "1".
Support the shock absorber strut and pivot support from below with a garage jack.
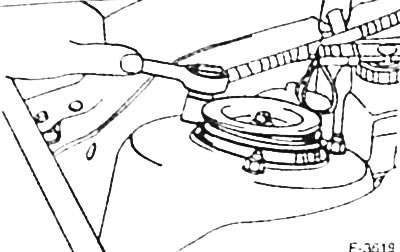
Remove the dust cover of the support bearing from the shock absorber strut cup in the engine compartment. Unscrew the 3 upper nuts securing the thrust bearing to the cup and remove the shock absorber strut by moving it downwards.
Installation
Insert the shock absorber strut from below so that it is located in the center of the cup.
I tightened by hand the 3 upper nuts securing the thrust bearing to the shock absorber cup, but did not tighten them completely
Install the swivel support.
Models from 9/94: tighten the stabilizer link to the shock absorber strut to 80 Nm, then tighten the stabilizer link to 50 Nm, see Figure F-3693.
Place the front wheel so that the marks made before removal match. First apply a thin layer of plastic grease for rolling bearings to the place where the rim fits on the wheel hub. Do not lubricate the threads of the wheel studs. Tighten the wheel with nuts. Lower the car and tighten the wheel mounting nuts crosswise to a torque of 100 Nm.
Tighten the three upper nuts securing the thrust bearing to the shock absorber strut cup to a torque of 50 Nm. Place the protective cover on top of the shock absorber strut cup.
If possible, check the chassis parameters immediately and, if necessary, adjust them, see p. 109.
This article is a copy from the website [Fordbook.ru]