Rear axle
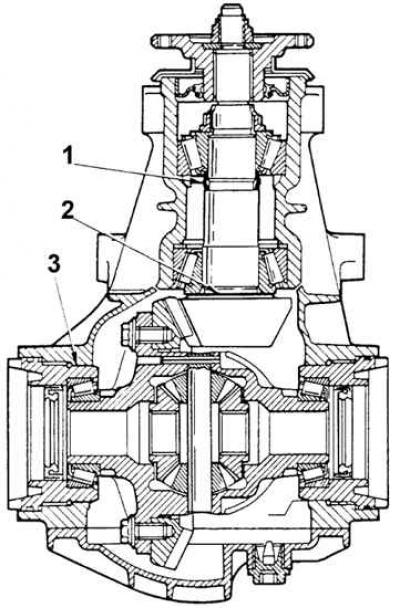
1 – spacer sleeve, 2 – gasket, 3 – main gear clearance adjustment flange
Rear axle parts
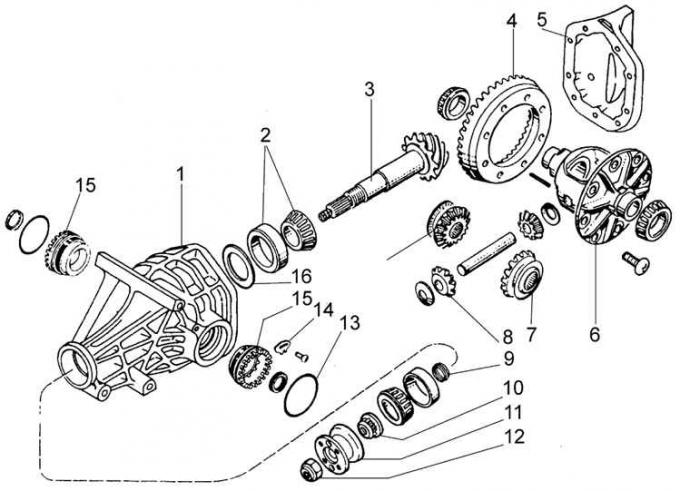
1 – crankcase, 2 – differential bearings, 3 – final drive pinion, 4 – final drive driven pinion, 5 – rear axle housing cover, 6 – differential case, 7 – axle gears, 8 – satellites, 9 – assembly gasket, 10 – final drive pinion bearing nut, 11 – final drive pinion flange for connection to the rear joint of the propeller shaft, 12 – flange nut, 13 – sealing ring, 14 – locking flange, 15 – bearing holder, 16 – compensation washer
Differential with viscous clutch
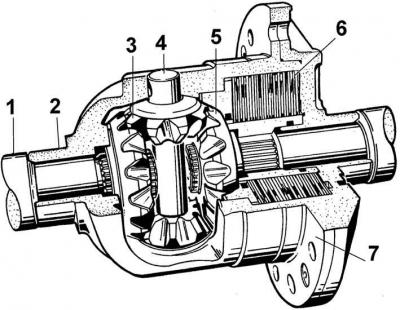
1 – output shaft, 2 – differential box, 3 – satellites, 4 – axle, 5 – half-axle gear, 6 – clutch, 7 – flange
1. Raise the car.
2. Remove the rear exhaust system mounting pads and move it to the side.
3. Remove the propeller shaft.
4. Remove the drive shafts from the rear axle flanges by unscrewing the six Torx bolts securing the inner joints to the shaft flange on each side.
5. Disconnect the left support of the rear axle beam from the bottom to provide access to the bolts securing the rear axle to the beam.
6. Support the rear axle with a jack and unscrew the mounting bolts to the rear suspension beam.
7. Remove the rear axle housing cover suspension bracket.
8. Unscrew the rear axle housing mounting studs.
9. Lower the jack and remove the rear axle from under the vehicle.
Installation
Perform the steps in reverse order to the removal process. After installation, check the oil level in the rear axle housing.
(For details, please visit the website: FORDBOOK.RU)