Turbocharger
Turbocharger Oil Supply Line
Removal
1. Remove the negative cable from the battery.
2. Remove the crankcase guard and mudguard.
3. Unscrew the nuts and disconnect the exhaust inlet pipe from the turbocharger.
4. Disconnect the oil return pipe from the turbocharger.
5. Remove the air supply pipe from the turbocharger.
6. Remove the pipe connecting the manifold and turbocharger.
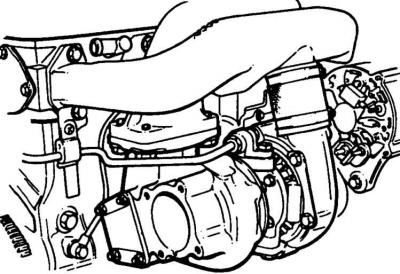
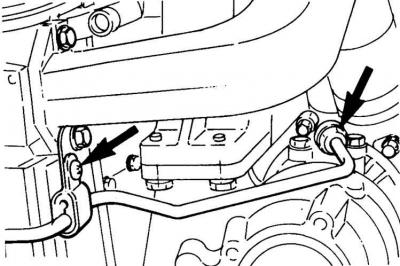
7. Remove the oil supply line to the turbocharger.
8. Unscrew the four bolts securing the turbocharger to the exhaust manifold and remove the turbocharger by lowering it down the engine compartment.
9. Thoroughly clean the mating surfaces on the manifold and turbocharger.
Installation
Installation is performed in the reverse order of removal. It is necessary to pay attention to some features:
- be sure to install new gaskets;
- after installing the turbocharger, remove the power connector from the electromagnetic valve on the high-pressure fuel pump. Crank the engine with the starter until the oil pressure indicator light goes out. This is necessary to ensure that oil reaches the turbocharger bearings, otherwise they may fail.
Starting the engine after major repairs
1. After installing the engine in the vehicle, check the oil and coolant levels.
2. Remove the connector from the engine stop solenoid valve and crank the engine with the starter until the oil pressure warning light goes out. Connect the connector to the engine stop solenoid valve.
3. Start the engine and check the tightness of all systems. Engine smoking is normal, as the oil that got on the parts during engine assembly burns off.