In addition, the gearbox is removed to replace the clutch, flywheel and rear crankshaft oil seal of the engine.
An automatic transmission is removed for almost the same reasons as a manual transmission, except for the need to replace the clutch and flywheel, which are absent in this case.
The methods for removing and installing manual and automatic transmissions are practically the same and are described using the manual transmission as an example. The difference lies in the size and number of transmission control cables, as well as the presence of hydraulic system hoses in the automatic transmission, connecting the transmission to the cooling radiator.
USEFUL TIP: The work of removing and installing the gearbox is very labor-intensive, so first make sure that its malfunctions are not caused by other reasons (insufficient oil level, clutch drive defects, loose gearbox mounts, etc.).
USEFUL TIP: The gearbox is quite heavy and its shape is awkward to hold, so we recommend removing it with an assistant.
For removal manual transmission perform the following operations.
NOTE: Removal and installation of a manual gearbox is shown using the example of removing the iB5 gearbox.
You will need: keys "8", "10", "13", "15", a socket head "13" with a ratchet handle, a screwdriver with a flat blade.
1. Place the vehicle on a lift or inspection pit.
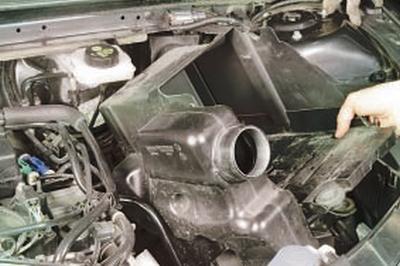
2. Remove the air filter (see Removing and installing the air filter and intake silencer).
3. Remove the mudguard and engine crankcase protection (see Removing and installing mudguard and engine crankcase protection).
4. Drain the oil (working fluid) from the gearbox (see Changing the oil in a manual transmission or the working fluid in an automatic transmission).
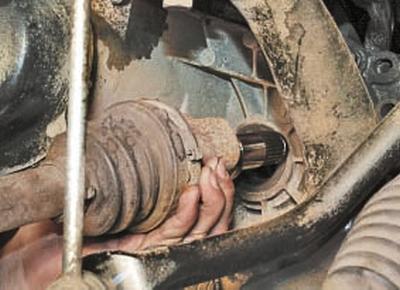
5. Remove the front wheel drives (see Removing and installing front wheel drives).
6. Disconnect the transmission control cables from the gearbox (see Replacing the transmission control cables).

7. Remove the battery mounting shelf (see Removing and installing the battery mounting shelf).
8. Disconnect the wiring harness connector from the reverse light switch (see Checking and replacing the reverse light switch)…
9….pry it up with a screwdriver…
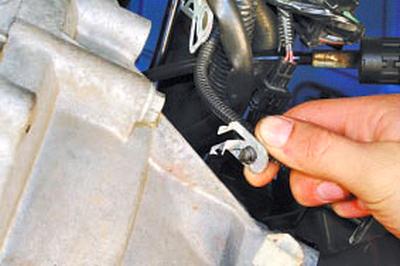
10….disconnect the reverse light switch wiring harness holder from the gearbox housing and move the harness to the side.
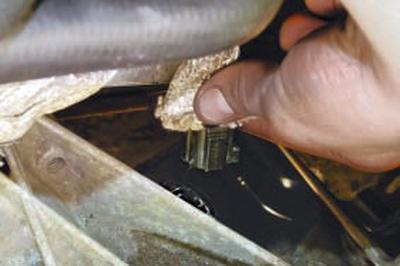
11. Disconnect the wiring harness connector from the speed sensor (see Checking and replacing engine management system sensors).
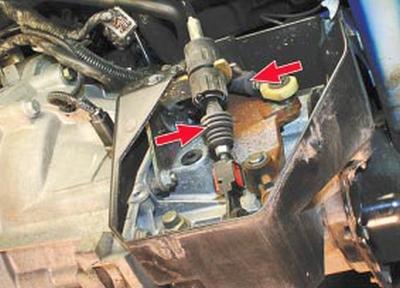
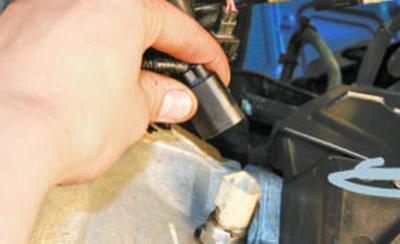
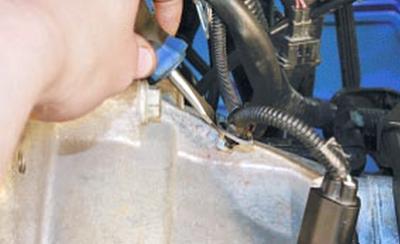
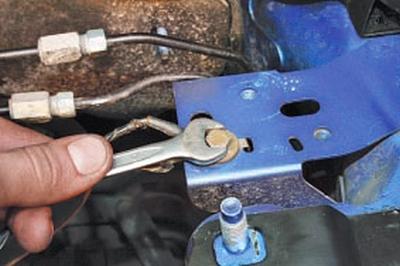
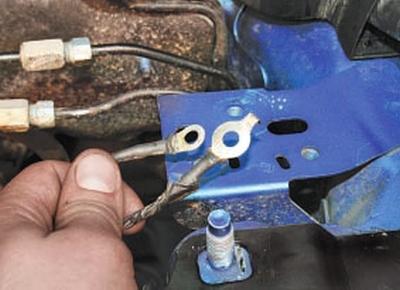
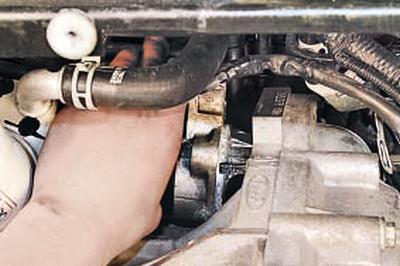
12. Using a screwdriver, remove the spring retainer from the end of the hydraulic clutch release hose…
13….and disconnect the hose from the hydraulic drive pipe.
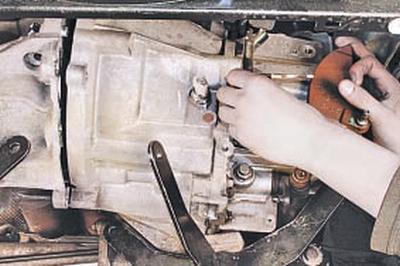
NOTE: Take measures to prevent oil from leaking from the clutch release hydraulic tube (for example, by plugging the tube opening with a rag or wooden plug).
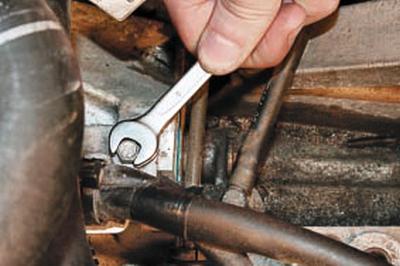
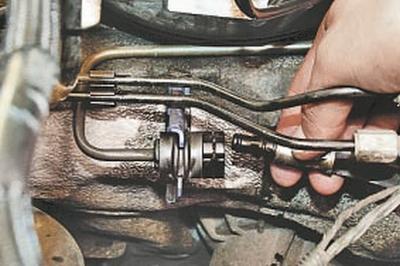
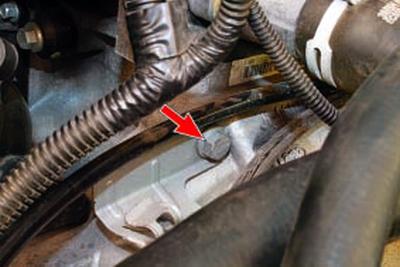
14. Unscrew the bolt securing the hose brackets to the gearbox housing…
15….and move the bracket together with the hoses to the side.
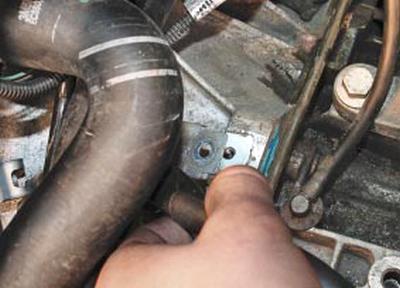
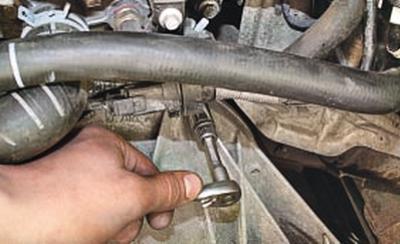
16. Unscrew the bolt securing the ground wires to the body bracket..
17….disconnect the wires from the bracket and move them to the side.
18. Unscrew the mounting bolts and remove the starter from the clutch housing without disconnecting the wires from it (see Removing and installing the starter). Move the starter to the side and secure it in any way so that it does not interfere with further work.
19. Install a reliable support under the engine or hang it up using a lifting mechanism. Install a similar support under the gearbox.
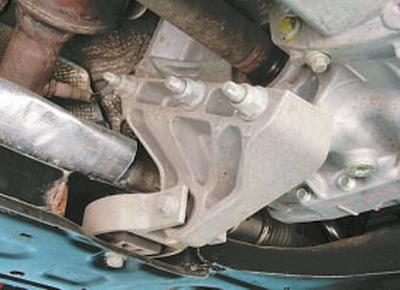
20. Remove the left powertrain mount support (see Replacing the left support of the powertrain suspension).
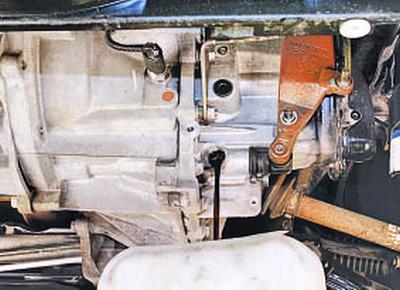
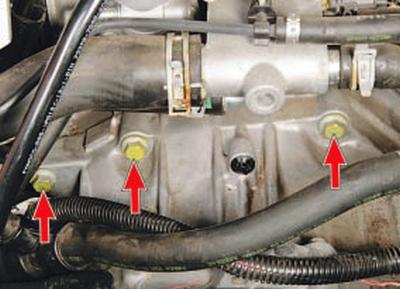
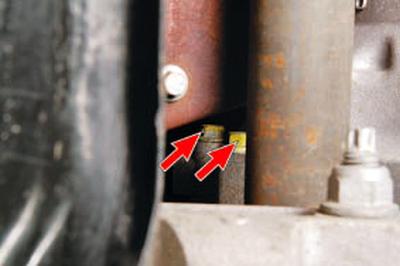
21. Unscrew one bolt securing the gearbox housing to the engine from the top left…
22….and on the right…

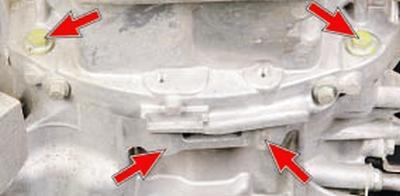
23….two bolts on the left side…
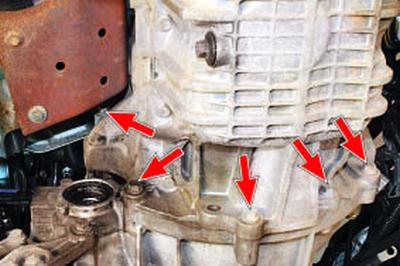
24….and five bolts at the bottom.
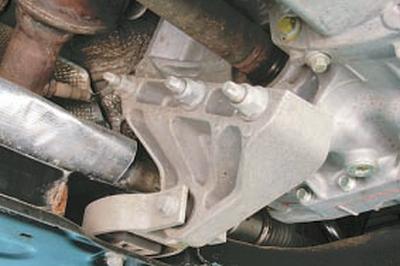
25. Remove the rear powertrain suspension support (see Replacing the rear powertrain suspension support).
26. Move the gearbox back until the input shaft of the gearbox comes out of the hub of the driven clutch disc.
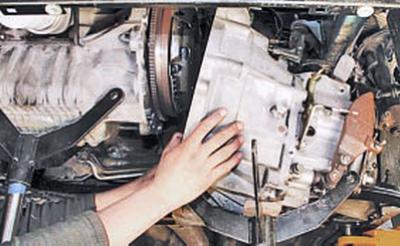
27. Move the box as far back as possible, remove the support from underneath it and, tilting the rear part of the box down, remove it from the car.
CAUTION: When removing the transmission, do not rest the end of the input shaft against the diaphragm spring petals to avoid deforming them.
28. Install the gearbox and all removed parts and assemblies in the reverse order of removal.
USEFUL TIP: Before installing the gearbox, we recommend lubricating the splines of the input shaft with a thin layer of high-melting grease.
Check with a special mandrel how the driven clutch disc is centered (see Clutch Removal and Installation).
29. Fill the gearbox with oil (see Changing the oil in a manual transmission or the working fluid in an automatic transmission).
30. Remove air from the clutch release hydraulic drive (see Bleeding the clutch release hydraulic drive).
31. If necessary, adjust the gearbox control drive (see Adjusting the gearbox control drive).
For removal automatic transmission perform the following operations.
1. Place the vehicle on a lift or inspection pit.
2. Remove the air filter (see Removing and installing the air filter and intake silencer).
3. Remove the mudguard and engine crankcase protection (see Removing and installing mudguard and engine crankcase protection).
4. Drain the oil (fluid) from the gearbox (see Changing the oil in a manual transmission or the working fluid in an automatic transmission).
5. Remove the front wheel drives (see Removing and installing front wheel drives).
6. Remove the battery mounting shelf (see Removing and installing the battery mounting shelf).
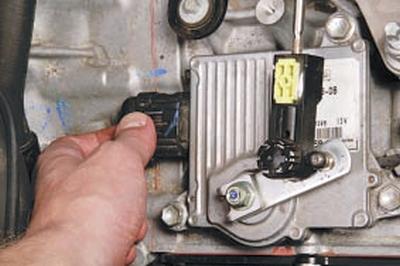
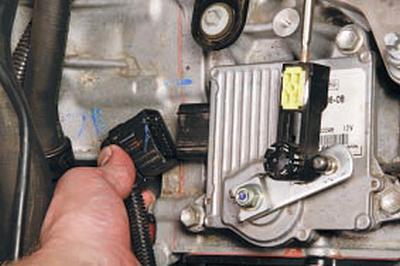
7. Press the lock…
8….and disconnect the cable end from the gearbox shift lever.
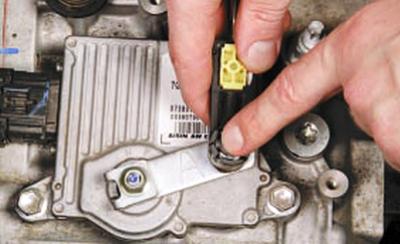
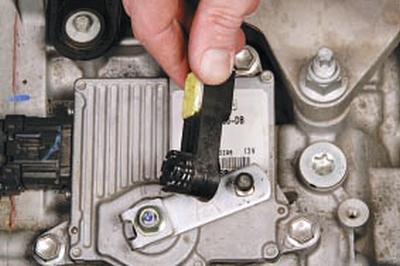
9. Press the latch..
10….and disconnect the wiring harness connector from the gearbox switch unit.
11. Disconnect the automatic transmission fluid cooling line hoses.
12. Remove the starter (see Removing and installing the starter).
13. Unscrew the four nuts securing the torque converter to the drive disk.
NOTE: To access the torque converter-to-drive plate mounting nuts, rotate the crankshaft using the pulley mounting bolt.
14. Place reliable supports under the engine and gearbox.
15. Remove the rear and left powertrain suspension mounts (see Replacing the rear powertrain suspension support Replacing the left support of the powertrain suspension).
16. Remove the three bolts securing the upper gearbox to the engine…
17….two side mounting bolts…
18….four lower mounting bolts and remove the automatic transmission from the vehicle.
19. Install the gearbox and all removed parts and assemblies in the reverse order of removal.
20. Fill the gearbox with working fluid (see Changing the oil in a manual transmission or the working fluid in an automatic transmission).
21. If necessary, adjust the gearbox control drive (see Adjusting the gearbox control drive).