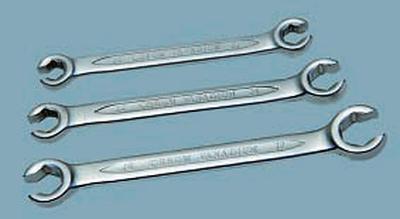
NOTE: The nuts that hold the brake pipes are usually very tight, and when you try to loosen them with a regular wrench, the edges of the nuts are crushed. Therefore, we recommend using special wrenches for brake pipes.
1. Disconnect the wire from the negative terminal of the battery.
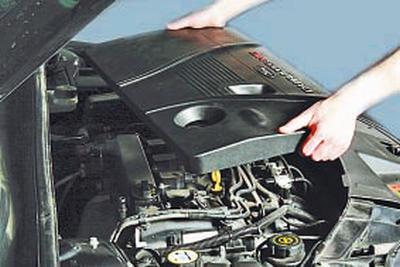
2. Remove the decorative engine cover (see Removing and installing the decorative engine cover).
3. Remove the air filter (see Removing and installing the air filter and intake silencer).
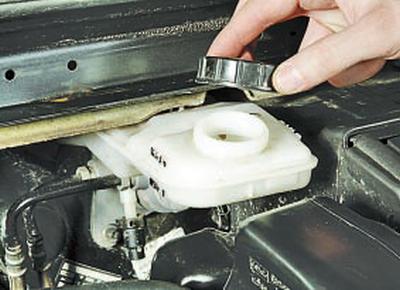
4. Remove the reservoir cap and pump out the brake fluid from the reservoir, for example, using a large medical syringe.
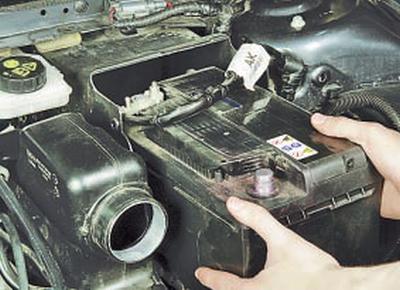
5. Remove the battery (see Removing and installing the battery)…

6….and its mounting shelf together with the intake noise muffler (see Removing and installing the battery mounting shelf).
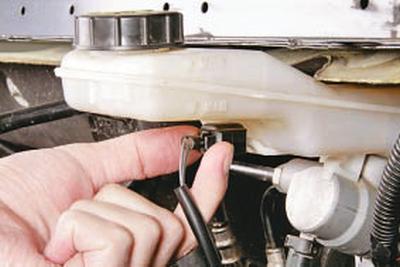
7. Press the brake fluid level sensor wiring harness connector lock…
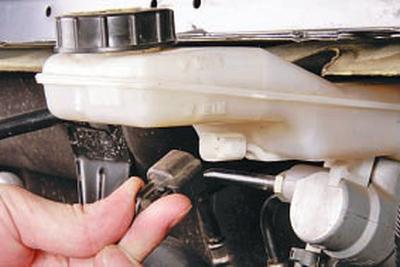
8….and disconnect the connector from the sensor.
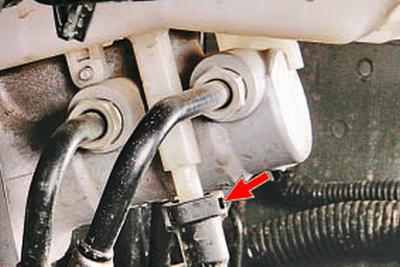
9. On a vehicle with a manual transmission, squeeze the clamps of the hose end (shown in the photo by the arrow) to the clutch master cylinder and disconnect the hose from the brake master cylinder reservoir.
USEFUL TIP: Immediately after disconnecting the hose from the reservoir, plug its opening without lowering the hose down. This will leave some working fluid in the hose, so after installing the reservoir and connecting the hose to it, there is no need to bleed air from the clutch release hydraulic drive.
Install a cap on the tank to prevent dirt from getting into it.
NOTE: On vehicles with automatic transmission, the master cylinder reservoir nipple has a spring-loaded plug instead of a hose tip. It does not need to be removed unless necessary.
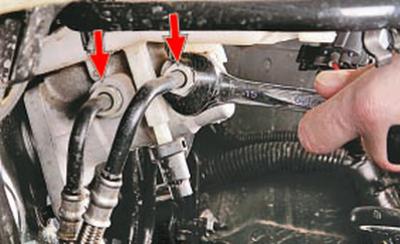
10. Loosen the nuts securing the two pipes to the master brake cylinder and move the pipes to the side.
HELPFUL TIP: Seal the lines using any means available (such as by placing protective bleeder caps on the ends) to prevent brake fluid from escaping.
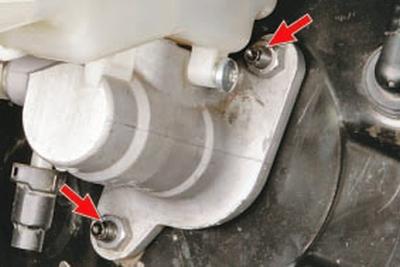
11. Unscrew the two nuts securing the master brake cylinder to the vacuum booster…
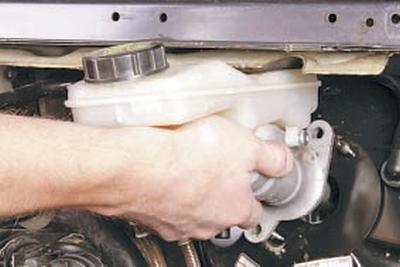
12….and remove the master brake cylinder assembly with the reservoir.
13. If the new master cylinder is missing a reservoir or it is necessary to replace the rubber reservoir bushings, remove the reservoir from the old cylinder (see Replacing the master brake cylinder reservoir) and install it on the new cylinder.
14. If during operation a leak of brake fluid was observed through the connecting bushings, remove the bushings from the holes in the cylinder body.
WARNING: Do not reuse coupling bushings, replace with new ones.
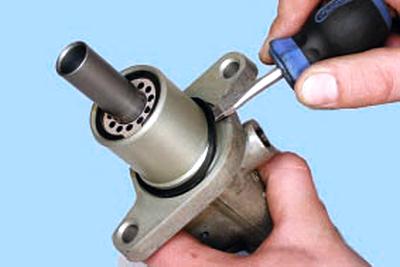
15. Using a screwdriver, remove the rubber sealing ring from the main brake cylinder housing.
CAUTION: Replace the master cylinder O-ring with a new one each time the connection is disassembled.
16. Install the brake master cylinder and all removed parts in the reverse order of removal, fill with brake fluid and bleed air from the system (see Bleeding the hydraulic brake system).