Brake pads need to be replaced when the pads are worn (the minimum allowable thickness of friction linings is 1.5 mm), loose connection of linings with the base, oiling of working surfaces, as well as in the presence of deep grooves or chips.
WARNING: Replace the brake pads of the front brake mechanisms only in a set - 4 pcs. (two on each side).
Before replacing the brake pads, check the brake fluid level in the master cylinder reservoir. If the level is close to the "MAX" mark, it is necessary to pump out part of the liquid (for example, a medical syringe or a rubber bulb), because after replacing worn pads with new ones, the level will rise.
You will need: wrenches "for 13", "for 15", tongs for removing retaining rings, pliers with thin jaws, a wrench for wheel nuts.
1. Remove the rear wheel from the side to be replaced.
2. Loosen the rear parking brake cables (refer to Parking Brake Actuator Adjustment).
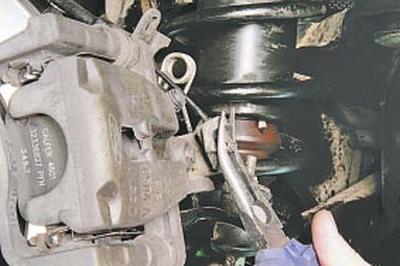
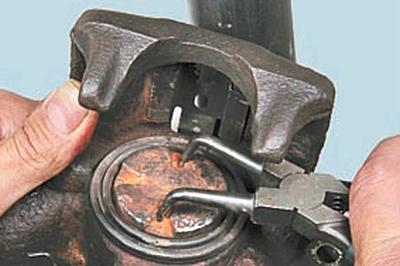
3. Grab the tip of the rear parking brake cable with fine jaw pliers..
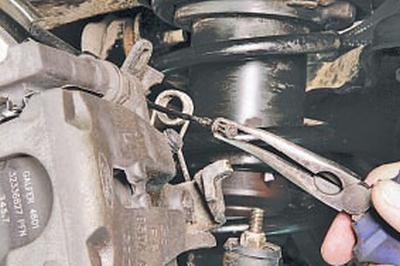
4….and pull it out of the slot in the spreader lever.
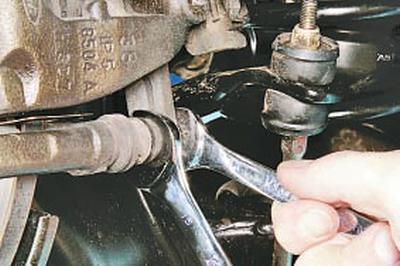
5. Turn out two bolts of fastening of directing fingers of a support.
NOTE: Keep your fingers from turning with the second wrench by the hex on them.
6. Disconnect the harness connector from the brake pad wear sensor (if the vehicle is equipped with such sensors).
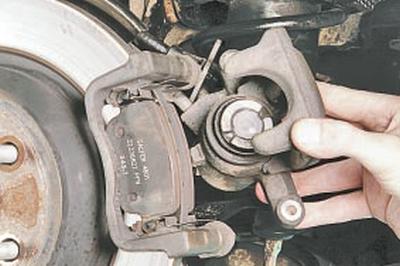
7. Remove the caliper from the shoe guide and secure it to the side, for example by tying it with wire to the suspension arm. When doing this, make sure that the brake hose is not stretched or twisted.
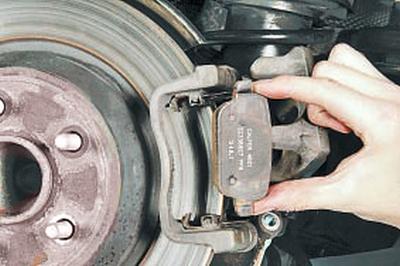
8. Remove the outer and inner brake pads.
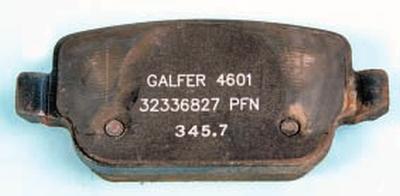
NOTE: Pay attention to the markings on the brake pads. Buy new pads with the same markings.
USEFUL ADVICE: Every time you replace the brake pads, be sure to check the condition of the protective rubber covers of the guide pins and the movement of the fingers in the holes of the brake pad guide.
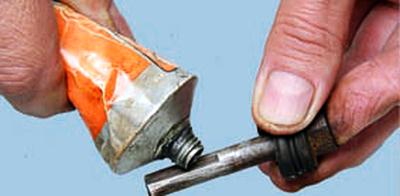
If the caliper guide pins are difficult to move, remove them and lubricate them with grease.
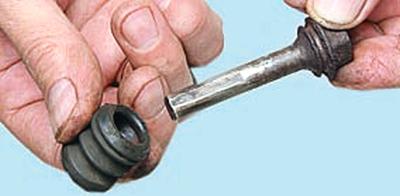
Put grease in the finger guards. Replace protective covers if they are hardened, deformed or torn.
9. Using circlip pliers or other suitable tool, screw the piston into the caliper cylinder.
10. Install the rear brake pads in the reverse order of removal. To prevent self-loosening of the caliper guide pin bolts, lubricate their threads before installation with an anaerobic thread locker.
Depress the brake pedal several times to bring the brake pads to the disc.
11. Connect the rear parking brake cable to the expansion lever.
12. Install the wheel.
13. Replace the second rear wheel brake pads in the same way.
14. Check up and if necessary restore level of a brake liquid in a tank of the main brake cylinder.
15. Adjust parking brake actuator (refer to Parking Brake Actuator Adjustment).
USEFUL ADVICE: After replacing worn out brake pads with new ones, do not rush to immediately go to busy highways. It is possible that at the very first intensive braking you will be unpleasantly surprised by the low efficiency of the brakes, although the pads were branded. Brake discs also wear out, and new pads only touch them at the edges, with little to no braking. Choose a quiet street or passage without cars and slow down gently several times so that the pads get used and begin to fit the entire surface. At the same time evaluate the effectiveness of the brakes.
USEFUL ADVICE: Try not to brake sharply for at least the first 100 km. With strong heating of unused pads, the top layer of their linings burns and the brakes will not be as effective as possible for a long time.
Visitor comments