Contents: Removal ↳ Installation ↳
Special tool
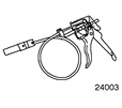 | Coolant Hose Clamp Remover/Installer 303-397 (24-003) |
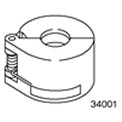 | 5/8" Spring Lock Coupling Puller (Black) 412-081 (34-003) |
Removal
Cars with air conditioning system
1. Drain the refrigerant from the air conditioning system. For additional information, refer to Section 412-00.
All cars
2. Drain the coolant from the cooling system. Refer to Section 303-03 for additional information.
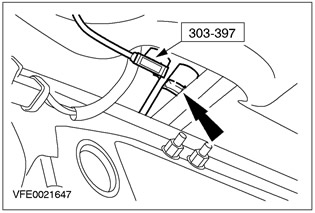
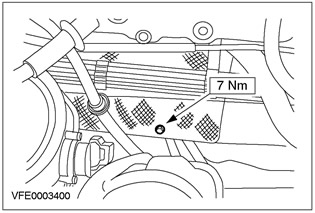
3. Using a special tool, disconnect the coolant hoses from the heater body.
4. Lower the vehicle.
5. Remove the instrument panel. For additional information, refer to Section 501-12.
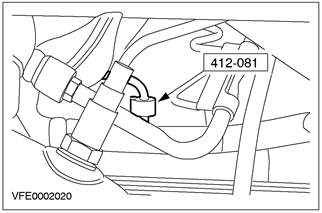
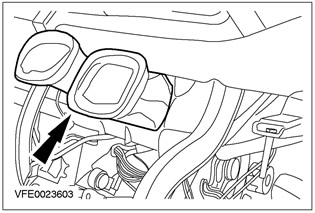
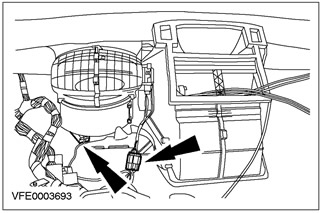
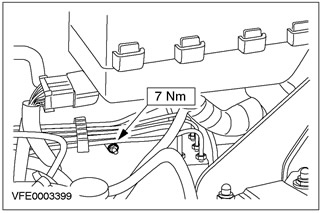
6. Using the special tool, disconnect the refrigerant lines from the evaporator core (discharge line shown below).
- Discard the O-rings.
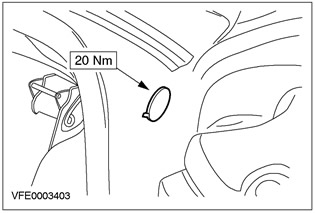
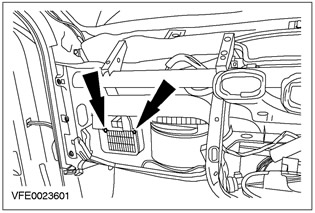
7. Unscrew the left and right inner cross member mounting bolts. Remove the plugs.
8. Remove the right air ducts.
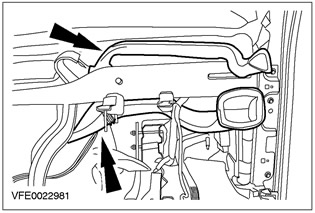
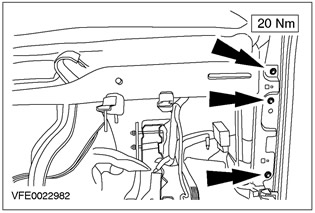
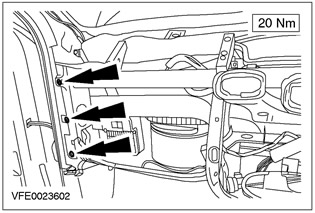
9. Remove the right inner cross member mounting bolts.
- Disconnect the wiring harness from the inner cross member.
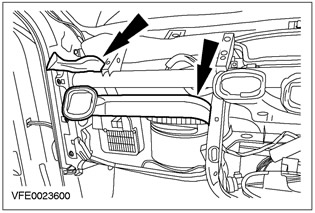
10. Remove the left air ducts
11. Disconnect the central junction box (CJB) from the inner cross member.
12. Remove the left inner cross member mounting bolts.
- Unclip the wiring harness from the inner cross member.
13. Remove the air duct.
- Unclip the wiring harness from the inner cross member.
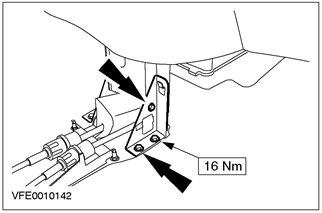
14. Remove the left and right inner cross member bracket (right side shown).
- Push the inner cross beam back.
15. Remove the rear footwell ventilation ducts.

16. Disconnect the wiring harness from the heater housing.
17. Unscrew the heater housing mounting nut on the passenger side.
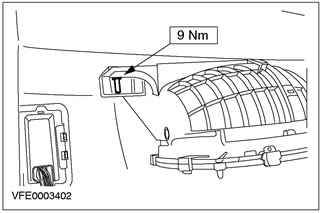
18. Unscrew the heater housing mounting nut on the driver's side.
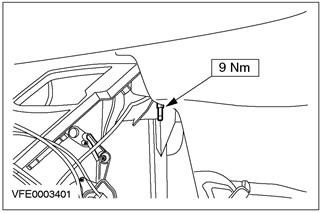
19. Unscrew the right nut securing the heater housing.
20. Remove the heater housing.
- Unscrew the left nut securing the heater housing.
Installation
All cars
NOTE: Procedure to be used when complaints are made about poor ventilation of the passenger compartment or fogging of the windows.
1. Remove the rear bumper fascia. For additional information, refer to Section 501-19.
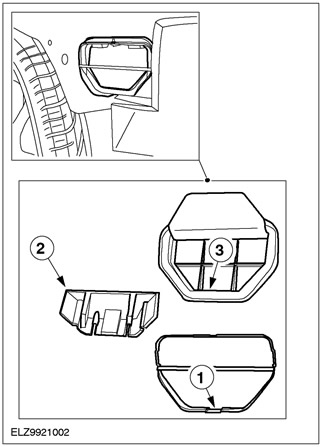
2. Remove the forced air bleed cover (left side shown).
- 1. Press the locking clip on the forced air bleed frame and release the frame.
- 2. Press on the inside of the forced air outlet deflector.
- 3. Release the clip on the forced air vent cover at the bottom and remove the cover.
3. Install the new forced air bleed cover.
4. Repeat steps 2 and 3 for the right side of the vehicle.
5.
NOTE: Install new refrigerant line O-rings.
NOTE: Apply clean refrigeration oil to the O-rings of the refrigerant lines before installation.
To install, follow the removal procedure in reverse order.