|
STATES |
DETAILS/RESULTS/ACTIONS |
|
A1: VEHICLE ROAD TEST |
|
|
1 Road test the vehicle and apply the brake pedal. |
|
|
• Is the vehicle pulling or moving? |
|
|
→ Yes |
|
|
Go to A2 |
|
|
→ No |
|
|
The car is correct. |
|
|
A2: CHECKING TIRE PRESSURE |
|
|
1Check for excessive tire wear and incorrect tire pressure |
|
|
• Tires in good condition? |
|
|
→ Yes |
|
|
If the vehicle is equipped with rear drum brakes, Go to A3 |
|
|
If the vehicle is equipped with rear disc brakes, Go to A4 |
|
|
→ No |
|
|
ADJUST tire pressure or INSTALL new tires if excessive wear is present. CHECK the system is working properly. |
|
|
A3: INSPECTION OF BRAKE PADS AND LININGS |
|
|
1 INSPECT brake pads and linings, looking for grease or fluid on the linings and signs of wear. |
|
|
• Are there any malfunctions? |
|
|
→ Yes |
|
|
INSTALL new brake pads. See Section 206-02 for more information. CHECK the system is working properly. DO A ROAD TEST (if it is needed). |
|
|
→ No |
|
|
Go to A4 |
|
|
A4: CHECK THE CALIPER |
|
|
1 Check the pistons and caliper studs for signs of deformation, leakage or jamming. See Section 206-03 / 206-04 for more information. |
|
|
• Are the disc brake caliper pistons and pins warped, leaking or binding? |
|
|
→ Yes |
|
|
REPAIR or INSTALL new pistons or studs as needed. CHECK the system is working properly. |
|
|
→ No |
|
|
Go to A5 |
|
|
A5: INSPECTION OF THE BRAKE DISC |
|
|
1 Check the brake discs for excessive wear or damage. |
|
|
• Is there excessive wear or damage? |
|
|
→ Yes |
|
|
REPAIR or INSTALL new brake discs as needed. CHECK the system is working properly. |
|
|
→ No |
|
|
Go to A6 |
|
|
A6: FRONT WHEELS BEARING INSPECTION |
|
|
1 Check the front wheel bearings. See Section 204-00 for more information. |
|
|
• Are the wheel bearings correct? |
|
|
→ Yes |
|
|
Go to A7 |
|
|
→ No |
|
|
INSTALL new wheel bearings. See Section 204-01 for more information. CHECK the system is working properly. |
|
|
A7: CHECKING WHEELS ANGLES |
|
|
1 Check the vehicle's wheel alignment. See Section 204-00 for more information. |
|
|
• Are wheel alignments within specification? |
|
|
→ Yes |
|
|
The car is correct. |
|
|
→ No |
|
|
Adjust wheel alignment if necessary. See Section 204-00 for more information. |
|
PINPOINT TEST B: RED BRAKE LIGHT IS ON PERMANENTLY
|
STATES |
DETAILS/RESULTS/ACTIONS |
|
NOTE: The brake warning light comes on for approximately five seconds when the ignition is turned on and then goes out. |
|
|
B1: CHECK RED BRAKE LIGHT |
|
|
1 Drive the ON position. |
|
|
• Is the red brake warning light on? |
|
|
→ Yes |
|
|
If the vehicle is equipped with ABS, Go to B2 Go to PINPOINT TEST B. If the vehicle is not equipped with ABS, Go to B3 Go to PINPOINT TEST B |
|
|
→ No |
|
|
The car is correct. |
|
|
B2: ABS SYSTEM CHECK |
|
|
1 Enter the OFF position. |
|
|
2 Disconnect the diagnostic tool. FDS2000 |
|
|
3 Using WDS, perform an ABS diagnostic test. |
|
|
• Are there any problems with the ABS system? |
|
|
→ Yes |
|
|
REPAIR or INSTALL new items as needed. See Section 206-09A / 206-09B / 206-09C for more information. |
|
|
→ No |
|
|
Go to B3 Go to PINPOINT TEST B |
|
|
B3: PARKING BRAKE CHECK |
|
|
1 CHECK if the parking brake is fully released. |
|
|
• Does the red brake warning light turn off? |
|
|
→ Yes |
|
|
The car is correct. |
|
|
→ No |
|
|
Go to B5 Go to PINPOINT TEST B |
|
|
B4: CHECK PARKING BRAKE SWITCH CIRCUIT FOR SHORT TO " GROUND " |
|
|
1 Disconnect the C930 parking brake switch. |
|
|
• Does the red brake warning light turn off? |
|
|
→ Yes |
|
|
INSTALL a new parking brake switch. CHECK the system is working properly. |
|
|
→ No |
|
|
Go to B5 Go to PINPOINT TEST B |
|
|
B5: BRAKE FLUID LEVEL CHECK |
|
|
1 Check the brake fluid level in the brake fluid reservoir. |
|
|
• Is the brake fluid level in the brake fluid reservoir at the MAX level? |
|
|
→ Yes |
|
|
Go to B6 Go to PINPOINT TEST B |
|
|
→ No |
|
|
Add brake fluid to the brake fluid reservoir up to the MAX mark. |
|
|
B6: CHECK THE BRAKE FLUID LEVEL SWITCH CIRCUIT FOR A SHORT TO « GROUND » |
|
|
1 Disconnect the C810 brake fluid level switch. |
|
|
• Does the red brake warning light turn off? |
|
|
→ Yes |
|
|
INSTALL a new brake fluid level switch. CHECK the system is working properly. |
|
|
→ No |
|
|
Go to B4 Go to PINPOINT TEST B |
|
|
B7: ELECTRICAL CIRCUIT CHECK 31S - GC6 (BLACK YELLOW) FOR THE PRESENCE OF A SHORT CIRCUIT ON "MASS" |
|
|
1 Enter the OFF position. |
|
|
2 Disconnect the C809 instrument panel. |
|
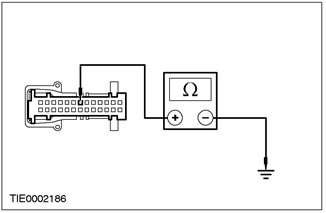 |
3 Measure the resistance between pin 20 of instrument panel connector C809, circuit 31S-GC6 (black and yellow), And "weight". |
|
• Is the resistance greater than 10,000 ohms? |
|
|
→ Yes |
|
|
INSTALL a new instrument panel. CHECK the system is working properly. |
|
|
→ No |
|
|
REPAIR circuit 31S-GC6 (black and yellow). CHECK the system is working properly. |
|
PINPOINT TEST C: BRAKING VIBRATION
|
STATES |
DETAILS/RESULTS/ACTIONS |
|
C1: ROAD TEST VEHICLE |
|
|
1 Road test the vehicle in the speed range of 40-80 km/h (25-50 mph) without applying the brakes. |
|
|
• Is there vibration? |
|
|
→ Yes |
|
|
CHECK for noise, vibration and shaking. See Section 100-04 for more information. REPEAT the road test if necessary. |
|
|
→ No |
|
|
Go to C2 |
|
|
C2: REAR BRAKES VIBRATION CHECK |
|
|
NOTE: Apply the parking brake. |
|
|
1 Road test the vehicle in the speed range of 40-80 km/h (25-50 mph), applying a medium force to the parking brake lever only. |
|
|
• Is there vibration? |
|
|
→ Yes |
|
|
INSPECT rear brake discs or drums for excessive wear or cracks. See Section 206-04 / 206-02 for more information. |
|
|
→ No |
|
|
Go to C3 |
|
|
C3: FRONT BRAKES VIBRATION CHECK |
|
|
1 Road test the vehicle in the speed range of 40-80 km/h (25-50 mph), by applying light to moderate force to the brake pedal. |
|
|
• Is there vibration? |
|
|
→ Yes |
|
|
INSPECT front brake discs for excessive wear or cracks. See Section 206-03 for more information. CHECK the system is working properly. |
|
|
→ No |
|
|
The car is correct. |
|
PINPOINT TEST D: FAST DOWN PEDAL
|
STATES |
DETAILS/RESULTS/ACTIONS |
|
D1: BRAKE PEDAL FORCE CHECK |
|
|
1 Road test the vehicle and apply the brake pedal. |
|
|
• Is the force applied to the brake pedal correct? |
|
|
→ Yes |
|
|
The car is correct. |
|
|
→ No |
|
|
Go to D2 |
|
|
D2: BRAKE FLUID LEVEL CHECK |
|
|
1 Check the brake fluid level in the brake fluid reservoir |
|
|
• Is the brake fluid level within specifications? |
|
|
→ Yes |
|
|
Go to D3 |
|
|
→ No |
|
|
CHECK brake reservoir seals. Refer to ch. "Checking the Master Cylinder", presented in this section. ADD brake fluid and BLEED the brake system. For more information, refer to Bleeding - Pressurized. For more information, refer to Bleeding - Normal available in this section. CHECK the system is working properly. REPEAT the road test if necessary. |
|
|
D3: CHECK BRAKE PEDAL HEIGHT - PRESSURE THE SYSTEM |
|
|
1 Quickly depress the brake pedal five times. |
|
|
• Is the brake pedal height increased and then held at the new level? |
|
|
→ Yes |
|
|
BLEED AIR from the brake system. Refer to ch. "Bleeding air from the brake system", presented in this section. Check the bypass circuit in the cylinder. REPEAT the road test if necessary. |
|
|
→ No |
|
|
Go to D4 |
|
|
D4: CHECK THE BRAKE SYSTEM FOR LEAKAGE |
|
|
1 Check for external leaks in the brake system. |
|
|
• Are leaks found? |
|
|
→ Yes |
|
|
REPAIR, ADD brake fluid and BLEED the brake system as needed. For more information, refer to Bleeding - Pressurized available in this section. CHECK the system is working properly. REPEAT the road test if necessary. |
|
|
→ No |
|
|
Go to D5 |
|
|
D5: CHECK BYPASS CIRCUIT IN CYLINDER. |
|
|
1 Check for bypass in the brake master cylinder. Refer to ch. "Checking the Master Cylinder", presented in this section |
|
|
• Any malfunctions found? |
|
|
→ Yes |
|
|
INSTALL a new brake master cylinder, ADD brake fluid and BLEED the brake system. For more information, refer to Bleeding - Pressurized. For more information, refer to Bleeding - Normal available in this section. CHECK the system is working properly. |
|
|
→ No |
|
|
The system is correct. |
|
PINPOINT TEST E: SLOW PEDAL DOWN
|
STATES |
DETAILS/RESULTS/ACTIONS |
|
E1: ROAD TEST - BRAKE PEDAL OPERATION CHECK |
|
|
1 CHECK if this condition occurs when actually trying to stop by depressing the brake pedal in a moving vehicle. |
|
|
• Does the condition occur while the vehicle is moving? |
|
|
→ Yes |
|
|
Go to E2 |
|
|
→ No |
|
|
Go to E3 |
|
|
E2: CHECK FOR LEAKAGES IN THE BRAKE SYSTEM |
|
|
1 Check for external leaks in the brake system. |
|
|
• Are there external leaks in the brake system? |
|
|
→ Yes |
|
|
REPAIR if necessary. ADD brake fluid and BLEED air from the brake system. For more information, refer to Bleeding - Pressurized available in this section. CHECK the system is working properly. |
|
|
→ No |
|
|
Go to E3 |
|
|
E3: BRAKE MASTER CYLINDER BYPASS INSPECTION |
|
|
1 Check the master cylinder bypass. Refer to ch. "Checking the Master Cylinder", presented in this section. |
|
|
• Any malfunctions found? |
|
|
→ Yes |
|
|
INSTALL a new brake master cylinder, ADD brake fluid and BLEED the brake system. For more information, refer to Bleeding - Pressurized. For more information, refer to Bleeding - Normal available in this section. CHECK the system is working properly. |
|
|
→ No |
|
|
The system is correct. |
|
PINPOINT TEST F: BRAKE PEDAL LOW POSITION OR SOFT FEEL
|
STATES |
DETAILS/RESULTS/ACTIONS |
|
F1: CHECK FOR PRESENCE "SOFTNESS" PEDALS |
|
|
1 Road test the vehicle and apply the brake pedal. |
|
|
• Is the brake pedal force correct? |
|
|
→ Yes |
|
|
The car is correct. |
|
|
→ No |
|
|
Go to F2 |
|
|
F2: BRAKE PEDAL RESERVE CHECK |
|
|
NOTE: Increased resistance may be felt, similar to pedaling to the floor. |
|
|
1 The engine is idling. |
|
|
2 Lightly depress the brake pedal three or four times. |
|
|
3 Wait 15 seconds for the vacuum to regenerate. |
|
|
4 Depress the brake pedal until it stops moving down or increases resistance to pedal movement |
|
|
5 Keep the brake pedal depressed while increasing the engine speed to 2000 rpm. |
|
|
6 Release the accelerator pedal. |
|
|
• Does the brake pedal move down when the engine speed returns to idle? |
|
|
→ Yes |
|
|
Go to F3 |
|
|
→ No |
|
|
CHECK the vacuum supply to the brake booster. See Section 206-07 for more information. |
|
|
F3: CHECK BRAKE FLUID LEVEL |
|
|
1 Check the fluid level in the brake fluid reservoir. |
|
|
• Is the brake fluid level within specifications? |
|
|
→ Yes |
|
|
BLEED AIR from the brake system. For more information, refer to Bleeding - Pressurized available in this section. CHECK the system is working properly. |
|
|
→ No |
|
|
CHECK brake reservoir seals. Refer to ch. "Master brake cylinder", presented in this section. ADD brake fluid and BLEED the brake system. For more information, refer to Bleeding - Pressurized. For more information, refer to Bleeding - Normal available in this section. CHECK the system is working properly. REPEAT the road test if necessary. |
|
PINPOINT TEST G: BRAKE LOCK WHEN THE BRAKE PEDAL IS LIGHTLY DEPRESSED
|
STATES |
DETAILS/RESULTS/ACTIONS |
|
G1: BRAKE LOCK CHECK |
|
|
1 Road test the vehicle and apply light pressure to the brake pedal. |
|
|
• Are the rear brakes locking up? |
|
|
→ Yes |
|
|
Go to G2 Go to PINPOINT TEST G |
|
|
→ No |
|
|
The car is correct. |
|
|
G2: BRAKE SHOE INSPECTION |
|
|
1 Inspect the brake pads for grease or brake fluid on the pads, wear, damage, fit, size and type. |
|
|
• Any malfunctions found? |
|
|
→ Yes |
|
|
INSTALL new brake pads. See Section 206-02 / 206-04 for more information. |
|
|
CHECK the system is working properly. REPEAT the road test if necessary. |
|
|
→ No |
|
|
The car is serviceable |
|
PINPOINT TEST H: EXCESSIVE/INSTABLE BRAKE PEDAL TRAVEL
|
STATES |
DETAILS/RESULTS/ACTIONS |
|
H1: ROUGH ROAD TEST |
|
|
1Perform a road test of the vehicle in difficult driving conditions. |
|
|
2 Slowly apply the brake pedal. |
|
|
• Brakes OK? |
|
|
→ Yes |
|
|
The car is correct. |
|
|
→ No |
|
|
Go to H2 |
|
|
H2: WHEEL BEARING CHECK |
|
|
1 Check the front wheel bearings. See Section 204-01 for more information. |
|
|
• Are the front wheel bearings loose? |
|
|
→ Yes |
|
|
If the front wheel bearing is damaged, INSTALL a new one. See Section 204-01 for more information. CHECK the system is working properly. |
|
|
→ No |
|
|
CHECK difference in front brake disc thickness. See Section 206-03 for more information. |
|
PINPOINT TEST I: BRAKE STOPPING
|
STATES |
DETAILS/RESULTS/ACTIONS |
|
I1: ROAD TEST VEHICLE |
|
|
1 Road test the vehicle and apply the brakes. |
|
|
• Are the brakes working properly? |
|
|
→ Yes |
|
|
The car is correct. |
|
|
→ No |
|
|
INSPECT individual wheel cylinders or brake calipers and INSTALL new wheel cylinders or brake calipers if necessary. Go to I2 |
|
|
I2: BRAKE BOOSTER CHECK |
|
|
1 Check the adjustment and travel of the brake booster push rod. See Section 206-07 for more information. |
|
|
• Pusher OK? |
|
|
→ Yes |
|
|
The car is correct. |
|
|
→ No |
|
|
INSTALL a new brake booster. See Section 206-07 for more information. CHECK the system is working properly. |
|
PINPOINT TEST J: EXCESSIVE BRAKE PEDAL FORCE
|
STATES |
DETAILS/RESULTS/ACTIONS |
|
J1: VACUUM TEST |
|
|
1 Disconnect the vacuum hose from the brake booster. |
|
|
2 Connect a vacuum tester/leak tester to the vacuum hose. |
|
|
3 Drive the START position. |
|
|
4 Start the engine and let it reach normal operating temperature. |
|
|
5 Determine the vacuum pressure. |
|
|
• Is the vacuum pressure 40.5 kPa? |
|
|
→ Yes |
|
|
Go to J2 |
|
|
→ No |
|
|
FIND and REPAIR the cause of the low vacuum. CHECK the system is working properly. |
|
|
J2: SYSTEM INSPECTION |
|
|
1 Enter the OFF position. |
|
|
2 Connect the vacuum hose. |
|
|
3 Inspect the brake booster, rubber bushing, and all parts of the vacuum system for cracks, holes, loose connections, or missing clips/clamps. |
|
|
4 Depress the brake pedal five times to release the vacuum. Depress the brake pedal and keep it depressed. |
|
|
• Does the brake pedal move down when starting the engine? |
|
|
→ Yes |
|
|
The vacuum system is OK. |
|
|
→ No |
|
|
Go to J3 |
|
|
J3: BRAKE BOOSTER CHECK VALVE |
|
|
1 Check the brake booster check valve. Refer to ch. "Vacuum brake booster", presented in this section. |
|
|
• Is the brake booster check valve OK? |
|
|
→ Yes |
|
|
CHECK the vacuum brake booster. Refer to ch. "Checking the vacuum brake booster" presented in this section. INSTALL a new brake booster if necessary. CHECK the system is working properly. |
|
|
→ No |
|
|
INSTALL a new brake booster check valve. CHECK the system is working properly. |
|
PINPOINT TEST K: SLOW OR INCOMPLETE BRAKE PEDAL REVERSE
|
STATES |
DETAILS/RESULTS/ACTIONS |
|
K1: BRAKE PEDAL REVERSE CHECK |
|
|
1 Run the engine at a high idle speed while depressing the brake pedal several times. |
|
|
2 Pull the brake pedal back with a force of approximately 44.5 N. |
|
|
3 Release the brake pedal and measure the distance to the driver's foot rubber. |
|
|
4 Depress the brake pedal firmly. |
|
|
5 Release the brake pedal and measure the distance between the brake pedal and the driver's foot rubber. The brake pedal should return to its original position. |
|
|
• Does the brake pedal return to its original position? |
|
|
→ Yes |
|
|
The car is correct. |
|
|
→ No |
|
|
Vehicles built up to 01.1999 Go to K2 Vehicles built since 01.1999 Go to K3 |
|
|
K2: BRAKE PEDAL STICK CHECK |
|
|
1 Check the brake pedal and make sure the brake pedal moves freely. |
|
|
• Does the brake pedal move freely? |
|
|
→ Yes |
|
|
INSTALL a new brake booster. See Section 206-07 for more information. CHECK the system is working properly. |
|
|
→ No |
|
|
REPAIR or INSTALL a new brake pedal bracket. See Section 206-06 for more information. CHECK the system is working properly. |
|
|
K3: BRAKE PEDAL STICK CHECK |
|
|
1 Check the brake pedal and make sure the brake pedal moves freely. |
|
|
• Does the brake pedal move freely? |
|
|
→ Yes |
|
|
INSTALL a new brake booster. See Section 206-07 for more information. CHECK the system is working properly. |
|
|
→ No |
|
|
Go to K4 |
|
|
K4: BRAKE PEDAL LINKAGE CHECK |
|
|
1 Check for clearance between the brake pedal and the brake pedal return lever. |
|
|
• Is there a gap between the brake pedal and the brake pedal return lever. |
|
|
→ Yes |
|
|
INSTALL a new brake pedal bracket. See Section 206-06 for more information. CHECK the system is working properly. |
|
|
→ No |
|
|
VERIFY the position of the brake pedal bracket and the brake pedal return lever. CHECK the system is working properly. |
|
Visitor comments