2. Install the oiled differential case bearings and the replacement differential case.
3. Screw the differential box bearing clearance adjustment flanges by hand until they contact the bearings and tighten the knurled nut securing the replacement box.
4. Rotate the replacement box repeatedly to accurately position the bearing rollers.
5. Install a dial indicator on the crankcase and rest its measuring tip against the center of the replacement box.
6. Perform one full revolution of the replacement box and observe the oscillations of the indicator arrow.
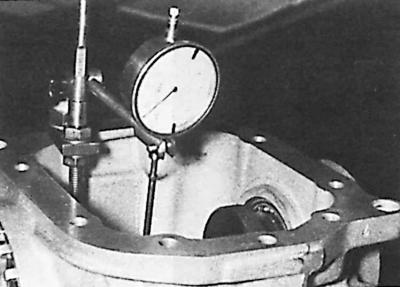
7. Set the replacement box to a position where the indicator arrow is in the middle position between the extreme readings. Do not rotate the replacement box any further.
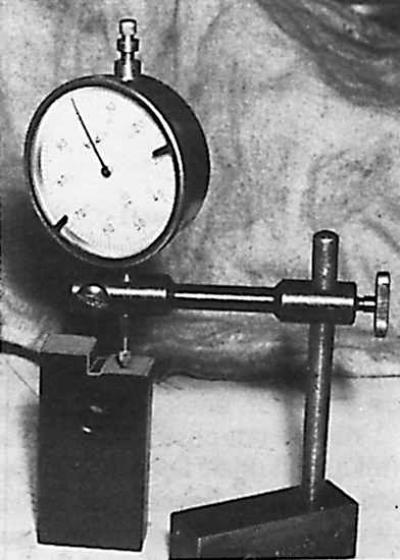
8. Mount the dial indicator on the holder (device 15.008). Rest its measuring tip against the template of device 15.075 and adjust the indicator. For a 6.5" bridge, use the lower plane of the template, and for a 7" bridge, use the upper plane.
9. Place the indicator holder against the end of the main gear pinion and the indicator measuring tip against the middle of the replacement box.
10. Remove the difference relative to the distance set according to the template.
11. Adjust the measured distance by selecting the thickness of the gasket between the inner bearing of the drive gear and the main gear gear so that the deviation from the zero reading of the indicator is no more than 0.01 mm.
12. After tightening the gear bearing mounting nut, it should be caulked.
13. Using tool 15.047 A, install a new final drive pinion seal ring.
14. Install the final drive pinion flange (for connection to the rear joint of the propeller shaft) and tighten the flange mounting nut to the appropriate torque.