Contents: Removal ↳ Installation ↳
Rear axle

A – spacer sleeve, B – gasket, C – main gear clearance adjustment flange
Rear axle
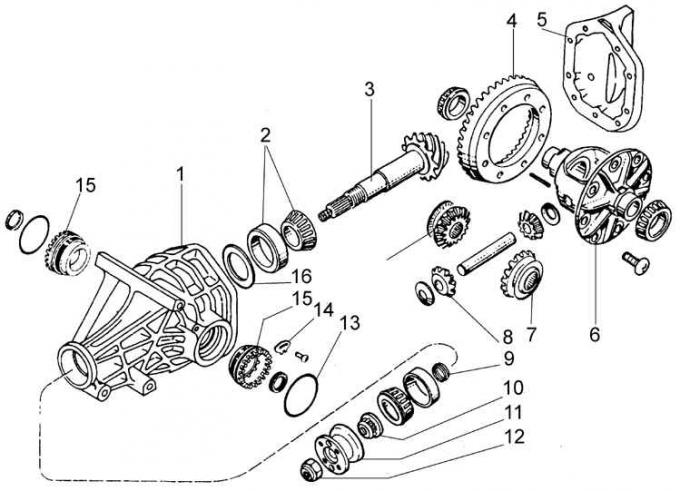
1 – crankcase, 2 – differential bearings, 3 – final drive pinion, 4 – final drive driven pinion, 5 – rear axle housing cover, 6 – differential case, 7 – axle gears, 8 – satellites, 9 – assembly gasket, 10 – final drive pinion bearing nut, 11 – final drive pinion flange for connection to the rear joint of the propeller shaft, 12 – flange nut, 13 – sealing ring, 14 – locking flange, 15 – bearing holder, 16 – compensation washer
Removal
1. Raise the car.
2. Remove the rear wheels.
3. Remove the brake drums.
4. Remove the wheel hubs and axle shafts (see the corresponding description in subsection 7.11.1).
5. Remove the brake shields.
6. Remove the propeller shaft (see subsection 7.2).
7. Support the rear axle with a jack.
8. Disconnect the rear axle mounting element from the body.
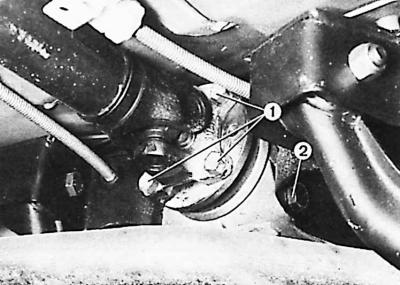
9. Disconnect the front axle mounting elements to the rear axle beam (1 – hinge flange bolts, 2 – rear axle boat mounting bolts).
10. Remove the rear axle.
Installation
Perform the steps in reverse order to the removal process. After installation, check the oil level in the rear axle housing.