Inlet (top) and outlet valve kit
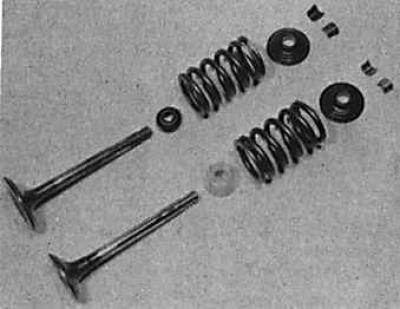
Inlet (left) and outlet valve seals

1. Remove oil and dirt from cylinder heads. Remove carbon deposits from combustion chambers and valve heads using a scraper or rotating wire brush.
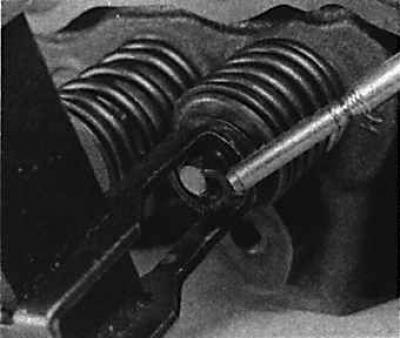
2. Compress the valve springs with a suitable valve spring compressor and remove the valve keepers. Remove the valve spring compressor and remove the valve spring retainer, spring and valve. Mark each valve for proper reinstallation.
3. After removing the valves, remove carbon deposits from the channel walls.
4. Check the valve plates and seats for chipping and burning. Light chipping on the valve and valve seat can be removed by lapping first with coarse and then fine grinding paste. If there are deep chipping marks, the valves must be ground on a valve grinding machine and the seats on a valve seat milling machine. The last two types of work must be performed by specialists.
5. Check the valve guides for wear: insert the valve into the guide, the valve in the guide should move easily, without lateral clearance. To replace worn guides with new ones, special tools are needed, so you should contact specialists.
6. When grinding valves, use only fine-grained polishing paste.
7. Lubricate the surface of the valve seat with a small amount of paste and install the valve in the corresponding seat. Press the rubber suction cup tightly to the valve plate and rotate the valve in one direction or the other.
8. After finishing the grinding process, thoroughly clean all parts from dirt and paste and check the valve seat and plate. A solid matte ring should be visible on both parts, which indicates the width of the valve chamfer.
9. Check valve springs for compression force and unloaded spring length.
10. Lubricate the valve stem with engine oil and install it in the valve guide. Install a new seal.
11. Install the valve spring and valve spring retainer.
12. Using a suitable valve spring compressor, compress the spring until the crackers fit into the slots in the valve stem. Remove the compressor.
13. After installing all the parts in place, lightly tap the top of the valve springs with a plastic hammer to ensure that the crackers are seated in place.