Contents: Removal ↳ Installation ↳
Elements of the lubrication system
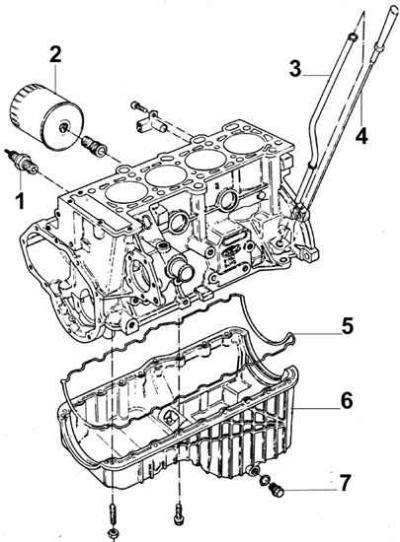
1 – Oil pressure sensor, 2 – Oil filter, 3 – Oil level gauge pipe, 4 – Oil level gauge, 5 – Oil pan gasket, 6 – Oil pan, 7 – Oil drain plug
Removal
1. Remove the gearbox.
2. Remove the clutch.
3. Remove the flywheel and engine shield.
4. Drain the engine oil from the engine.
5. Check that the steering wheel is in the straight ahead position and mark the position of the intermediate shaft lower clamp and steering gear pinion with paint or a marker, then disconnect the intermediate shaft from the steering gear.
6. Carefully lift the engine with a lifting mechanism and then unscrew the engine holders.
7. Disconnect the brake pipes from the front suspension beam.
8. Support the beam using a suitable lift and a wide board.
9. Unscrew the bolts securing the beam to the bottom of the car. Tilt the beam so that access to the oil pan is free.
10. Unscrew the bolts and nuts securing the oil pan and remove it from under the engine.
Installation
Places where sealant is applied to the mating surfaces of the oil pan and cylinder block
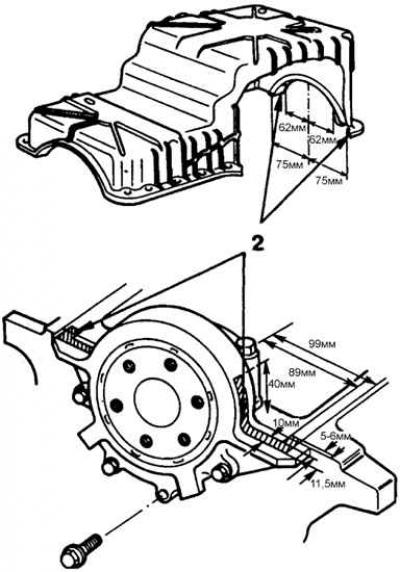
2 – places where the sealant is applied
1. Thoroughly clean the mating surfaces of the cylinder block and oil pan.
2. Install a new gasket into the oil pan grooves.
3. Apply sealant to the areas that meet the sealing ring cover.
4. Apply a compound that prevents loosening to the threads of the bolts and nuts, install the oil pan and screw in the bolts and nuts without tightening them completely.
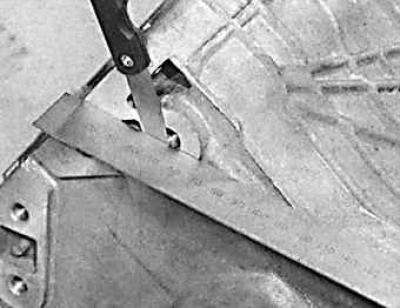
5. Align the end surfaces of the oil pan and cylinder block and tighten the bolts and nuts completely. If there is a step between the end surfaces, it is necessary to measure it and, depending on the size of the step, install a gasket of the recommended thickness.
6. Further operations are performed in the reverse order of removal.
Step size | Thickness | Color of the installed gasket |
0 – 0.25 mm | do not install gasket | |
0.25 – 0.29 mm | 0.15 mm | silver |
0.30 – 0.44 mm | 0.30 mm | blue |
0.45 – 0.59 mm | 0.45 mm | red |
0.60 – 0.75 mm | 0.60 mm | black |
The original version can be found on the website fordbook.ru