1. Remove the rear door trim (see "Removal and installation the rear door trim").
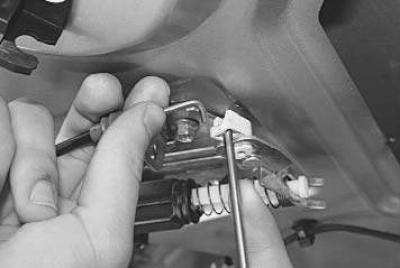
2. Use a screwdriver to pry up and disengage the electric drive rod from the retainer.
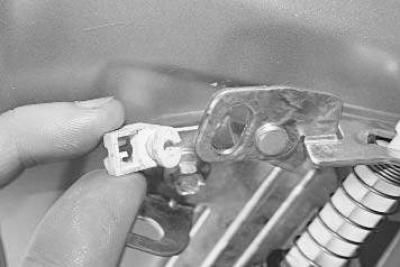
3. Remove the retainer from the rod on the electric drive mounting bracket.
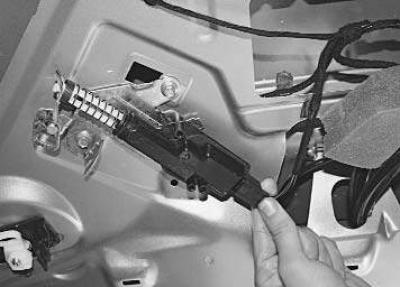
4. Press the locking tab of the electric drive wiring harness connector…
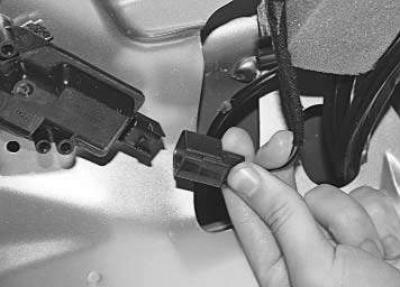
5. …and disconnect the electric drive terminal block.
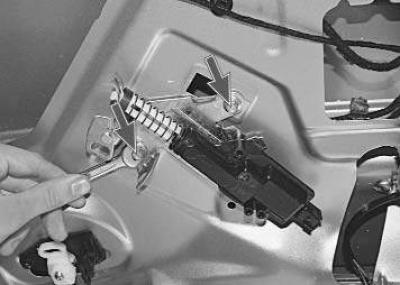
6. Remove the two bolts securing the rear door lock electric drive…
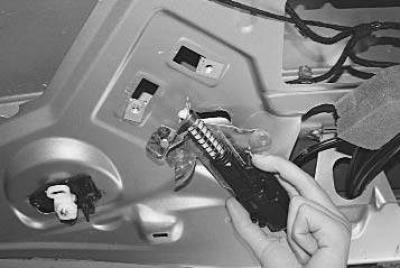
7. …and remove the electric drive assembly with its mounting bracket from the vehicle.
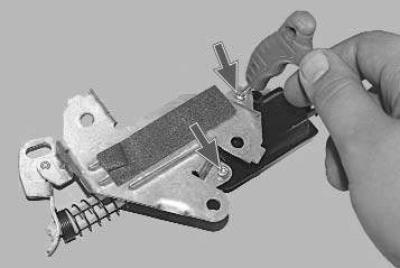
8. Remove the two screws securing the electric drive to the bracket…
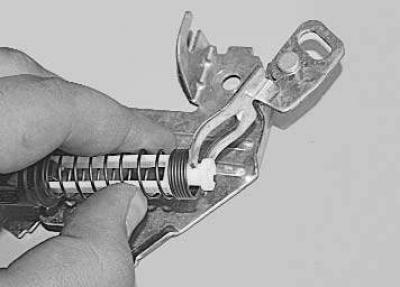
9. … remove the electric drive rod from engagement with the rod on the bracket…
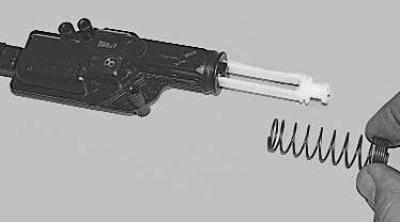
10. …and remove the spring from the electric drive rod.
11. Install the rear door lock electric drive in the reverse order of removal.
To remove the tailgate lock switch you will need a TORX T20 key.
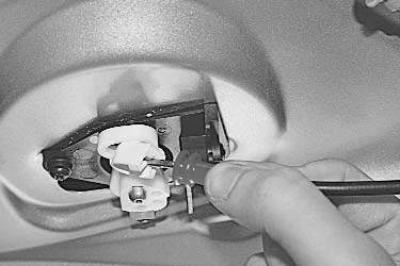
1. Disengage the lock drive cable housing from the holder…
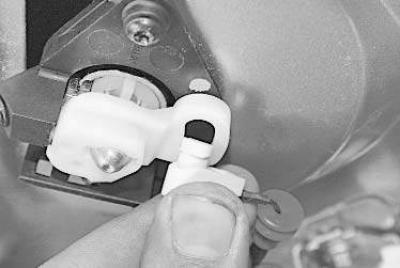
2. …and remove the cable end from the rod together with its retainer.
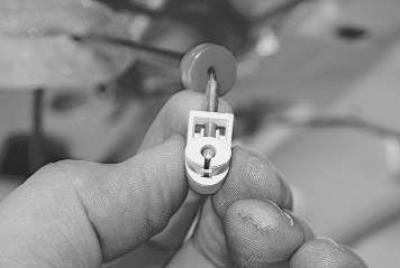
3. If necessary, remove the retainer from the cable end.
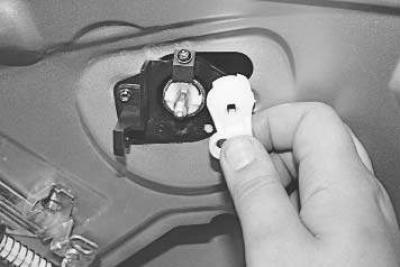
4. Remove the rod from the switch base.
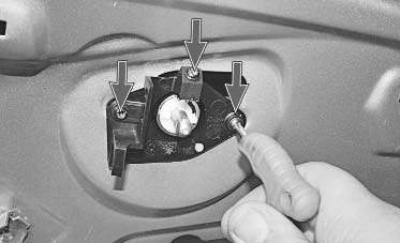
5. Remove the three screws securing the lock base…
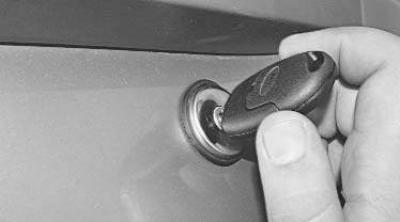
6. …turn the key in the lock counterclockwise…
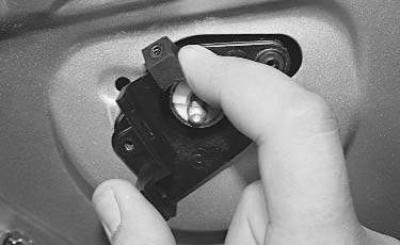
7. …remove the base of the lock switch…
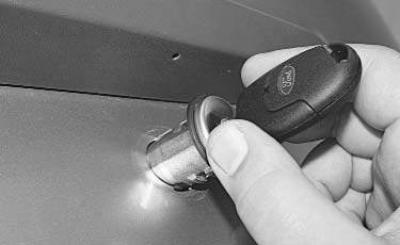
8. …and remove the switch cylinder.
9. Install the tailgate lock switch in the reverse order of removal.
To remove the tailgate lock you will need a TORX T40 key.
1. Disconnect the rod from the electric drive of the tailgate lock (see above in this subsection).
2. Disconnect the rod from the lock switch (see above in this subsection).
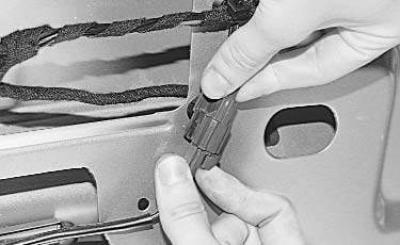
3. Press the locking tab on the lock limit switch wiring harness connector…
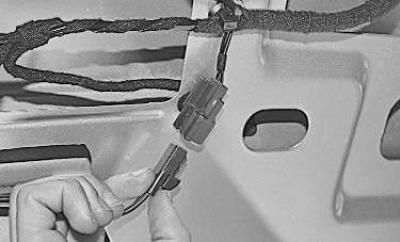
4. …and disconnect the connector.
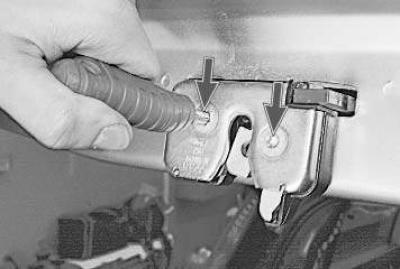
5. Remove the two mounting screws…
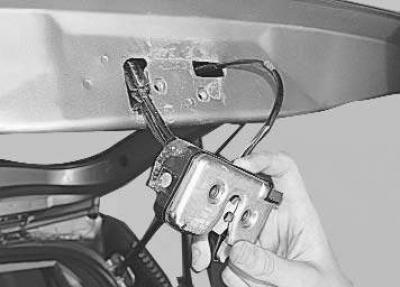
6. …and remove the tailgate lock.
7. Install the tailgate lock in the reverse order of removal.
To remove the tailgate lock latch you will need a TORX T40 key.
1. Remove the rear panel trim (see "Removal and installation trunk trims").
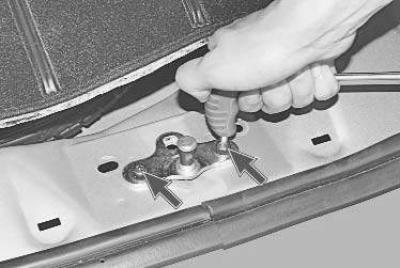
2. Remove the two screws securing the latch to the rear panel…
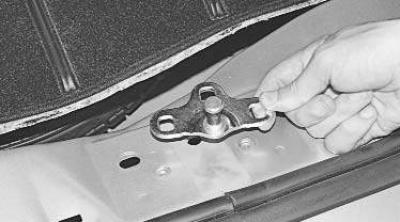
3. …and remove the latch.
4. Install the tailgate lock latch in the reverse order of removal.
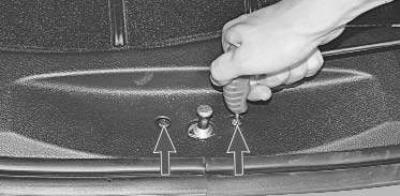
5. If after installing the latch the door slams shut with the lock lever hitting the latch, adjust the latch position by loosening the two latch mounting screws through the holes in the trim and moving the latch in the transverse or longitudinal direction until the door slams shut without impact. Then tighten the latch mounting screws.
The full article is on the online resource: FORDBOOK.RU