- Jack up the front of the car. If installed, remove the underbody protection sheet under the front of the car;
- remove the right lower trim in the right wheel arch;
- place a suitable container under the pan and drain the oil. The oil should be slightly warm (but not hot) - it drains better. Clean the closing plug well and screw it in again (26 Nm);
- if there is air conditioning, remove the heat shield plate under the compressor (two nuts);
- disconnect the lambda probe plug, cut the cable connector and release the wire from the clamp;
- disconnect the front exhaust pipe from the flange connection;
- Loosen and unscrew the pin screws of the heat-protective metal sheet of the oil pan and remove the protective sheet;
- if you have an automatic transmission, remove the cover;
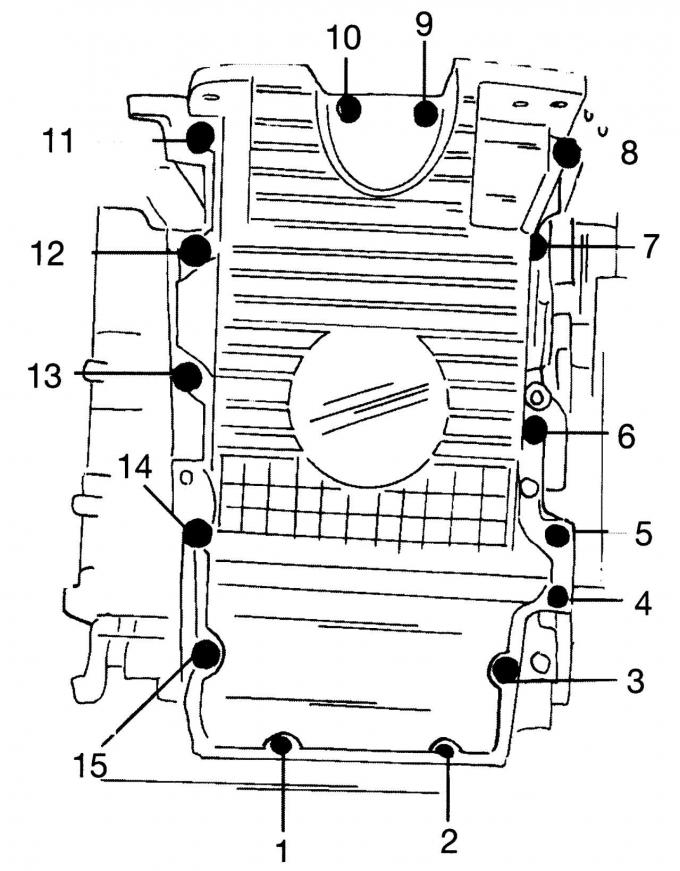
Fig. 320. Sequence of unscrewing the oil pan mounting screws
- remove the oil pan by unscrewing the two screws on the lower flange (Fig. 320). Remove the pan and remove the gasket.
Installation is carried out in the following order:
- lightly lubricate the separating surfaces of the crankcase at the junction with silicone sealant;
- install the pan in the correct position, screw in the screws one by one and then tighten slightly. Press the oil pan against the clutch housing and tighten both screws on the lower flange to 48 N·m;
- tighten the screws in reverse order in several stages with a torque of 25 Nm;
- perform all other stages of work in the reverse order. Tighten the front exhaust pipe connection on both sides to a torque of 40 N·m. Fill the oil pan with the required amount of recommended engine oil. Start the engine, let it run for a while, then stop it. Check the separating surfaces of the oil pan for leaks.
(The original article can be viewed on the portal: FORDBOOK.ru)