- disconnect the wire from the negative terminal of the battery, observing all safety precautions;
- remove the top engine cover;
- remove the drive belt. To do this, loosen the belt tensioner by turning it toward the camshaft. Remove the belt as soon as it becomes free;
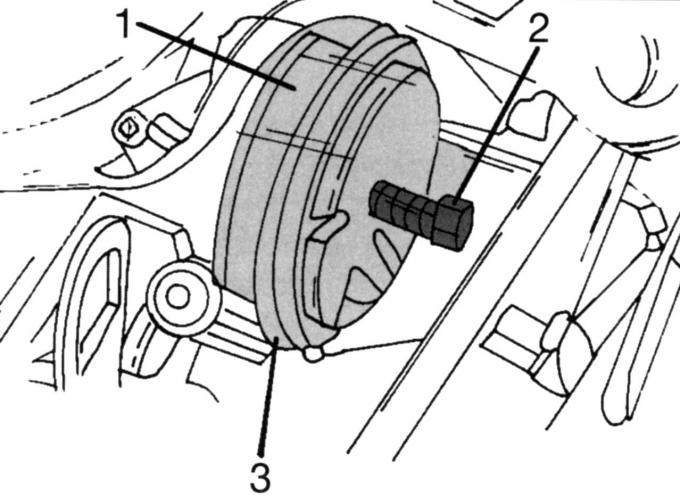
Fig. 315. Using a puller to remove the belt pulley on the camshaft: 1 - special tool 303-338-02; 2 - tightening screw 303-338; 3 - belt pulley
- remove the belt pulley 3 (Fig. 315) from the camshaft. This figure shows a special puller. It consists of a plate that is installed behind the belt pulley. The puller itself is screwed to this plate. By tightening the middle nut, which presses on the camshaft, the belt pulley is lowered;
- remove the camshaft sealing ring. To do this, screw in two screws from the outside and push it out using pliers and a screwdriver;
- lubricate the new sealing ring on the working edges and carefully press it into the hole. Perform this operation very carefully;
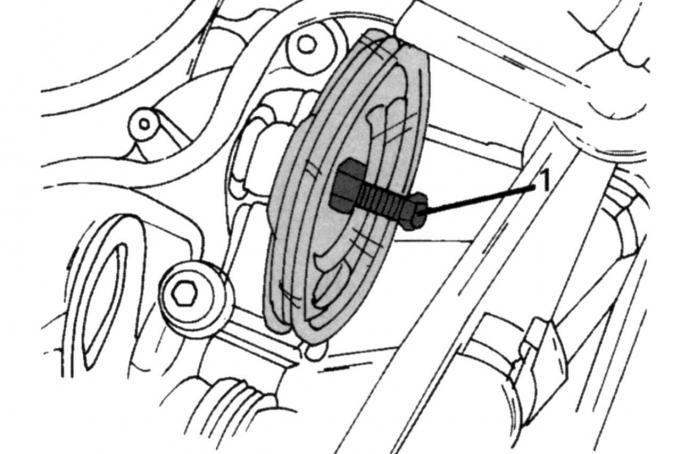
Fig. 316. Installing the camshaft pulley using a screw and nut
- Warm up the camshaft pulley with an air heater and install it on the camshaft. Screw the screw into the end of the camshaft and tighten the nut to the pulley until it is properly seated (Fig. 316);
- install the drive belt, press the tensioner against the camshaft and release it again when the belt is properly tensioned;
- all other work is performed in the reverse order of removal.
(The original article is available on the website: FORDBOOK.ru)