Contents: Removal ↳ Installation ↳
Removal
1. Apply the parking brake. Raise the front end and place it on stands.
2. Drain the engine oil. Then flush and install the drain plug. Tighten it to the specified torque. Replace the plug gasket if necessary.
3. Remove the bolts from the plastic cover that covers the coolant pump from the front cylinder head.
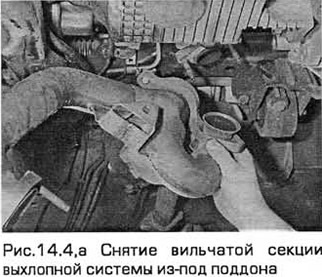
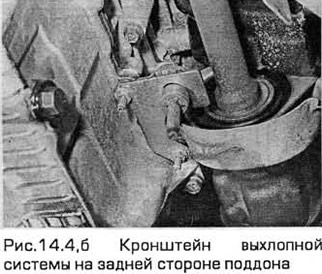
4. Unscrew the bolts and nuts and disconnect the fork section of the exhaust system from the lower ends of the receiving pipes and from the intermediate section of the exhaust system. Unscrew the nuts of the exhaust system bracket from the studs on the rear side of the pan (see Fig. 14.4,a,b).
5. Loosen the nuts and remove the air conditioning compressor heat-insulating casing from the pan (see Fig. 14.5).

6. Unscrew the bolts of the technological cover from the transmission socket,
7. Remove the bolts that secure the oil pan to the transmission. Note that the bolts vary in length. The long through bolts are located at the front.
8. After this, you need to hang the power unit by the cargo eyes located on the block head.
9. Mark the position of the right engine mount bracket. Then unscrew the nuts and remove the bracket. Note the position of the ground wire on the bracket.
10. Raise the engine slightly so that the oil pan can be removed. Do not overload the front and rear engine mounts.
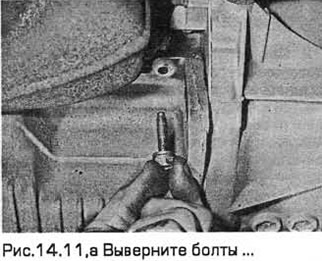
11. Note the position of the pan bolts. Unscrew and remove the bolts, except for the two located on opposite sides, which do not need to be unscrewed completely. Then, supporting the pan, unscrew these two bolts and remove it. Remove and discard the gasket (see Fig. 14.11, a, b).

Installation
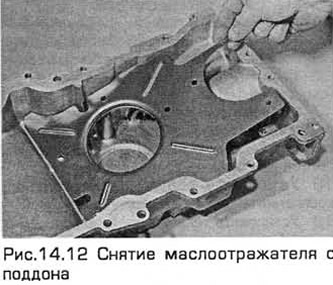
12. When installing, thoroughly clean the mating surfaces of the cylinder block and the oil pan, and remove any grease from them. Then wipe the oil pan and the inside of the engine with a clean rag. If necessary, remove the oil deflector (see Fig. 14.12). After cleaning, install the oil deflector and tighten the bolts.
13. Apply a bead of sealant to the joints between the valve cover and the cylinder block at the bottom of the block.
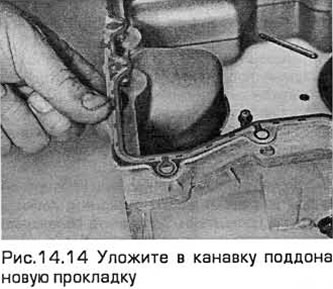
14. Place a new gasket into the oil pan groove (see Fig. 14.14). If necessary, stick it to the oil pan with grease.
15. Lift the pan with the gasket to the bottom of the block and insert the bolts. Keeping the gasket in place, tighten the bolts by hand.
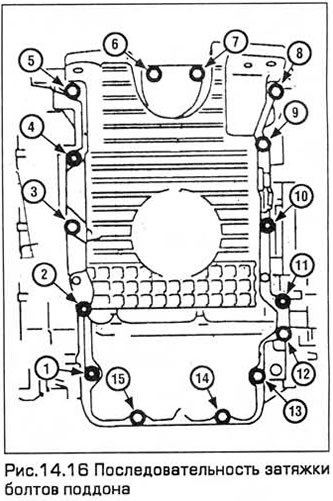
16. Tighten the bolts to the required torque (see Fig. 14.16).
17. Lower the engine and install its right support in its previous position. Tighten the nuts to the required torque. Install the ground wire. Remove the lift.
18. Install the lower oil pan flange bolts to the transmission.
19. Install the service cover onto the transmission bell and tighten the bolts.
20. Install the air conditioning compressor insulation housing onto the pan and tighten the nuts.
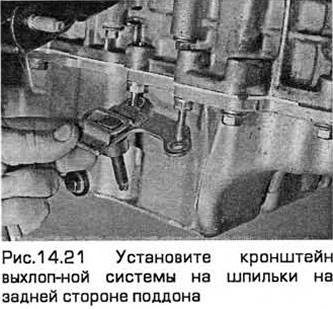
21. Install the fork section of the exhaust system onto the lower ends of the downpipes and onto the intermediate section of the exhaust system. Tighten the nuts and bolts. Install the exhaust system bracket onto the studs on the rear side of the pan and tighten the bolts (see Fig. 14.21).
22. Install the plastic cover over the coolant pump and tighten the bolts.
23. Lower the car to the ground. Fill the engine with oil (chapter 1).
(The original article can be viewed on the portal fordbook.ru)