Contents: Removal ↳ Installation ↳
Removal
1. Apply the parking brake. Raise the front end and place it on supports. Remove the right front wheel.
2. Remove the right front wheel liner (Chapter 11).
3. Turn the accessory drive belt tensioner clockwise and remove the belt from the pulleys. Carefully release the tensioner.
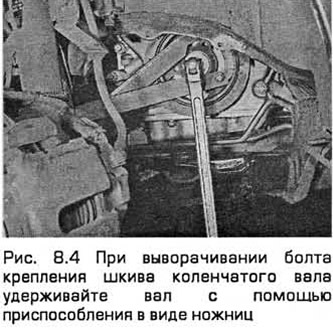
4. When unscrewing the crankshaft pulley mounting bolt, prevent the shaft from turning. Follow these instructions:
- 1) On models with manual transmission - engage top gear and have an assistant depress the brake pedal.
- 2) On vehicles with automatic transmission, remove the transmission bell housing cover. Use a power screwdriver or similar to lock the faceplate gear while your assistant removes the pulley bolt. Be careful not to damage the teeth or adjacent components. Another locking method is shown in Fig. 8.4.
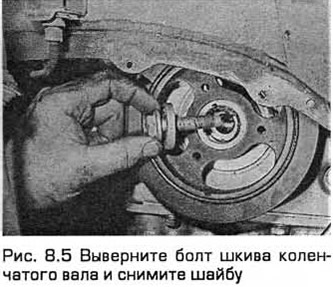
5. Remove the pulley bolt and washer (see Fig. 8.5). Always use a new bolt when installing.
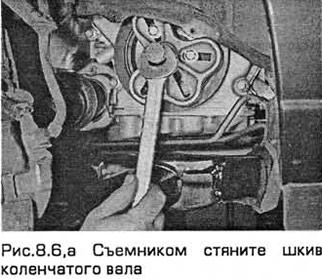
6. Remove the pulley using a puller. If the woodruff key is loose, remove it and save it (see Fig. 8.6,a,b).

7. Clean the pulley and crankshaft end.
Installation
8. Lubricate the keyway in the pulley bore. Insert the woodruff key into the keyway on the crankshaft nose, aligning it parallel to the shaft surface.
9. Place the pulley on the shaft, aligning it with the key. Press the pulley onto the shaft using the old bolt and washer. Unscrew the bolt.
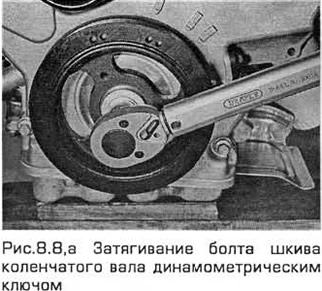
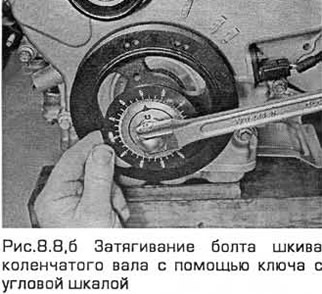
10. Screw in a new bolt with a washer and tighten it to the required torque, turning it to the required angle. To prevent the shaft from turning during tightening of the bolt, fix its flywheel using the method described in paragraph 4. Note that the bolt must be tightened in four stages, as specified in the Technical Data (see Fig. 8.10, a, b).
11. Disassemble the locking device and (on automatic transmission models) install the transmission case cover.
12. Install the main accessory drive belt as described in Chapter 1.
13. Install the right wing liner as described in Chapter 11.
14. Install the right wheel and lower the vehicle.