Removal
1. Remove the transmission (Chapter 7A or 7B). It makes sense to also check the seals and replace them if necessary.
2. On models with a non-automatic transmission, remove the clutch (Chapter 6). It may be a good idea to check or replace the clutch components
3. Use a punch or a drop of paint to mark the flywheel/faceplate and crankshaft to ensure they are aligned during installation.
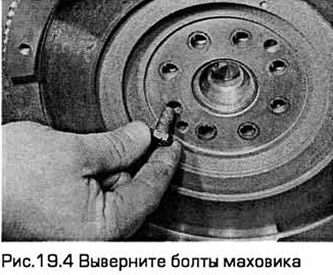
4. Block the flywheel/faceplate from turning by locking the flywheel teeth or by fixing the faceplate/flywheel relative to the cylinder block/crankcase using a steel strip and bolts. Unscrew the bolts one by one (see Fig. 19.4).
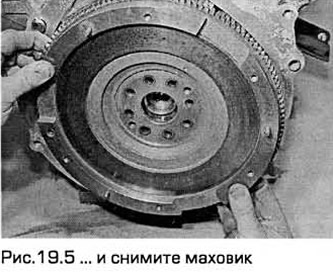
5. Remove the flywheel/faceplate. Do not drop this unit, it is very heavy (see Fig. 19.5).
6. If necessary, remove the adapter plate from the cylinder block pins (see Fig. 19.6).

Inspection
7. Clean the flywheel/faceplate, removing grease and oil. Inspect the surface for cracks, burrs, burn marks, and other defects. Small burrs can be removed with sandpaper. Check for cracks or broken teeth on the ring gear. Lay the flywheel/faceplate flat and use the end of a straightedge to check for warpage.
8. Clean and inspect the mating surfaces of the flywheel/faceplate and crankshaft. If the left crankshaft oil seal is leaking, (paragraph 20) replace it before installing the flywheel/faceplate.
9. Thoroughly clean the inside of the flywheel/faceplate assembly. Clean the threaded holes for the bolts in the crankshaft, as well as the bolt threads from old sealant.
Installation
10. Install the adapter plate onto the cylinder block pins.
11. Now install the flywheel/faceplate onto the crankshaft so that all the bolt holes are aligned (there is only one way to do this). Make sure that the marks made before removal are aligned. Block the flywheel/faceplate in the same way as when removing. Apply sealant to the bolts and insert them. Tighten the new bolts evenly in a crisscross pattern (in two or three stages, see Specifications).
12. On models with non-automatic transmission, install the clutch (Chapter 6).
13. Install the transmission (Chapter 7A or 7B).