Contents: Removal ↳ Installation ↳
| Name | Specification |
| Rear side panel | |
| Seal mounting panel |
Removal
1. General notes:
- Depending on the nature of the damage, it is also possible to perform a sectional replacement of the rear side panel (see operation No.44 512 0).
- Remove the following components: bumper, taillight, tailgate seal, vent holder, fuel filler cap, fuel filler neck, door window, interior trim panels, interior fender, seat cushion, rear seatback, seat belt, roof liner, roof rail protector, lower trim panel, and lock striker.
- Move flooring and electrical wiring away from the work area.
- Note the cutout in the rear side panel for replacement in conjunction with the lower trim panel.
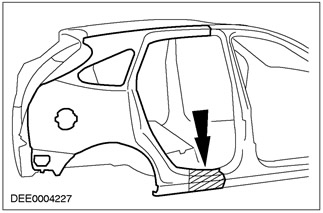
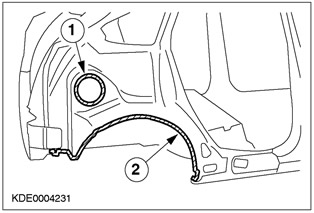
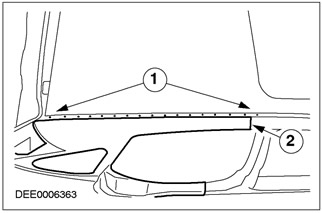
2. Rear side panel
- Cutting zone.
3.
CAUTION: Due to welding technology considerations (2-layer panels), please ensure the cutting size is accurate.
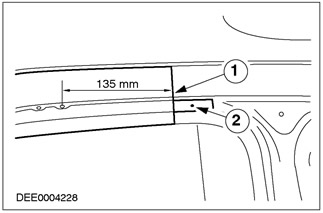
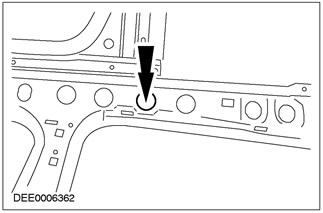
Post "B" - roof beam
- 1. Rez (base for size is the center of the hole).
- 2. Mill out the spot welding areas, remove the seal mounting panel.
4.
CAUTION: Roof Panel: Only route to a depth equal to twice the panel thickness. To remove the remaining flange, cut along the roof panel (best access).
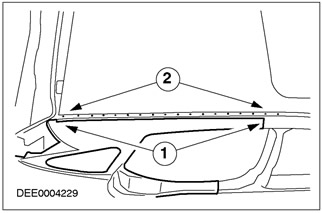
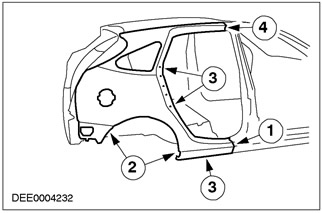
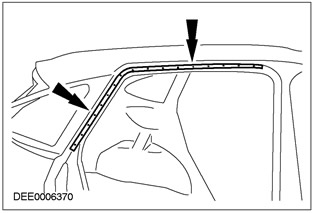
Rear side panel/roof connection
- 1. Cut.
- 2. Rout the spot welds. Use a 7mm diameter spot weld router. Rout two more spot welds in the roof rail/rear quarter panel junction area. Be careful not to damage the reinforcement panels below.
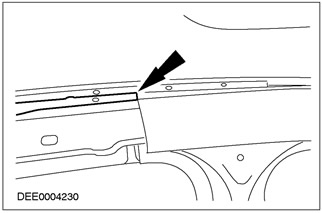
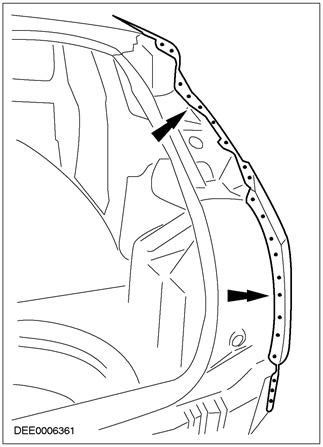
5. Rear side panel/roof connection
- Place of cutting
- Use a plastic wedge to slightly lift the roof panel.
- Cut the remaining joint into the roof timber.
- Remove the remaining flange.
Installation
1.
NOTE: Apply flange protector and two-component metal adhesive immediately prior to installing the new spare part.
Sealing
- 1. Apply flange sealant.
- 2. Apply two-component metal adhesive.
2. Rear side panel
- 1. Using a spot welder, weld the backing strip along the cut edge and make a continuous weld using MIG technology.
- 2. Crimp the joint of the wheel arch sections and perform spot welding.
- 3. Perform puddling welding.
- 4. Perform continuous welding using MIG technology.
3. Rear Side Panel - D-Pillar
- Perform puddling welding.
4. Rear side panel - roof beam
- The weld area of the rear side panel joint flange is on the inside. Perform a continuous MIG weld through the hole in the roof batten.
5. Rear side panel/roof connection
- To connect the roof batten, drill out the weld flange at the rear side panel/roof joint to 5mm diameter only. Use the existing holes.
- 1. Perform puddling welding.
- 2. Perform continuous welding using MIG technology.
6. Seal mounting panel
- Place the mounting panel in the same position as the "old" panel and puddle weld it.
7. Sealing - protection against corrosion
- Apply flange sealant to the roof/rear quarter panel joint to a thickness that will ensure the kick strip is positioned at its original height and fits accurately.