Contents: Removal ↳ Installation ↳
| Name | Specification |
| Rear side panel | |
| Seal mounting panel |
Removal
1. General notes:
- Depending on the nature of the damage, it is also possible to replace the rear side panel section by section or to repair it using roof lining sections (see operation 44 513 0).
- Remove the following components: bumper, taillight, tailgate seal, air vent holder, door window, trim panels, inner fender, seat cushion, rear seatback, seat belt, door seal and lock striker.
- Move floor coverings and electrical wiring away from the work area.
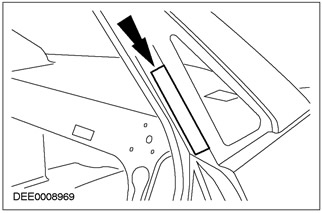
2. Seal mounting panel
- Place of cutting
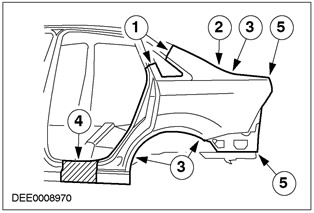
3. Rear side panel
- 1. Place of cutting
- 2. Rout to a depth equal to twice the panel thickness at the joint between the rear side panel and the rear storage shelf panel.
- 3. Heat the work area.
- 4. Possible cutting area.
- 5. Disconnect the soldering points.
Installation
1. Rear side panel
- Before installing a new spare part, weld a reinforcement plate in the bumper mounting area.
2.
NOTE: Apply two-component metal adhesive immediately prior to installing the new spare part.
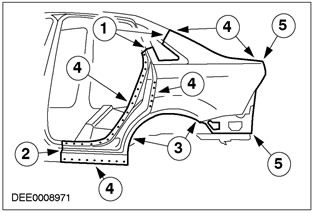
Rear side panel
- 1. Perform a continuous weld using MIG technology.
- 2. Using a spot welder, weld the backing strip along the cut edge and make a continuous weld using MIG technology.
- 3. Apply two-component metal adhesive. Then crimp the joint of the wheel arch sections and perform spot welding.
- 4. Perform puddling welding.
- 5. Perform soldering.
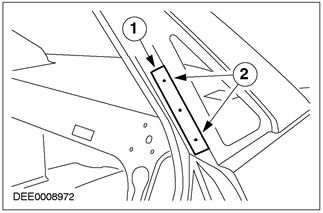
3. Seal mounting panel
- 1. Perform a continuous weld using MIG technology.
- 2. Perform puddling welding.
For more information, please visit the specified website www.fordbook.ru