2. Unscrew the screws of the decorative door panel (see pictures).
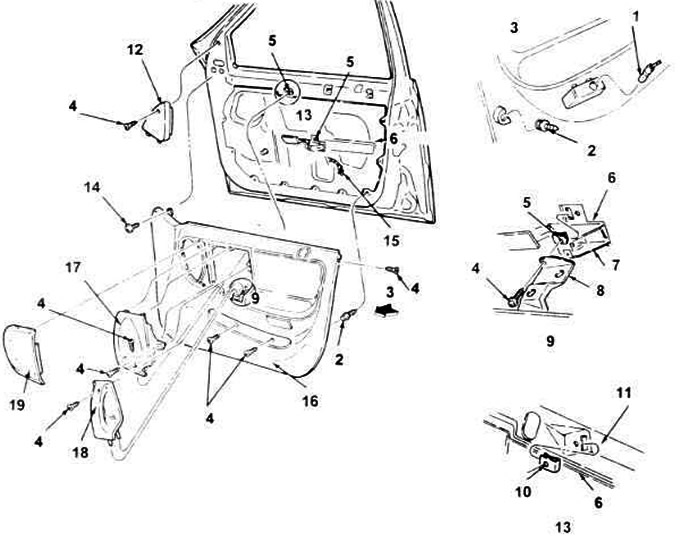
15.2, a. Details of the decorative panel of the front door.
1. Open door light.
2. Piston.
3. View A.
4. Screw.
5. Spring nut.
6. Moisture insulation.
7. Door.
8. Finishing panel.
9. View B.
10. Spring nut.
11. Door.
13. View C.
12. Lid.
14. Screw and washer.
17. Decorative panel.
19. Lid.
18. Handle - bracket.
16. Decorative door panel.
15. Light bulb.
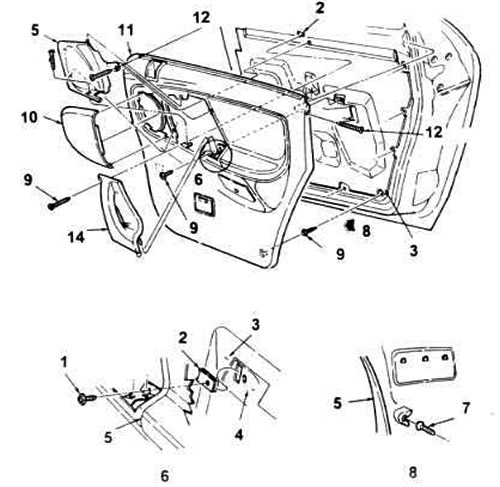
15.2, b. Details of the decorative panel of a typical rear door (the right door is shown, the left one is similar).
1. Screw 56902 - S2.
2. Spring nut.
3. Moisture insulation.
4. Door.
5. Decorative panel.
6. View B.
7. Push pin.
8. View A.
9. Screw.
10. Lid.
11. Decorative door panel block.
12. Screw and washer.
14. Handle - bracket.
3. On manual window models, pull out the handle cover, unscrew the screw and remove the handle (see illustration). On electric window models, pull out the switch control unit and disconnect it.
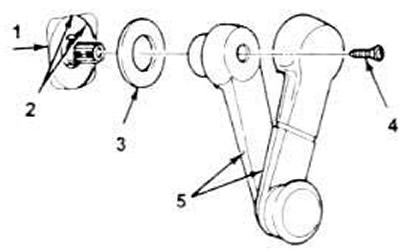
15.3. Details of the mechanical window lift handle.
1. Tauras.
2. Sable.
3. Handle plate.
4. Screw.
5. Regulator block.
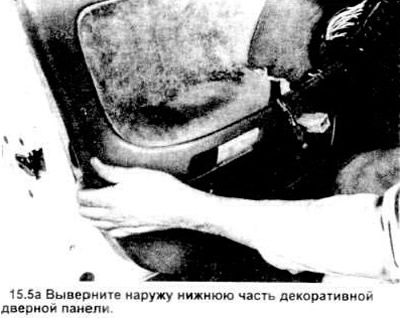
4. Insert a large screwdriver or pry bar between the door panel and the door and pry open the clips along the bottom.
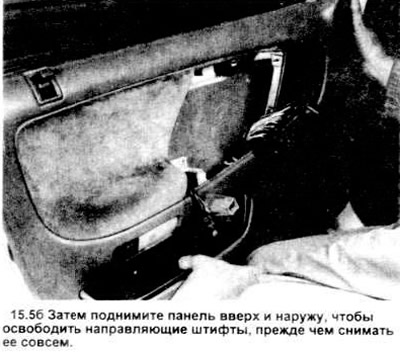
5. After disengaging the clips, turn the bottom of the door panel outward and then push the front edge of the panel out of the door; this will make the pins soldered into the guide visible (see picture). Lift the panel straight up, disconnect the existing electrical connectors, then remove it from the door.
6. To access the inside of the door, carefully remove the moisture barrier. When installing - put the moisture barrier in place and press it inward.
7. Before installation, replace all pins and clips that were removed during removal from the door panel.
8. Insert the electrical connectors and lower the top of the panel to the level of its position in the door then slide its front edge onto the guide pins. Install the panel by pressing it until the pins engage and the clips snap into place then tighten the screws. Install the manual window handle or window switch assembly.
[For more information, please visit the website Fordbook.ru]