Latch
1. Mark the position of the latch with paint, disconnect the cable, unscrew the two locking bolts and disconnect the latch (see figure).
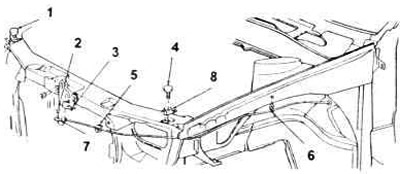
10.1. Bonnet release latches details.
1. Bumper.
2. Screw.
3. Latch.
4 Bumper.
5. C-clamp.
6. Cable.
7. Nut.
8. Clamp.
2. Installation is carried out in reverse order.
Cable
3. From the engine compartment side, disconnect the cable at the latch and remove the retaining clips.
4. From the interior side, detach the decorative panel by prying it with a screwdriver and unscrew the two locking screws that disconnect the cable and lever (see figure).
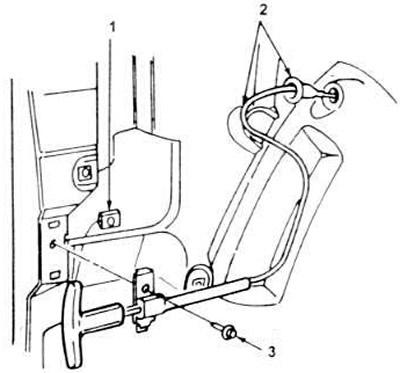
10.4. Cable details.
1. Nut.
2. Cable.
3. Screw.
5. Attach a piece of thin wire or string about 2.5 m (8 ft) long to the end of the cable in the engine compartment. Then pull the cable into the vehicle. Attach the wire or string to the new cable and pull it into the engine compartment.
6. Connect the cable to the latch, inserting it into the spring before installing it in the working position (see figure). Secure the cable to the clamps in the engine compartment and install the release lever and decorative panel in the passenger compartment.
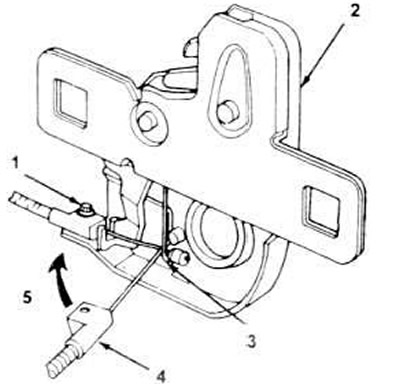
10.6. Parts connecting the cable to the latch.
1. Cable end locking screw.
2. Hood latch block.
3. Bonnet latch cable return spring.
4. Plastic cable end stopper.
5. Insert the end of the cable into the spring before turning it to the working position.
[For more information, please visit the website FORDBOOK.ru]