Removal
1. Remove the door decorative panel and moisture insulation (see section 15).
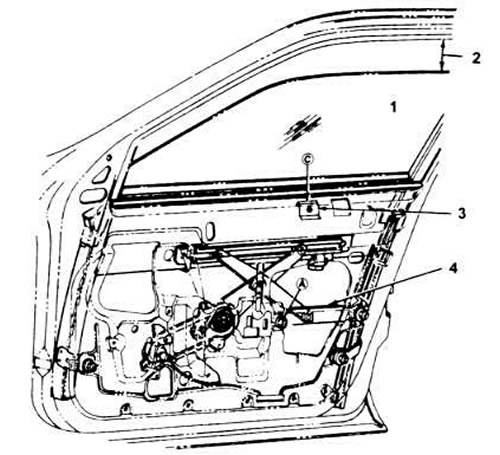
2. Remove the door seals along the contour of the door glass.
3. On the front doors, lower the windows to gain access to the two rivets that secure the glass to the retaining bracket (see figure).
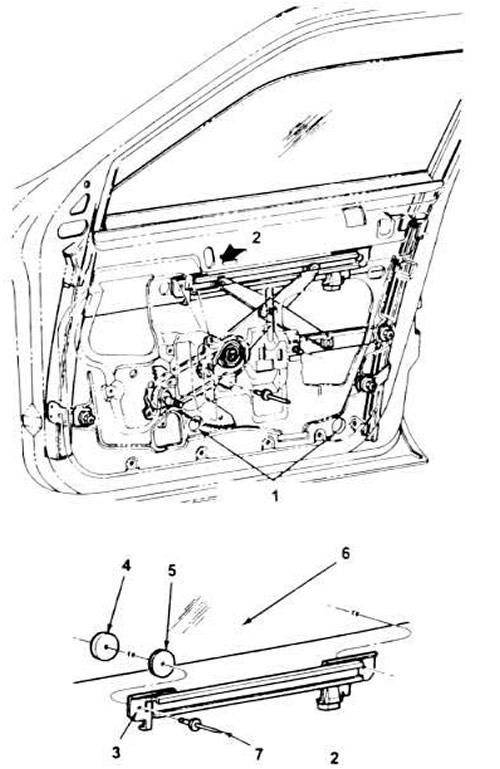
20.3. Typical parts of the front door window glass.
1. Additional holes for removable rivets.
2. Type A.
3. C-channel regulator.
4. External glass retainer (2 pieces).
5. Intermediate element (2 pieces).
6. Door glass.
7. Rivet.
4. Insert a block of wood between the outer door panel and the glass bracket, use a hammer and punch to remove the center pins of the rivets holding the bracket to the glass. Drill out the rivets with a drill bit approximately 12.7 mm (1/2 inch).
5. On the front doors, loosen the door glass stabilizer retaining nuts. Tap the glass to move it forward and then remove it from the outside through the window opening.
6. On the rear doors, first unscrew the screw and remove the glass stabilizer bracket. Lift the glass up through the door glass trim and remove it from the door.
Installation
7. First, make sure that all stoppers and spacers are installed on the glass.
8. Lower the glass to its normal position on the door.
9. Install it into the brackets and secure it with rivets. You can use screws of 6.4 mm (1/4 inch) or longer to secure the glass to the bracket. Tighten the nuts to the required torque.
10. Install the door seal.
Adjustment
11. Lower the glass approximately 50-70 mm (2-3 inches) from the highest position.
Front door
12. Loosen the adjusting nuts, with the door open, grasp both sides of the glass with both hands and slide it back into the glass groove on the B-pillar as far as you can.
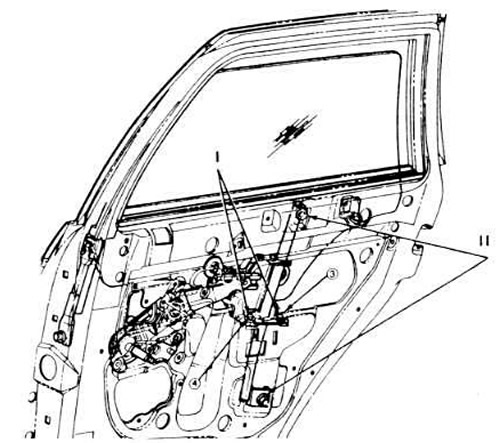
20.12. Adjusting elements of the front door glass.
1. Move the glass back into the groove on the B-pillar.
2. Approximately 75mm (3 inches).
3. Nut.
4. Compensator bracket.
13. Tighten nut and washer A (in Figure 20.12), press down the compensator bracket, then tighten nut B.
14. Install the door glass stabilizer so that it lightly touches the glass, then tighten nut C to the specified torque.
15. Move the glass several times to make sure it fits tightly, adjust if necessary.
Back door
16. To ensure that the glass fits tightly into the window opening, loosen the adjusting bolts, push them forward towards the B-pillar, tighten nut number 1, then 2, 3 and 4 (see figure).
20.16. Rear door glass adjustment elements.
I. Inward-outward adjustment.
II. Forward and backward adjustment.
17. After loosening the corresponding adjusting bolt, the glass can be moved outward and inward, forward and backward.
(Information for this article was taken from the website fordbook.ru)