

SEQUENCE OF WORKS
1. Raise the glass up to the stop.
2. Remove the inner door trim. Carefully remove the moisture-proof film from the door frame, as damaged film will allow water to pass through.
3. Loosen the two screws securing the rear glass guide and remove it from the door.
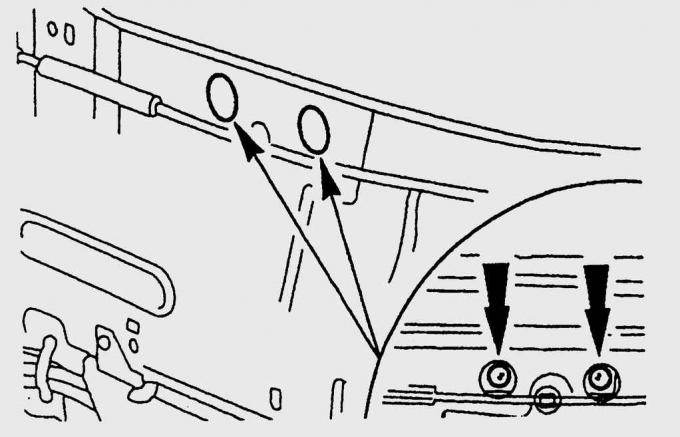
Fig. 16.26. Location of holes through which access to the screws for fastening the glass to the window regulator is possible
4. Carefully lower the glass (briefly connect the window regulator connector) so that the screws securing the glass to the window regulator are positioned opposite the holes in the door panel (Fig. 16.26).
5. Loosen the screws securing the glass to the window regulator.
6. Lower the side window completely.
Since there is no longer a rear guide, hold the glass with your hand.
7. Using a wide screwdriver, carefully lift the rubber glass seal off the door.
8. Tilt the glass forward and at an angle and pull it up out of the door frame.
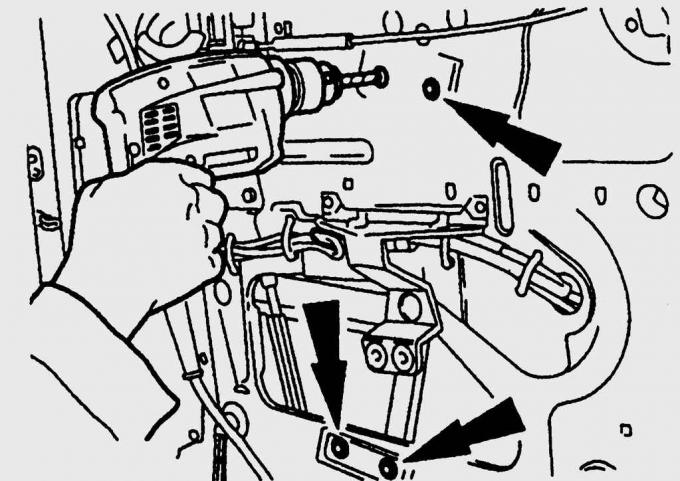
Fig. 16.27. Drilling out the window regulator mounting rivets
9. Drill out the window regulator mounting rivets (Fig. 16.27).
10. Tilt and turn to remove the window regulator from the door.
11. Disconnect the connector from the electric window motor. Remove the three motor mounting bolts and remove the motor from the door.
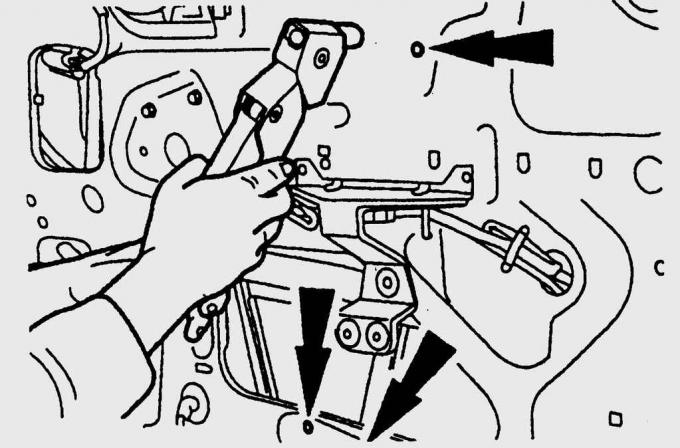
Fig. 16.28. Fastening the window regulator with new rivets
12. Insert the new window regulator into the door, install it in place and secure it with new countersunk rivets (Fig. 16.28).
13. On models with electric windows, install the electric window motor and secure it with screws.
14. Carefully install the glass into the door.
15. Raise the glass up, having first pulled out the glass guide.
16. Lower the glass completely and install the rubber glass seal into the door frame.
17. Raise the glass up to the stop and install the lower glass guide.
18. Lower and raise the glass. If it jams, adjust the position of the guides, then, with the glass completely lowered, securely tighten the guide mounting screws.
19. Raise the glass up so that the threaded holes for the screws securing the glass to the window regulator are aligned with the holes in the door panel. Screw in the screws and tighten them to a torque of 10 N·m.
20. Further installation is carried out in the reverse order of removal.

PRACTICAL ADVICE
Electric window does not work while driving
Switch malfunction.
Remove the switch on the other door and connect it to the contact connector in place of the faulty switch. If the connector is working, you can close the window.
Broken wire to the electric motor.
Run an additional wire from the battery (if there is no positive voltage) or from the ground (if there is no ground) to the electric motor connector and close the window.
Electric motor damage.
Remove the door trim. Loosen the screws that secure the glass to the window regulator and lift it up. Temporarily secure the glass in this position with strong adhesive tape or support it from below with a suitable wooden block. Naturally, these are only temporary measures.
[The original can be found on this resource: Fordbook.ru]