SEQUENCE OF WORKS
1. Raise the side window up to the stop. Use chalk to mark the position of the window lift handle on the door trim.
2. Remove the window handle. To do this, insert a special tool or a medium-sized screwdriver between the cover and the handle shaft. Typically, the "open" side of the mounting bracket is on the handle side, but it can be removed by turning it 180°.
3. Press the mounting bracket out of the groove.
4. Remove the window lift handle from the shaft.
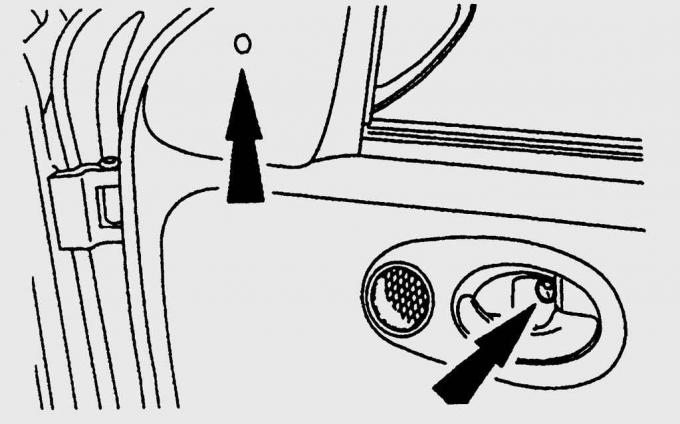
Fig. 16.24. Location of screws securing the trim panel (upper arrow) and the inner door handle trim (lower arrow)
5. Use a screwdriver to remove the trim panel (Fig. 16.24).
6. Using a thin-bladed screwdriver, remove the plugs located in the recess of the inner door handle trim and unscrew the screws. Lower the inner door handle trim down, hang it up and remove it through the handle.
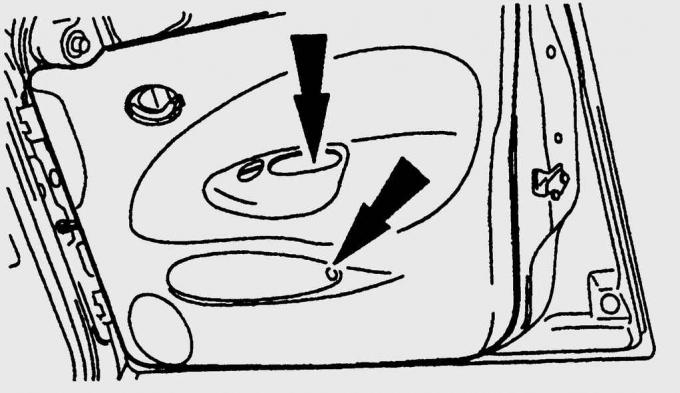
Fig. 16.25. Location of door trim mounting screws
7. Using a thin-bladed screwdriver, remove the plugs and unscrew the upholstery mounting screws (Fig. 16.25).
8. Using a wide spatula (a kitchen spatula will do), separate the upholstery from the frame around the perimeter of the door and remove it. Do not damage the moisture-proof film on the door, otherwise water will get on the upholstery in rainy weather.
9. Remove the door trim and place it in a clean place. If necessary, disconnect the speaker and power window connectors.
10. Installation is carried out in the reverse order of removal.
11. Install the window lift handle according to the previously applied marks and insert the mounting bracket.