Contents: Steering column cover ↳ Left decorative panel ↳ Radio panel ↳ Decorative panel window under the… ↳
1. Disconnect the wire from the negative terminal of the battery.
Steering column cover
2. Unscrew the mounting screws and remove the steering column cover from the instrument panel (see figure).
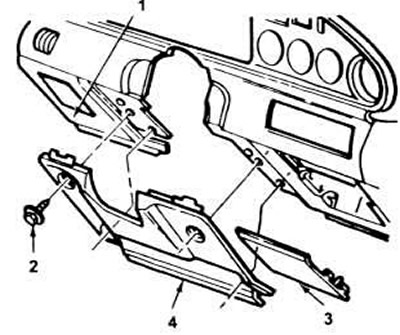
18.2. Steering column trim parts.
1. Instrument panel.
2. Screw.
3. Ashtray lid.
4. Steering column cover.
3. Installation is carried out in reverse order.
Left decorative panel
4. Carefully pry it up by the edge to release the clips and remove the panel from the dashboard (see picture).
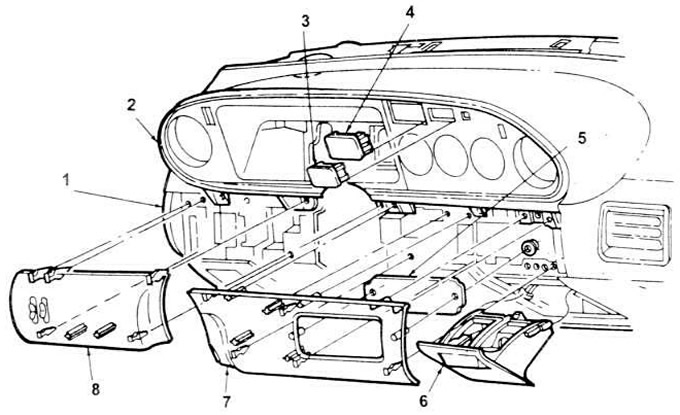
18.4. Typical arrangement of instrument panel panels.
1. Instrument panel.
2. Windows of the decorative panel under the instrument cluster.
3. Control window plug.
4. Window plug for the clock.
5. Window plug for radio receiver.
6. Ashtray.
7. Radio panel.
8. Left decorative panel.
5. To install, position it in place and press in until the pins click into place.
Radio panel
6. Carefully pry it off along the edges with a screwdriver until the panel clips are released. Pull the panel out, disconnect the electrical connector and set the panel aside.
7. When installing, first connect the electrical connector, then place it in place, press inward until the pins click into place.
Decorative panel window under the instrument cluster
8. Remove the Torx head screws. Remove the air conditioner heater and headlight control buttons, and remove the headlight switch retaining nut.
9. Remove the decorative steering column cap, disconnect the steering column electrical connectors.
10. On models with tilt steering wheel, lower it to the lowest position.
11. Unscrew the locking (fixing) screws and pull the panel sharply to release the clamps. Disconnect all electrical connectors, lower the panel down from the dashboard (see figure).
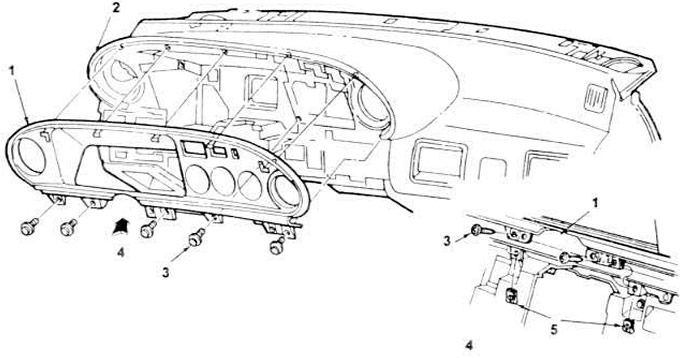
18.11. Details of a typical decorative instrument panel.
1. Panel with windows for the instrument cluster.
2. Instrument panel.
3. Screw.
4. View A.
5. Nut.
12. Installation is carried out in reverse order.