Contents: Removal ↳ Installation ↳
Removal
Sun visor
1. Disconnect the interior mirror light wiring (if equipped).
2. Remove the screws and sun visor.
3. Remove the cover, unscrew the screws of the inner bracket and remove the bracket.
Passenger handle
4. Remove the covers. Then unscrew the screws and remove the handle.
Front pillar trim panel
5. Remove the door moisture seal in the trim area.
6. Release the alarm and antenna wiring from the upper and middle clips.
7. Carefully pry the trim panel away from the upper and middle clips and pull the trim panel up. Remove the lower sealing strip.
8. Remove the upper and middle clamps from the rack.
B-pillar trim
9. Pull out the door moisture seal in the trim area.
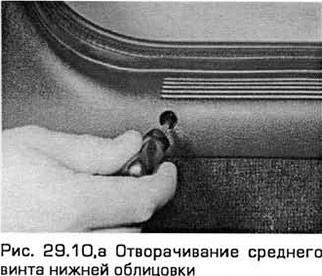
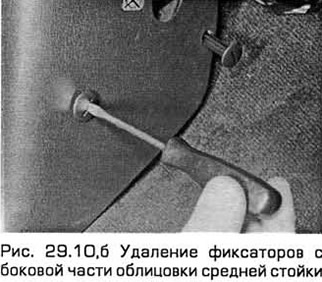
10. Unscrew the screws, release the trim from the fasteners and remove the lower trim (see Fig. 29.10, a, b).
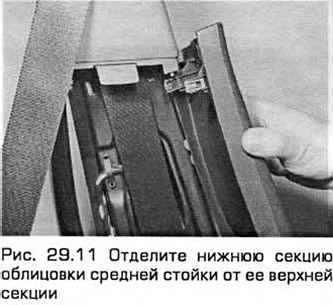
11. Carefully separate the lower section of the lining from its upper section (using a screwdriver if necessary) (see Fig. 29.11).
12. Remove the belt mounting bolt located under the front seat. Remove the rest of the trim from the B-pillar, passing the belt through the trim.
Rear pillar trim (Sedan and Hatchback)
13. Remove the door moisture seal in the trim area.
14. Tilt the rear seat cushion forward.
15. On 1997 and later hatchback models, remove the screw caps and two screws securing the trim to the shelf support.
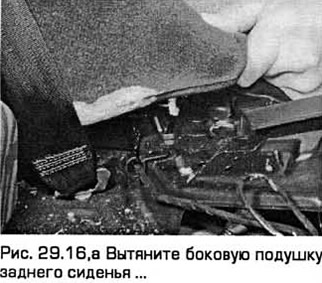
16. Lift the rear seat side cushion by releasing its upper hook. Note that on some models the side cushion is secured with a screw (see Fig. 29.16,a,b).

17. Remove the upper trim by releasing it from the clips.
18. Unscrew the side of the lower support of the rear seat belt. Then remove the trim and pass the belt through it.
Rear pillar trim (Station wagon)
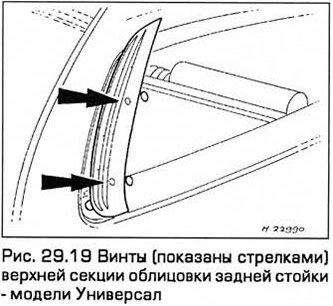
19. Remove the covers, unscrew the screws and remove the upper section of the trim from the rear pillar (see Fig. 29.19).
20. Remove the bolt securing the upper rear seat belt tie rod to the rear pillar.
21. Unfasten and remove the trim.
22. On models with an ultrasonic parking distance sensor, separate the warning light assembly from the panel or disconnect its wiring connector.
Rear outer pillar trim (Station wagon)
23. Remove the three mounting screws, then detach the trim from the pillar.
Lower trim of the front panel
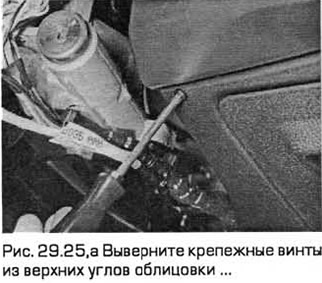
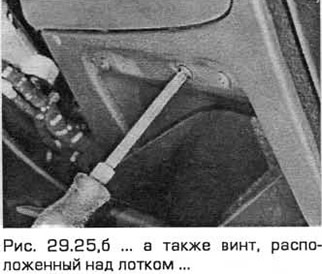
24. Remove the upper and lower steering column covers.
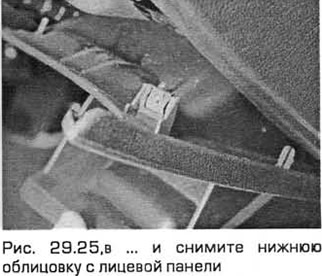
25. Remove the fastening screws from the upper corners of the trim, as well as the screw located above the tray, and remove the lower trim from the front panel (see Fig. 29.25, a-c).
Lower center panels
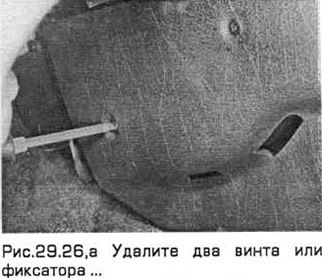
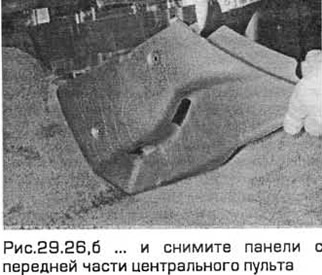
26. Remove two screws or fasteners on each side and remove the panels from the front of the central console (see Fig. 29.26,a,b).
Installation
27. Installation - in the reverse order of removal. If you have unscrewed the fasteners, they must be tightened to the required torque.