Warning: Be careful when servicing the special belt tensioner (capture). On models prior to 1996, it contains a powerful spring that could cause injury if triggered accidentally. On models since 1997, the tensioner is triggered by a squib, similar to those used in airbags. Once triggered, the tensioners cannot be restored and must be replaced. Please note that impacted seat belts and related components must be replaced.
Withdrawal
Front Seat Belt - Pre-1996 Models
Note: Before removing the belt buckle, you need a special plastic clip (available from dealers) fix the tensioner cable when you disconnect it.
1. Remove facing of an average rack and an overlay.
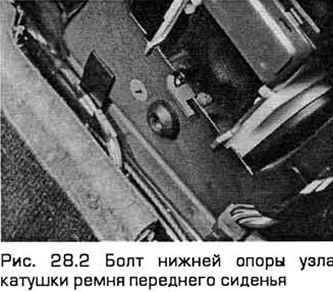
2. Loosen the bolts and remove the belt reel assembly (see fig. 28.2).
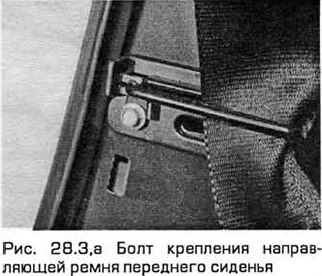
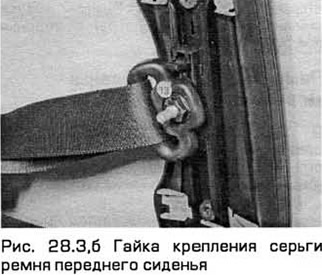
3. Turn out a bolt of fastening of directing a belt to an average rack. Then unscrew the nut securing the belt earring (see fig. 28.3, a, b).
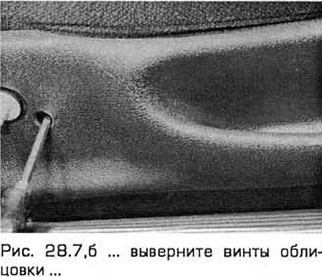
4. Where necessary, remove the screws and retainers. Remove the trim panel located on the side of the seat at the bottom to access the belt buckle.
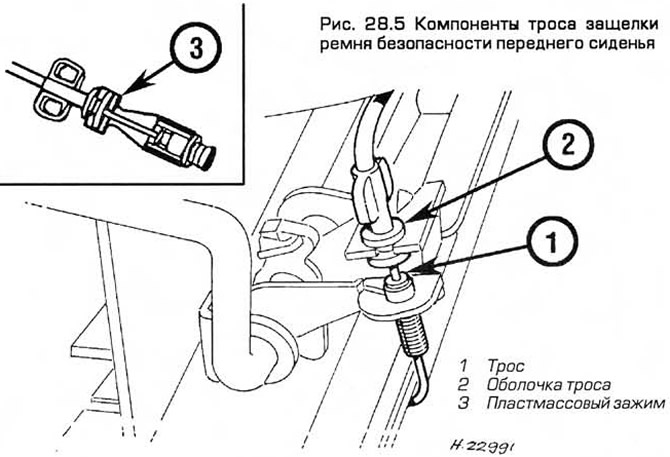
5. Pull the tensioner cable down and remove its trailer from the bracket. Rotate the cable sheath 90°and remove it from the bracket. Install a special plastic clip on the tensioner cable to block its operation (see fig.28.5).
6. Loosen the fixing nut (note that on the right seat it has a left-hand thread) and remove the clasp along with the gripper (see fig. 28.6).
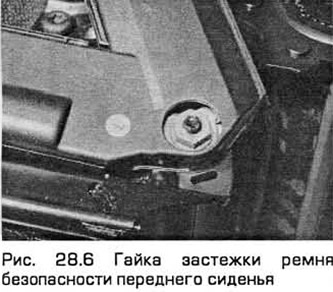
Warning: Careless handling during removal of the gripper may cause it to work. Be careful.
7. Remove the backrest adjustment knob and trim from the side outer side of the front seat. Unscrew the bolt and remove the end of the belt from the seat (see fig. 28.7, a-c).


Front seat belt - 1997 model year
8. On models with a squib-actuated tensioner. disconnect the negative battery cable (chapter 5A) and move it away from the battery.
Warning: Wait two minutes before proceeding to prevent accidental activation of the tensioner. During this time, the system capacitor is discharged.
9. Remove facing of an average rack and an overlay.
10. Turn out bolts and remove knot of the coil of a belt from a rack.
11. Turn out a bolt of fastening of directing a belt to an average rack. Then unscrew the nut securing the upper eyelet of the belt.
12. There. where necessary, remove the screws and retainers remove the trim panel located on the side of the seat below to access the belt buckle.
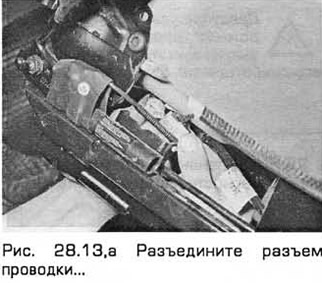
13. Disconnect the tensioner wiring connector. Unscrew the fixing nut and remove the fastener together with the tensioner assembly (see fig. 28.13, a, b).
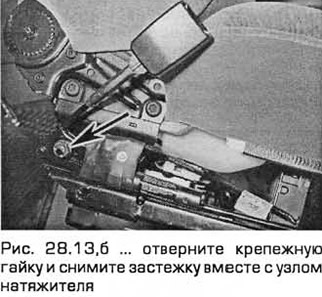
Warning: After removal, protect the tensioner from heat and chemicals in order to prevent it from tripping. Do not remove its mounting bolt from the tensioner: it is held by a paper washer.
14. Remove the backrest adjustment knob and trim from the side outer side of the front seat. Turn out a bolt and remove a tip of a belt from a seat.
Rear side seat belt
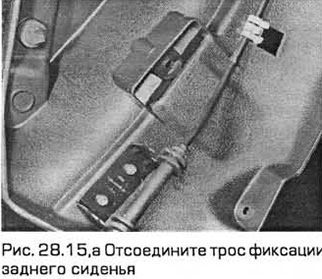
15. Turn out screws and remove facing of a back rack. Disconnect the seat release cable and remove the plastic cover from the seat lock (see fig. 28.15, a, b).

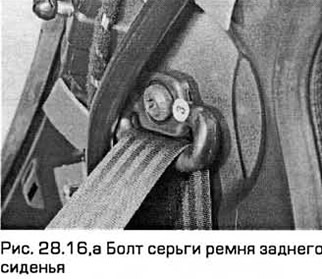
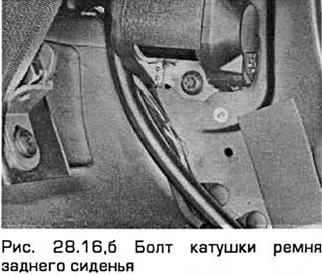
16. Tilt the rear seat cushions forward. Turn out bolts from an earring and the coil of a belt (see fig. 28.16, a, b).
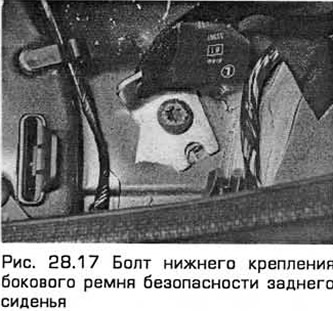
17. Turn out a bolt of fastening of a fastener of a belt and remove a fastener. Also remove the lower belt anchor bolt (in the presence of) (see fig. 28.17).
Seat belt of the middle part of the rear seat
18. This belt has been installed on 1997 models by separate order. The seat belt reel is attached to the seat back base, but removal requires removal of the seat upholstery. This procedure must be performed at dealers. The belt buckles can be removed as described in step 17.
Installation
19. Installation - in the reverse order of removal. Tighten nuts and bolts to the required torque.
Visitor comments