2. Working under the vehicle, unscrew the bolts securing the energy absorber and bracket assemblies to the bumper (see figure).
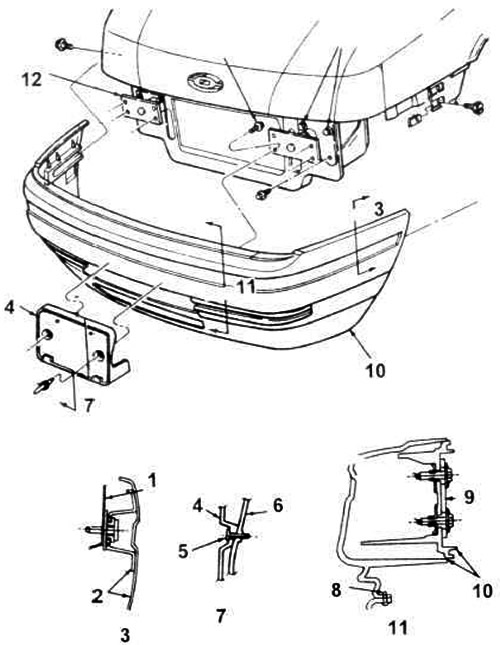
14.2. Front bumper and energy absorber parts.
1. Wing.
2. Bumper.
3. Section A.
4. Front number plate support bracket.
5. Rivet.
6. Front bumper.
7. Section B.
8. Push pin.
9. Insulator.
10. Bumper.
11. Section C.
12. Energy absorber and bracket.
3. With the help of an assistant, remove the bumper from the guide bolts on the sides of the body and remove it from the car (see figure).
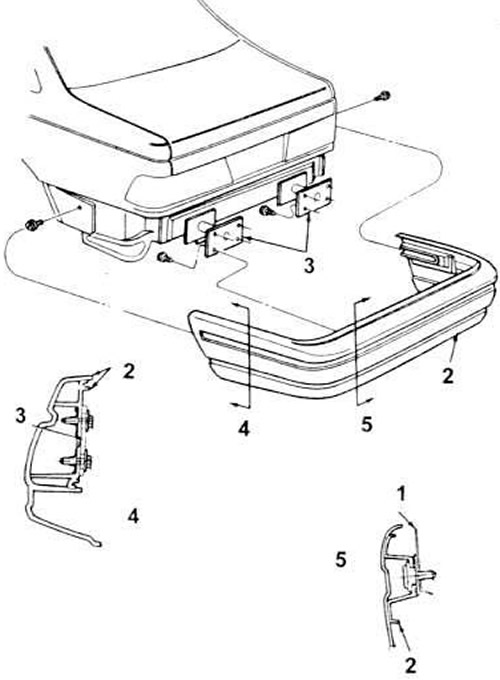
14.3. Rear bumper parts.
1. Panel.
2. Bumper.
3. Energy absorber and bracket.
4. Section A.
5. Section B.
4. Installation is carried out in the reverse order. After assembly, tighten the bracket and insulator bolts.
This article is a copy from the website (www.FordBook.ru)