Withdrawal
Front bumper - pre-1996 models
1. Apply the parking brake, raise the front end and place it on stands.
2. Disconnect the fog lamp wiring (in the presence of) from the front bumper (chapter 12).
3. Disconnect the tube from the headlight washers (in the presence of).
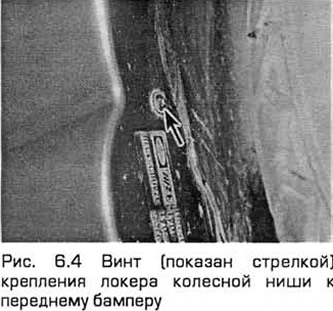
4. Remove the screws securing the wheel arch lockers to the front bumper (see fig. 6.4).
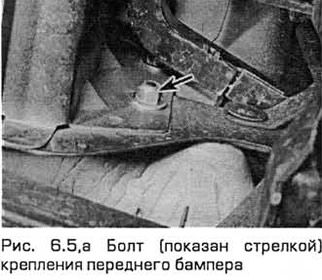
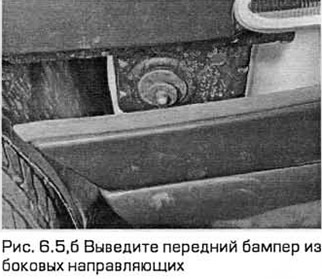
5. Turn away nuts of fastening of a bumper. Remove the bumper by pushing it forward while pulling the guides off the side pins (see fig. 6.5, a, b). When removing the bumper, disconnect the sensor wiring (if available) the lower limit of the outdoor temperature.
Front bumper - production models since 1997
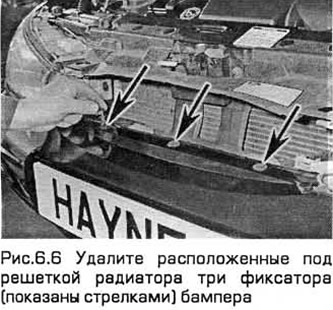
6. Remove the grille (paragraph 7). Then remove the three bumper clips underneath (see figure 6.6.).
7. Apply the parking brake. Raise the front end and place it on stands. From under the car, remove the screws and retainers securing the lower radiator cap. Remove the cover.
8. Disconnect the fog lamp wiring (in the presence of) from the front bumper (chapter 12).
9. Disconnect the tube from the headlight washers (in the presence of).
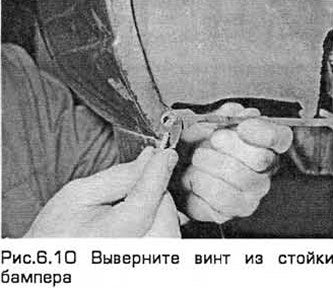
10. At each end of the bumper, remove the screw from the bumper strut (see fig.6.10).
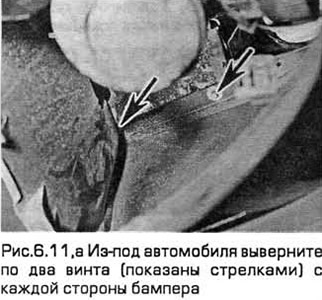
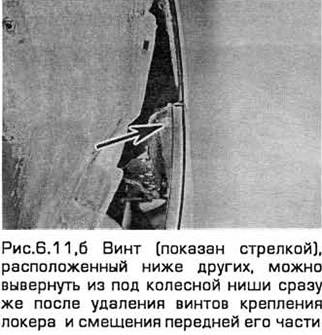
11. Remove two screws from under the car on each side of the bumper. If necessary, the screw located below the others can be unscrewed from the under-wheel housing immediately after removing the screws securing the locker (see Fig.6.11, a, b). Have an assistant support the bumper.
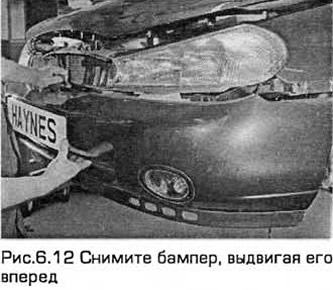
12. Remove the bumper by pushing it forward (see fig.6.12).
Rear bumper - all production models up to 1996
13. Support the front wheels with wedges, lift the rear and place it on supports.
14. Disconnect the rear rubber support of the exhaust system and support the exhaust system on a stand.
15. Turn out screws of fastening of lockers of wheel arches to a back bumper.
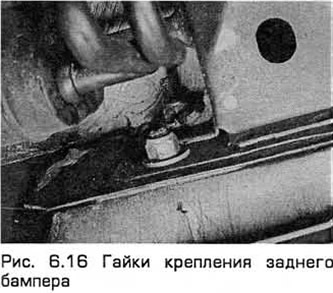
16. Turn away nuts of fastening of a bumper. Remove the bumper by sliding it to the rear while pulling the guides off the side pins (see fig. 6.16).
Rear bumper - Sedan and Hatchback models since 1997
Caution: Wear gloves to avoid cutting yourself on the sharp edges of the bumper.
17. Open the trunk lid / tailgate and remove the two screws securing the upper edge of the bumper (see fig.6.17).

18. Support the front wheels with wedges, lift the rear and place it on supports.
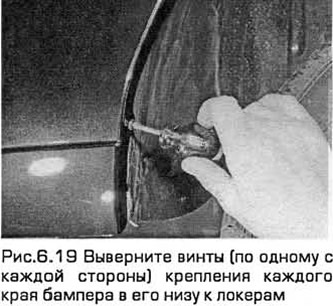
19. Remove the screws (one on each side) fastening each edge of the bumper at its bottom to the lockers (see fig.6.19).
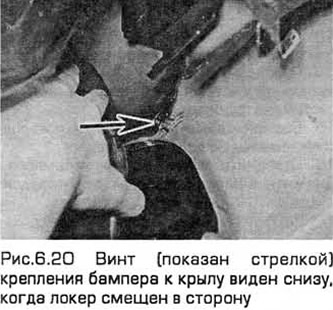
20. Loosen the screws as far as necessary and separate the lower edge of the locker to access the upper bumper screw (see fig.6.20).
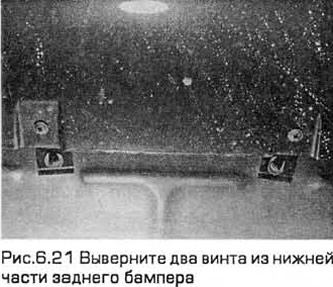
21. Remove the two screws from the bottom of the bumper (see fig.6.21).
22. Together with an assistant, remove the bumper by pushing it back and at the same time removing it from the side pins.
Rear bumper - Station wagon models since 1997
24. Support the front wheels with wedges, lift the rear and place it on supports.
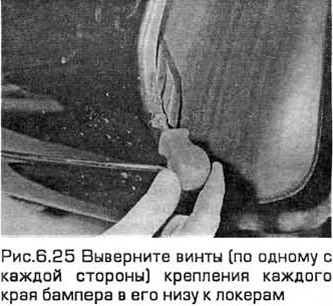
25. Remove the screws (one on each side) fastening each edge of the bumper at its bottom to the lockers (see fig.6.25).
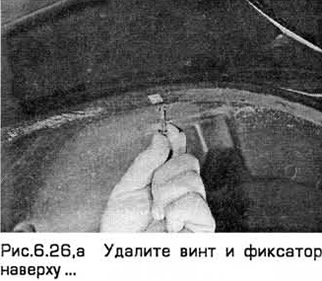
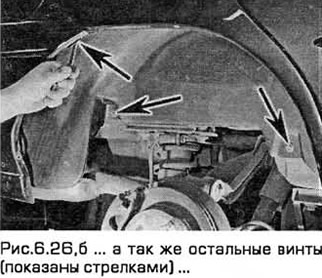
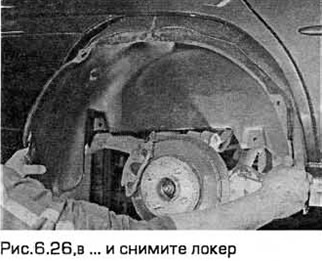
26. Remove the screws and fasteners securing the lockers and remove the lockers (see Fig. 6.26, a-c).
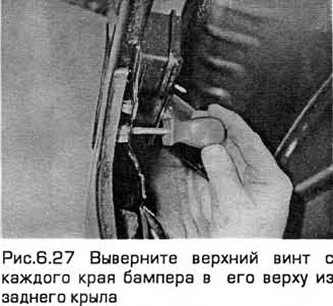
27. Remove the top screw from each edge of the bumper at the top of the rear fender (see fig.6.27).
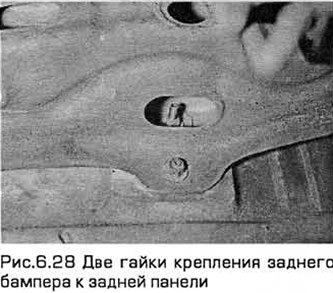
28. From under the car, unscrew two nuts securing it to the rear panel from each edge of the bumper (see fig.6.28).
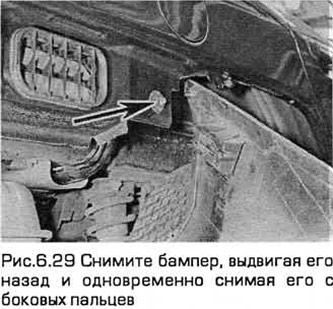
29. Together with an assistant, remove the bumper by pushing it back and at the same time removing it from the side pins (see fig.6.29). On models with ultrasonic parking distance sensors, disconnect the wiring from them as soon as they are available.
Installation
Front and rear bumpers - all models
30. Installation - in the reverse order of removal. Make sure that the guides are correctly aligned with the side pins.
Visitor comments