Contents: Removal ↳ Installation ↳
Removal
1. Open the hood and lock it in the open position.
2. Disconnect the negative battery cable.
3. Release the insulator clips located on the underside of the hood to gain access to the windshield washer hoses and engine compartment light. There is no need to remove the insulator.
4. Disconnect the wiring from the engine compartment light and unfasten the wiring from the hood.
5. Remove the ground wire bolt from the hood (see Fig. 8.5).
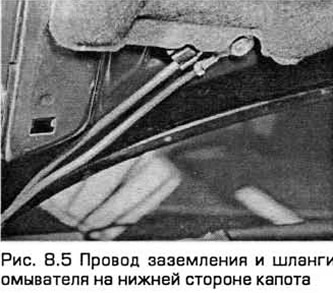
6. Disconnect the windshield washer hoses from the nozzles and unfasten the hose from the hood.
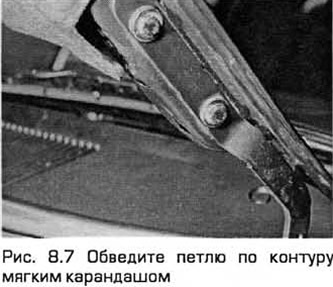
7. It is recommended to mark the position of the hinges on the hood for subsequent correct installation. To do this, trace the loop along the contour with a soft pencil. Loosen the two mounting bolts on each hinge on each side of the hood (see Fig. 8.7).
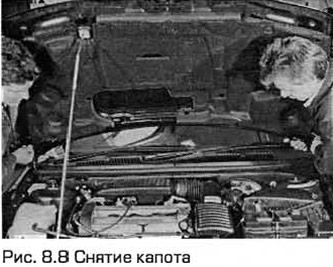
8 Unscrew the four bolts, remove the support securing the hood, and with the help of an assistant, remove the hood from the vehicle (see Fig. 8.8).
Installation
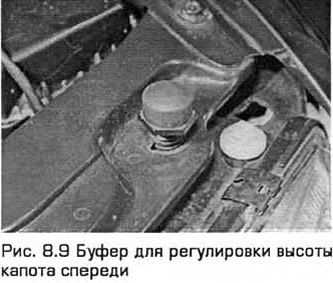
9. Installation - in the reverse order of removal. Install the hood hinges according to the marks made during removal. If necessary, you can adjust the hinges so that the gap between the hood and the body panels is the same in all places. The height of the hood at the rear is adjusted by moving it relative to the hinges. The height of the hood at the front is adjusted by moving the lock (paragraph 10) and turning the rubber buffers located on the panel in the engine compartment (see Fig. 8.9).
[The original article can be viewed on the portal FORDBOOK.RU]