Withdrawal
Hatchback
1. Disconnect the negative battery cable. Open the door.
2. The door can be removed by removing the bolts from the hinges and leaving the hinges in place, or the hinges can be detached from the ceiling panel by unscrewing the fixing nuts. At the same time, to access the nuts, you need to carefully bend the edge of the headlining upholstery.
3. Remove the left shelf support bracket as follows. Tilt the rear seat forward and, on pre-1997 models, disconnect the left seat section cable from the bracket and retainers. Where necessary, extend the rear seat side cushion (on low-volume models, this pad is secured with a screw). Remove the screws and remove the bracket.
4. Carefully remove the side trim on the left side of the luggage compartment.
5. Disconnect the door wiring connector located in the luggage compartment on the left above the wheel arch.
6. On models where the brake light is set high, remove the two screws securing the light cover and disconnect the wiring from the bulb holder.
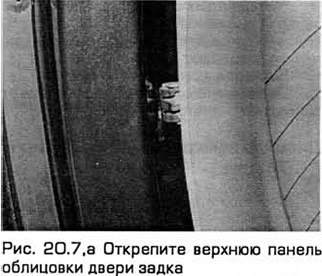
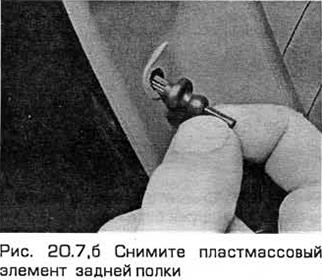
7. Unfasten and remove the top trim panel from inside the tailgate. Remove also the plastic element of the rear shelf (see fig. 20.7, a, b).
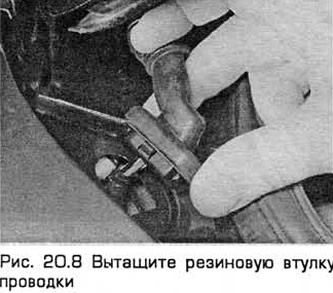
8. Remove the rubber grommet from the top of the door opening and pull the wiring through the hole (see fig. 20.8).
9. Disconnect the rear door glass washer tube from the nozzle.
10. Pull out the rubber grommet located on the right side of the door opening and pull out the washer tube.
11. Have an assistant hold the door open.
12. Using a small screwdriver, pull out the latches securing the racks to the door. Remove the bushings from the strut ball joints and lower the struts down.
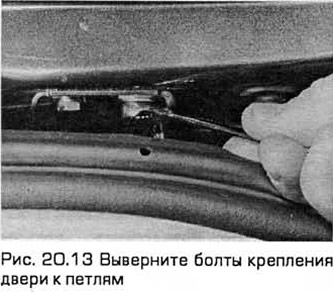
13. If you have already unfolded the headlining, remove the hinge nuts from the headlining panel. Otherwise, remove the bolts securing the door to the hinges (see fig. 20.13).
14. Remove the tailgate.
Station wagon
15.Disconnect the negative battery cable. Open the door.
16. The door can be removed by removing the bolts from the hinges and leaving the hinges in place, or the hinges can be removed from the ceiling panel by unscrewing the fixing nuts. At the same time, to access the nuts, you need to carefully bend the edge of the headlining upholstery.
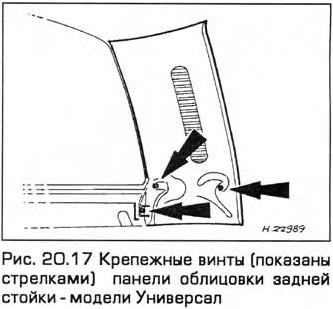
17. Turn out fixing screws. Then unfasten the trim panels from both C-pillars (see fig. 20.17).
18. Unfasten and remove the top panel of facing from the inside of a door.
19. Carefully remove the side trim on the left side of the luggage compartment. Disconnect the wiring connectors in the rear lamp housing.
20. On models where the brake light is set high, remove the two screws securing the light fixture cover and disconnect the wiring from the bulb socket.
21. Tie a thin strong rope to the end of the wiring to use it to pull the wiring through when installing the door.
22. Pull out the rubber bushing located in the door opening on the top left. Pull out the wiring. Untie the rope and leave it in the rear rack.
23. Disconnect the door glass washer tube from the nozzle. Pull out the rubber bushing and remove the tube.
24. Have an assistant hold the door open.
25. Using a small screwdriver, pull out the latches securing the racks to the door. Remove the bushings from the strut ball joints and lower the struts down.
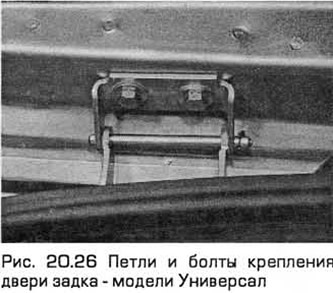
26. If you have already unfolded the headlining, remove the hinge nuts from the headlining panel. Otherwise, remove the bolts securing the door to the hinges (see fig. 20.26). Remove the door.
Installation
Hatchback and Station wagon models
27. Installation - in the reverse order of removal. The door should be symmetrical in the opening, and the latch should be symmetrical in the lock opening. If necessary, loosen the fixing nuts by adjusting the position of the door.
Visitor comments