


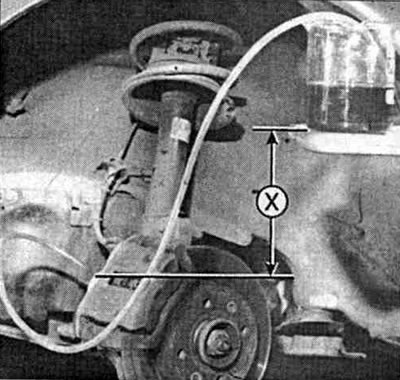
Place the collecting container approximately 30 cm (X) above the bleeder valve. This will ensure that the brake fluid exerts pressure on the bleeder valve and that air cannot enter the brake system through the valve threads.
Make sure that brake fluid does not get on the varnished surface. Otherwise, immediately wash the surface with clean water. Otherwise, the varnish will become dull and soon peel off.
Stages of work
Disconnect the connector of the locking cover. To do this, pull back the fastening loop 1 and press down the clamp 2. Unscrew the cover.
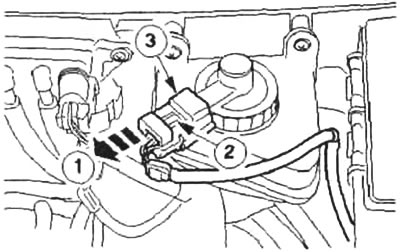
Central connector, expansion tank
Sequence of actions: bleed valve on the left in front - on the right in the back; bleed valve on the right in front - on the left in the back.
Remove the dust caps from the bleed valves and clean the valve nipples.
Slide a synthetic hose (arrow) onto the nipple and lower the free end of the hose into a collecting container with a small amount of brake fluid.
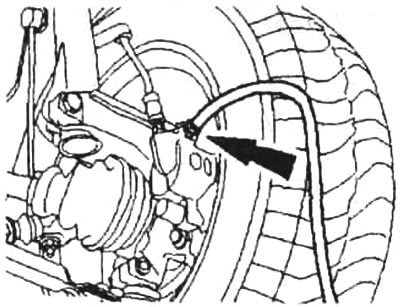
Bleed valve with hose attached
Loosen the bleeder valve nipple a maximum of one turn. Have your assistant slowly press the brake pedal to the floor and quickly release it.
Wait about 3 seconds, the master cylinder should fill again.
Repeat this process on each wheel until no more air bubbles come out of the bleeder valve and clean brake fluid comes out. Keep the brake pedal pressed to the floor.
Close the bleed valve - release the pedal. Remove the hose from the bleed valve, add brake fluid to the expansion tank up to the Max mark.
Fill the expansion tank, screw on the sealing cap and connect the central connector.
Check the operation of the brakes while driving carefully.
The original article is available on the website FORDBOOK.ru