Contents: Removal ↳ Installation ↳
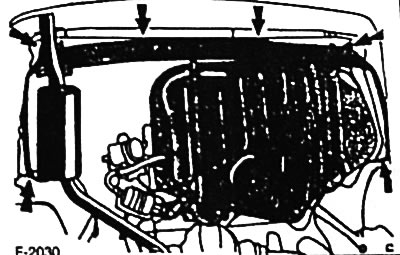
The fuel tank with a capacity of 70 liters is made of sheet steel. The tank is located under the body bottom in the luggage compartment area.
Attention: Strictly observe safety regulations when working with fuel supply systems, see p. 54.
Note: A suitable fuel pump is required to pump fuel out of the tank. A garage jack and 4 sturdy stands are required to support the vehicle.
Removal
Warning: Fuel may spill when removing the fuel tank. Gasoline and its vapors are poisonous and flammable, so ensure good ventilation of the workplace. Avoid contact of fuel with skin. Work in fuel-resistant gloves. No open flame, fire hazard! Have a fire extinguisher ready.
Disconnect the negative (-) battery cable.
Caution: When the battery is disconnected, the contents of electronic memory devices, such as engine fault codes or radio codes, are erased. Before disconnecting, also read the instructions in the chapter "Removal and installation the battery".
Unscrew the fuel tank filler cap and pump the fuel out of the tank.
If present, unscrew the 2 screws securing the filler neck arrow to the body.
Cars from 9/94: loosen the fastening clamps and disconnect the 2 ventilation system hoses from the bottom of the filler neck.
Loosen the nuts securing the right rear wheel, lift the car onto jack stands and remove the rear wheel.
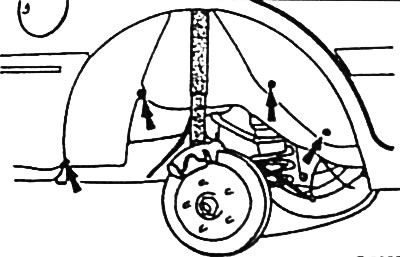
Unscrew the fastener and remove the right rear wheel arch trim.
Cars up to 8/94: unscrew the fastener and remove the lower extension of the bumper.
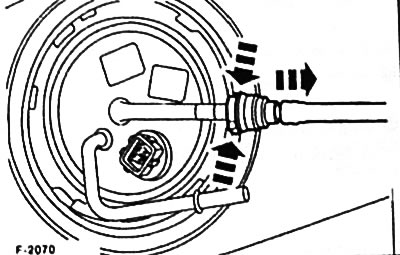
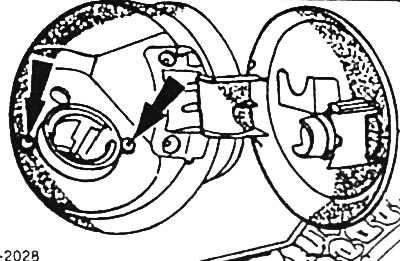
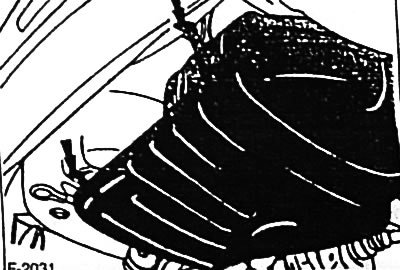
Place a fuel-resistant container underneath. Vehicles up to 8/94: Loosen the fastening clamps and disconnect the pressure and return fuel lines. To facilitate subsequent assembly, mark the fuel lines with adhesive tape. Vehicles from 9/94: Disconnect the fuel lines from the fuel level sensor. To release the quick-release fasteners, press both buttons fully and remove the fasteners, see figure. The nipples and the corresponding quick-release fasteners are color-coded to prevent the fasteners from being mixed up during assembly.
Support the fuel tank with a jack.
Loosen the retaining clamp bolts and carefully lower the fuel tank.
Disconnect the plug connector from the fuel level sensor and, if available, the fuel pump located in the tank.
Disconnect the ventilation system hose.
Check that all wires and hoses are disconnected. Remove the fuel tank.
Installation
Before installation, check the fuel tank and retaining clamps for through corrosion and replace if necessary.
Place the fuel tank in the installation position and connect the plug connectors of the fuel level sensor and fuel pump.
Place the fuel tank, install the retaining clamps and tighten the fasteners.
In accordance with the markings, connect and secure the pressure and return fuel lines with clamps.
Cars up to 8/94: attach the fuel filler neck to the side wall of the body with two bolts. Attach and bolt the lower extension of the bumper.
For vehicles from 9/94, connect two ventilation system hoses to the fuel tank filler neck and secure them with clamps.
Place and secure the wheel arch trim.
Install the wheel and lower the vehicle.
Tighten the wheel mount using a crisscross pattern to a torque of 100 Nm.
Fill the fuel tank with fuel and tighten the filler cap.
Connect the ground (-) cable to the battery.
If available, set the clock and enter the anti-theft code for the radio.
Check the operation of the fuel level indicator on the instrument panel.
(The text was obtained in its entirety from the specified website: FORDBOOK.RU)