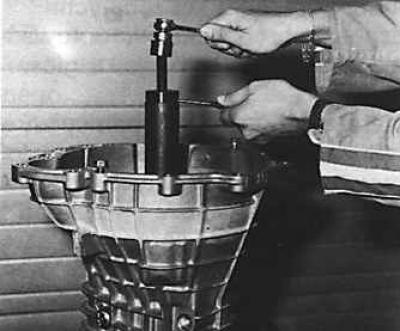
Front view of clutch housing
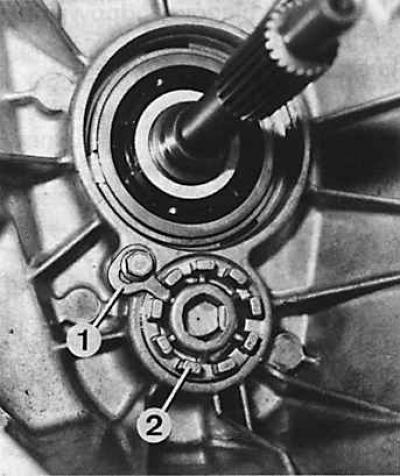
1 - nut fixing plate, 2 - intermediate shaft bearing nut
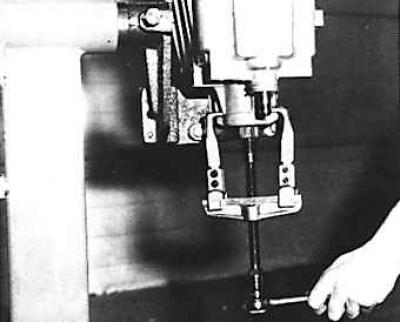
Removing the clutch release bearing guide
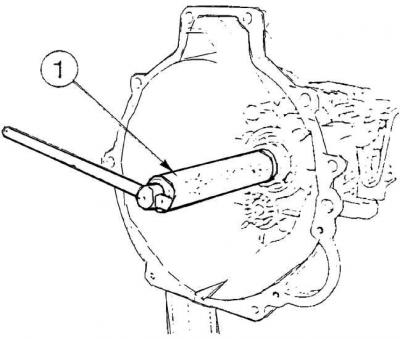
1 - special tool Ford 16.040
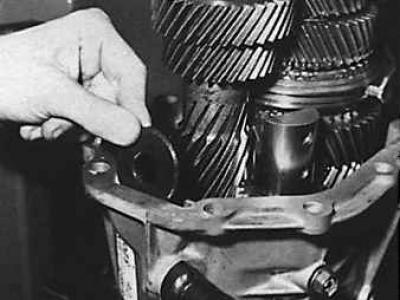
View of the left side of the gearbox
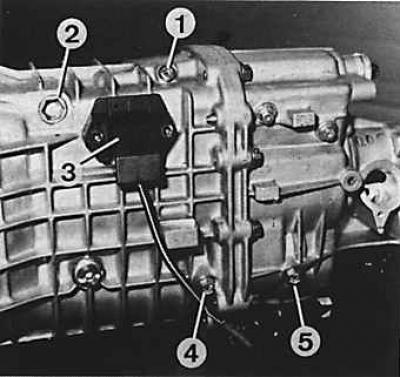
1 - reverse gear stopper bolt, 2 - selector stopper plug, 3 - reverse light switch, 4 - front bolt of fastening of reverse gear intermediate gear axle, 5 - rear bolt of fastening of reverse gear intermediate gear axle
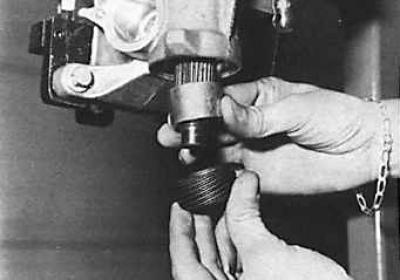
Removing the output shaft flange with a puller

Attention! After disassembling the gearbox, all spring retaining rings should be replaced with new ones with a thickness that ensures that the required values of the axial clearance of the elements installed with their help are obtained. All O-rings should also be replaced.
Gearbox elements (shafts, bearings, synchronizers, gear shift mechanism, etc.) are located in two interconnected crankcases. The first one, located closer to the engine, also contains the clutch and is called the clutch housing (although there are six elements of the gearbox in its rear); the other is called the gearbox housing (although it does not contain all the elements of this node).
1. Drain the oil from the gearbox.
2. Remove the release bearing and clutch release forks from the clutch housing.
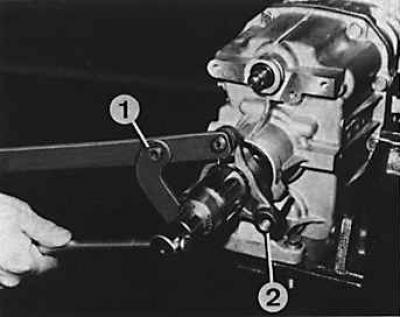
3. Fix the flange of the connection of the front joint of the propeller shaft and unscrew the flange fastening nut by applying light blows on the wrench (1 - device for blocking the flange, 2 - hinge flange).
4. Using tool Ford 16.040 remove the clutch release bearing guide bush.
5. Remove the inner circlip from the input shaft.
6. Remove the intermediate shaft bearing nut fixing plate (see fig. Front view of clutch housing).
7. Using a 17 mm wrench, unscrew the intermediate shaft bearing nut.
8. Unscrew the bolts on the side of the crankcase (Torx type) reverse gear lock (see fig. View of the left side of the gearbox).
9. Unscrew the plug on the side of the crankcase (2) selector stopper and remove the spring, pusher, bushing and selector stopper ball.
10. Unscrew the switch (3) reverse lights.
11. Unscrew two screws (4 and 5) fastening the shaft of the intermediate gear of the reverse gear and remove only the front bolt (4).
12. Unscrew the ten bolts connecting the clutch housing to the gearbox housing.
13. Using two screwdrivers, carefully separate both parts of the gearbox housing.
14. Remove the clutch housing from the gearbox housing; if necessary, use tool 16.041.
15. Remove fork axle (1) (see fig. Gearshift mechanism, gearbox type MT 75) 3-4 gears, 5th gear and reverse gear.
16. Remove rear bolt (5) (see fig. View of the left side of the gearbox) fastening of an axis of an intermediate gear wheel of transfer of a backing.
17. Remove the magnet from the gearbox housing.
18. Using a suitable puller, remove the flange connecting the front joint of the driveshaft from the output shaft (see fig. Removing the output shaft flange with a puller).

19. Remove the O-ring from the output shaft.
20. Remove the speedometer drive gear and spacer.
21. Pull the output shaft out of the gearbox housing using a puller.
Visitor comments