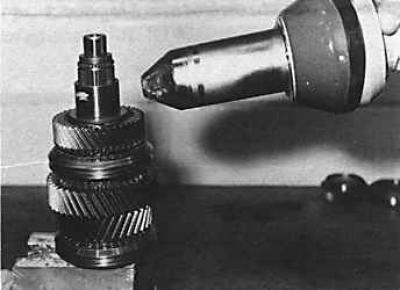
Removal the 5th gear pinion, 5th gear synchronizer ring and needle bearing from the secondary shaft
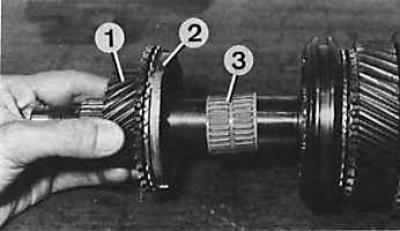
1 – secondary shaft of 5th gear pinion, 2 – 5th gear synchronizer ring, 3 – needle bearing
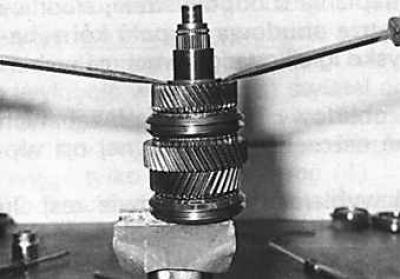
Removal the 3rd-4th gear synchronizer, 3rd gear synchronizer ring, 3rd gear gear and needle bearing from the secondary shaft
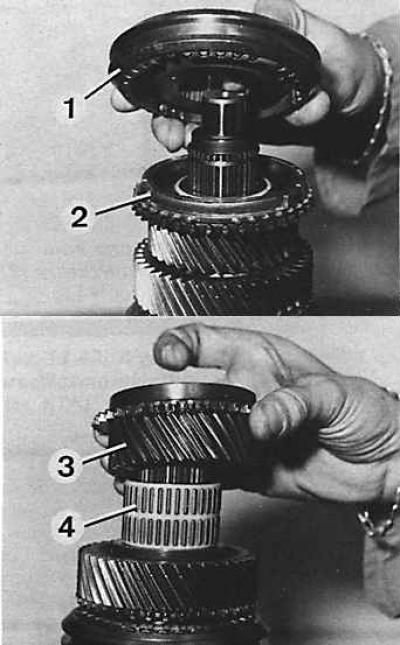
1 – 3-4 gear synchronizer, 2 – 3rd gear synchronizer ring, 3 – 3rd gear pinion, 4 – needle bearing
Removal the 2nd gear pinion, needle bearing and 2nd gear synchronizer ring from the secondary shaft
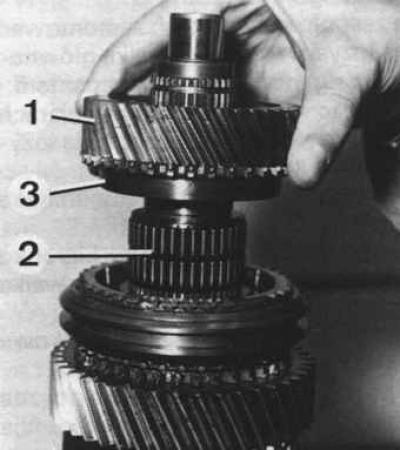
1 – 2nd gear pinion, 2 – needle bearing, 3 – 2nd gear synchronizer ring
Disassembly
1. Disconnect the primary and secondary shafts.
2. Remove the 4th gear synchronizer ring and bearing.
3. Remove the 5th gear pinion, synchronizer ring and needle bearing from the secondary shaft (see Fig. Removing the 5th gear pinion, 5th gear synchronizer ring and needle bearing from the secondary shaft).
4. Remove the 3-4 gear synchronizer installation spring ring from the other end of the secondary shaft.
5. Remove the unit: 3-4 gear synchronizer, 3rd gear synchronizer ring, 3rd gear gear and needle bearing (see Fig. Removing the 3-4 gear synchronizer, 3rd gear synchronizer ring, 3rd gear gear and needle bearing from the secondary shaft).
Caution! Do not disassemble the synchronizers to maintain the correct position of all their parts.
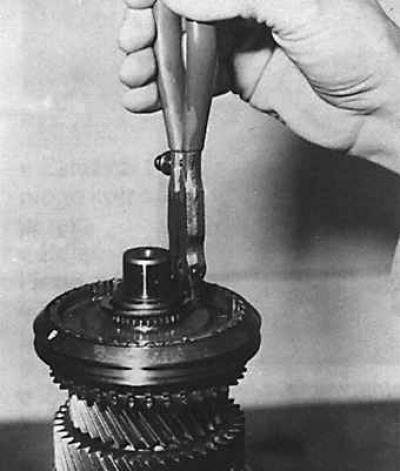
6. Heat the 3rd gear needle bearing ring to 100°C.
7. Using two screwdrivers, remove the 3rd gear needle bearing ring.
8. Remove the 2nd gear pinion, needle bearing and 2nd gear synchronizer ring (see Fig. Removing the 2nd gear pinion, needle bearing and 2nd gear synchronizer ring from the secondary shaft).
Caution! Do not interchange the 2nd and 3rd gear needle bearing rings.
9. Remove the 1st-2nd gear synchronizer snap ring.
10. Remove the 1st-2nd gear synchronizer, synchronizer ring and 1st gear gear, as well as the needle bearing.
Attention! Do not disassemble the synchronizers in order not to change the relative position of their parts.
11. Unscrew the secondary shaft, remove the 5th and reverse gear synchronizer snap ring, remove the reverse gear pinion and needle bearing.
Examination
1. The teeth of the gears and synchronizers must not be chipped or excessively worn, and the surfaces of the teeth must not show any signs of scoring.
2. It is necessary to check whether the synchronizer hubs are chipped and whether they move without excessive gaps or jamming.
3. The needle bearing should be replaced if there are obvious scratches on the surface or if there are excessive clearances or signs of wear.
Assembly
Attention! The synchronizers for 1-2 gears, 5th gear and reverse gear are identical, but they cannot be interchanged when assembling the gearbox.
When assembling, lubricate all components, especially the synchronizer rings and needle bearing, with gearbox oil.
1. Install the needle bearing and reverse gear gear on the secondary shaft.
2. Install the synchronizer ring and the 5th and reverse gear synchronizer.
3. Install a new snap ring.
4. Turn the secondary shaft and install the needle bearing and 1st gear.
5. Install the 1st gear synchronizer ring, 1-2 gear synchronizer and new snap ring.
6. Install the 1st gear synchronizer ring, needle bearing and 2nd gear.
7. Heat the 3rd gear needle bearing ring to 100°C.
8. Place the hot ring on the secondary shaft.
Caution! The needle bearing ring must be inserted deep enough to stop. A new needle bearing must be used during installation.
9. After the ring has cooled, install the needle bearing and 3rd gear.
10. Insert the 3-4 synchronizer assembly (shorter side up) and new snap ring.
11. Turn the shaft and install the 5th gear synchronizer ring, needle bearing and 5th gear.
12. Install the 4th gear synchronizer ring and bearing.
13. Connect the secondary and primary shafts.