Contents: Removal ↳ Installation ↳
Removal
Disconnect the negative (-) battery cable.
Caution: When the battery is disconnected, the contents of electronic memory devices, such as engine fault codes or radio codes, are erased. Before disconnecting, also read the instructions in the chapter "Removal and installation the battery".
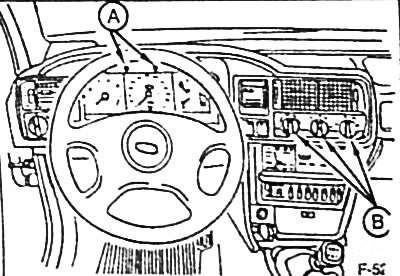
Unscrew the 2 fastening screws "A" and remove the instrument panel cover.
Remove the rotary knobs "B" for controlling the heating system.
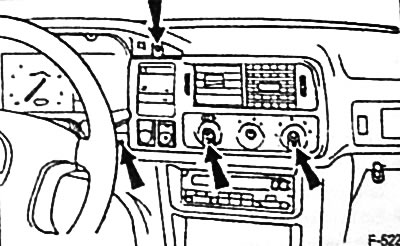
Unscrew the 4 screws securing the "arrow", pull the cover assembly slightly away from the instrument panel and disconnect the plug connectors of the switches. Remove the cover assembly.
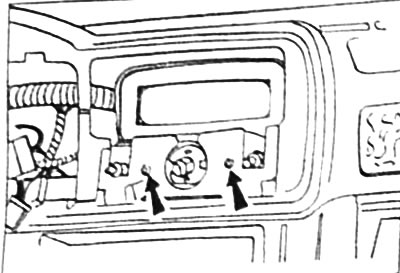
Unscrew the 2 "arrow" screws. Remove the control unit from the instrument panel and disconnect the multi-pin plug connector.
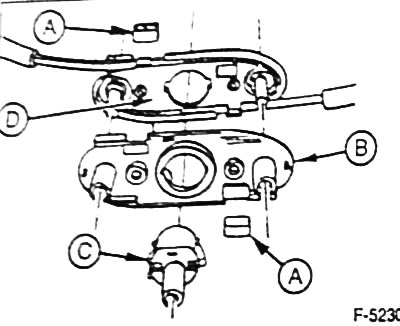
Disconnect fan switch "C" from the control unit.
Using a screwdriver, bend back the locking tabs and remove cover "B" from base "D".
Cut the "A" clamps of the Bowden cables. Unfasten the Bowden cables from the guide toothed tape and remove.
Installation
Insert the Bowden cables into the base and secure them in the toothed tape guide. Secure the Bowden cables with new clamps.
Place the lid on the base and secure it with the locking tabs.
Secure the fan switch to the control unit.
Connect the multi-pin plug connector of the control unit.
Place the control unit and screw it in place.
Connect the multi-pin plug connector to the cover plate. Place the cover plate and screw it in place.
Insert the rotary knobs to control the heating system.
Place the instrument panel cover on the panel and screw it in place.
Connect the battery ground (-) cable.
If available, set the clock and enter the radio theft protection code.