Cars manufactured before 04.1992
1. Remove the ground wire from the battery.
Attention! This will erase the information in the electronic storage devices.
Option with regular finish
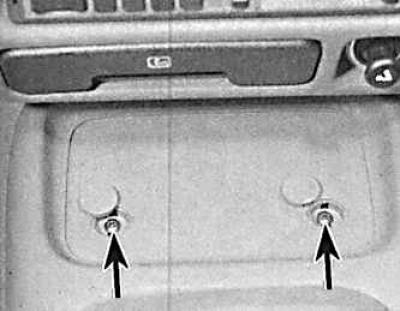
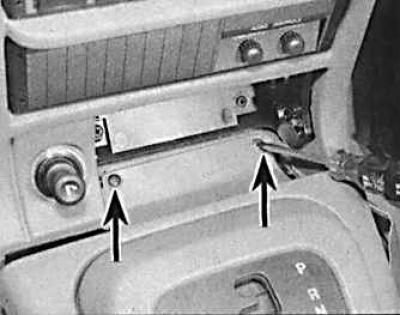
2. Remove the rubber mat and screw covers from the front of the console. Remove the two front screws (indicated by arrows).
3. Remove the gear shift knob by unscrewing it.
4. Remove the middle shelf in front of the handbrake lever.
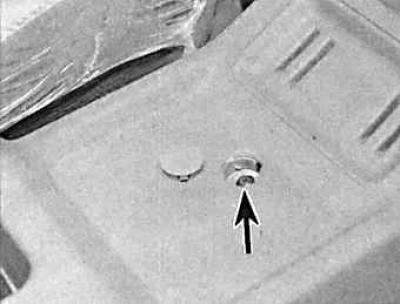
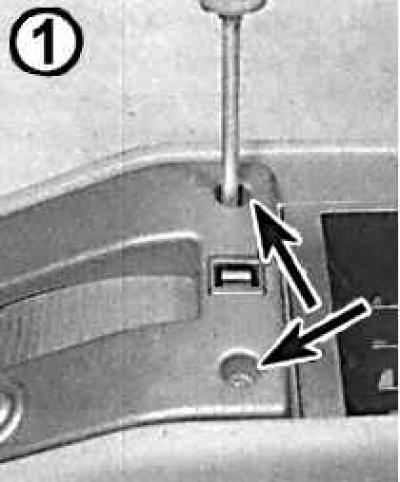
5. Unscrew the central screw (indicated by the arrow) of the mount, which is located under the plug, and the two rear screws.
6. Remove the console.
7. Installation is carried out in the reverse order of removal.
Option with improved finishing
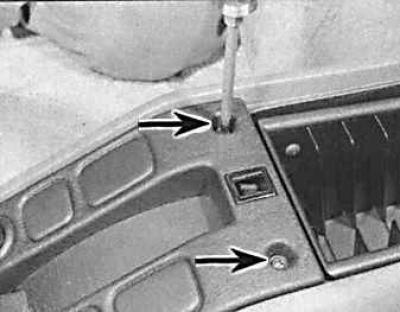
8. Remove the cassette box. Unscrew the two screws (indicated by arrows) located under the cover, securing the switch panel.
9. Lift the back of the panel, disconnect the connectors and remove them.
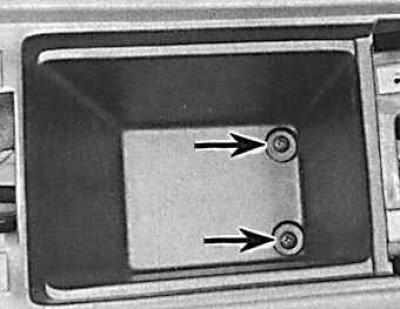
10. Remove the cassette box trim and the box, which is secured with two screws (indicated by the arrow).
11. Remove the rear control panel by unscrewing the two screws in the upper corners and removing the heating control knob. Disconnect the cigarette lighter and other wires, if any.
12. Remove the two screws securing the rear heater control.
13. Remove the gear shift knob by unscrewing it.
14. Remove the four remaining screws (two at the front (indicated by arrows) and one on each side).
15. Remove the console by pulling it out from under the lower trim of the instrument panel and the handbrake handle.
16. Installation is carried out in the reverse order of removal.
Cars manufactured since 04.1992
1. Remove the ground wire from the battery.
Attention! This will erase the information in the electronic storage devices.
 |
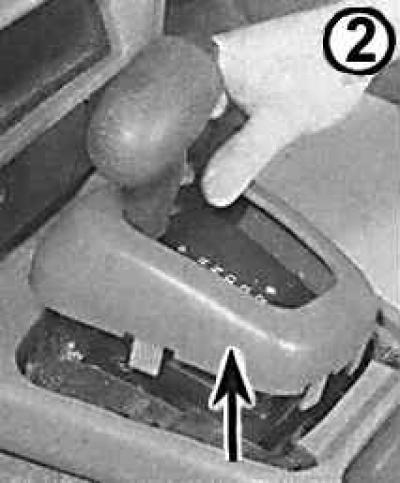 |
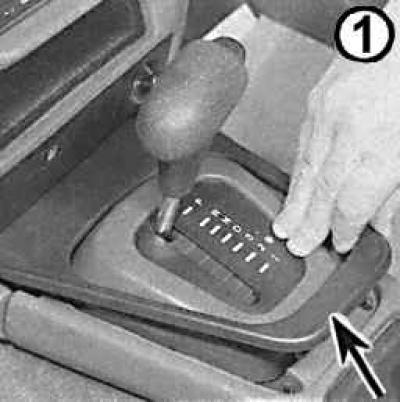
2. Using a thin screwdriver, pry up the outer (1) and inner (2) covers (indicated by arrows) of the gear shift lever.
3. Remove the back cover of the remote control, take out the cassette box and unscrew the two screws (indicated by arrows) securing the remote control.
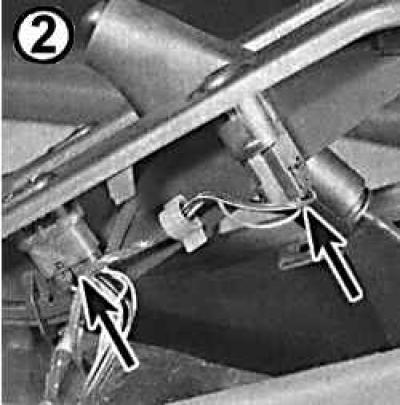
4. Lift the central console and disconnect the electrical connectors (indicated by arrows).
4. Remove the switch panel.
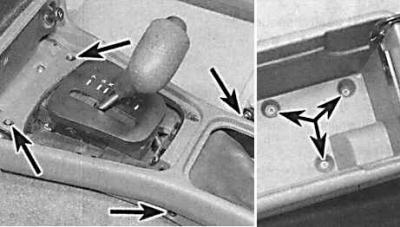
5. Unscrew the 7 screws (indicated by arrows) (two in front, one on each side and three at the back) securing the center console.
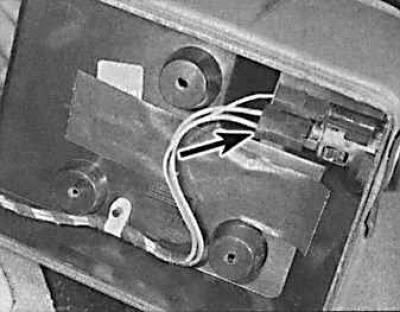
6. Remove the center console and disconnect the electrical connector (indicated by the arrow).
7. Installation is carried out in the reverse order of removal.
The original text is provided on an online resource FordBook