Cars manufactured before 04.1992
1. Remove the ground wire from the battery.
Attention! This will erase the information in the electronic storage devices.
2. Relieve the pressure in the cooling system by unscrewing the expansion tank cap.
3. Clamp the coolant supply pipes to the heater.
4. Disconnect two heating hoses from the pipes on the bulkhead; this will cause coolant to flow out of the heater, which must be collected in a container.
5. Drain the maximum amount of coolant from the heater radiator by blowing it out.
6. Remove the radiator pipe plate and gasket from the engine compartment bulkhead.
7. Remove the center console and trim to gain access to the heater control cable.
8. Remove the instrument cluster from the dashboard.
9. Remove the top portion from the instrument panel.
10. Disconnect the air duct from the heater body.
11. Unscrew the two nuts securing the heater unit. Pull the unit into the car until the pipes come out of the engine compartment bulkhead, then move the unit to the side.
12. Installation is carried out in the reverse order of removal.
13. Add fluid to the cooling system.
Cars manufactured since 04.1992
1. Remove the ground wire from the battery.
Attention! This will erase the information in the electronic storage devices.
2. Drain the coolant from the cooling system.
3. Loosen the clamps and disconnect the feed and return hoses from the radiator.
4. Unscrew the two screws securing the radiator protective plate and remove the gasket from the engine compartment bulkhead.
5. Remove the instrument panel.
6. Disconnect the instrument panel wiring harness to access the defroster attachment latches.
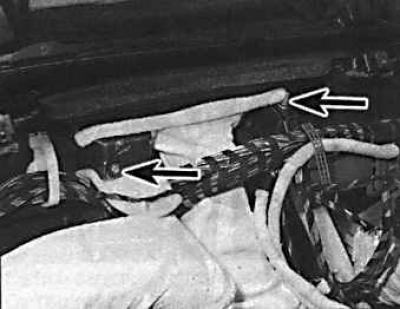
7. Unscrew the screw and nut and disconnect each windshield defroster nozzle from the heater (arrows indicate nozzle mounts). Unscrew the two nuts and disconnect the central nozzle from the heater at eye level.
8. Unscrew the two nuts and then disconnect the right eye-level nozzle from the heater. Repeat the same steps for the left nozzle.
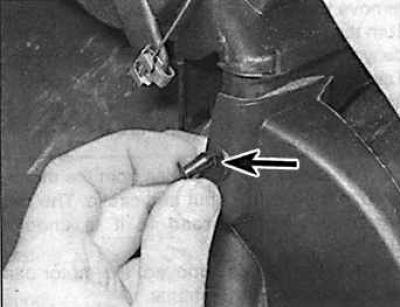
9. To remove the rear foot warmer attachments from the heater, remove the pin (arrow) from the bracket that holds the attachment while supporting the outer portion of the bracket at the rear.
Caution! If the bracket is not supported from behind, it will fall into the nozzle after the axle is removed. To get it out later, you will need to remove the ventilation duct, which requires removing the front seats and lifting the carpet.
10. Disconnect the connector from the heater control unit.
11. Unscrew the two nuts securing the heater to the engine compartment bulkhead and carefully remove the heater.
12. Installation is carried out in the reverse order of removal.
13. Add fluid to the cooling system.