Cars manufactured before 04.1992
1. Remove the ground wire from the battery.
Attention! This will erase the information in the electronic storage devices.
Front block
2. Remove the instrument cluster from the dashboard.
3. Remove the top portion from the instrument panel.
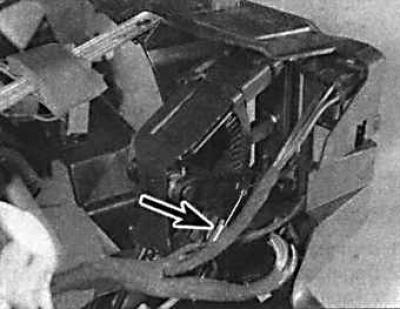
4. Mark the position of the cables. Release the clamp (indicated by the arrow) of the cable sheath, remove the clamps and the cable of the temperature regulator lever.
5. Remove the air distributor cable in the same manner.
6. On vehicles with air conditioning, disconnect the hoses from the vacuum switch.
7. Unscrew the four screws securing the heater control unit.
8. Install and secure the control panel with screws.
9. Connect the cables in accordance with the markings and secure them with clamps to the heater control panel, install the adjusting clamps and secure the cable sheaths.
10. Install the instrument cluster on the dashboard.
Rear block
11. Remove the center console.
12. Disconnect the control cables and remove the control unit.
13. Installation is carried out in the reverse order of removal.
Cars manufactured since 04.1992
Heater control unit
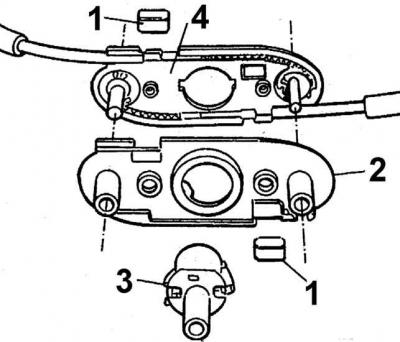
1 – control cable clamps, 2 – cover, 3 – fan switch, 4 – main board
1. Remove the ground wire from the battery.
Attention! This will erase the information in the electronic storage devices.
2. Unscrew the two screws and remove the trim from the instrument panel.
3. Remove the rotary knobs from the heater control unit by simply pulling them towards you.
4. Unscrew the 4 screws securing the control unit cover, pull the cover slightly and disconnect the connectors. Completely remove the control unit cover.
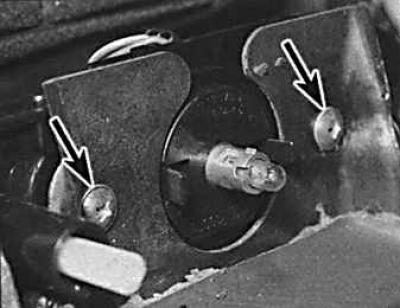
5. Unscrew the two screws (indicated by arrows) securing the control unit. Remove the heater control unit and disconnect the multi-pin connector.
6. Remove the fan switch from the control unit.
7. Use a screwdriver to bend back the retaining tabs and remove the cover from the main board.
8. Cut the cable fastening clamps. Release the cables from the toothed tape guide and pull them out.
9. Install the cables into the main board and connect them to the toothed guide tape. Secure the cables with new clamps.
10. Place the cover on the main board and squeeze the retaining tabs.
11. Install a fan switch in the heater control unit.
12. Connect the multi-pin connector to the heater control unit.
13. Install and secure the heater control unit with screws.
14. Connect the multi-pin connector to the heater control unit cover and screw the cover on with screws.
15. Install rotary knobs on the heater control unit.
16. Install the cover on the instrument panel and secure it with screws.
17. Connect the ground wire to the battery.