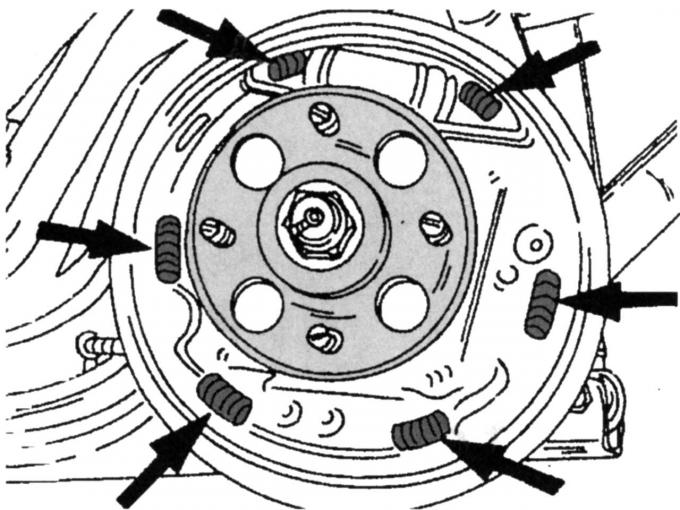
Fig. 260. Lubrication points for heated bearings
- lightly lubricate the brake pad contact areas shown in Fig. 260 with a compound for heated bearings;
- lubricate the rotation points and threads of the adjusting pusher with the same grease;
- if the pads are replaced, the new rear pad is supplied together with the parking brake lever, which is riveted to the pad, before installing the pads, lubricate the hinge areas well, remove excess grease;
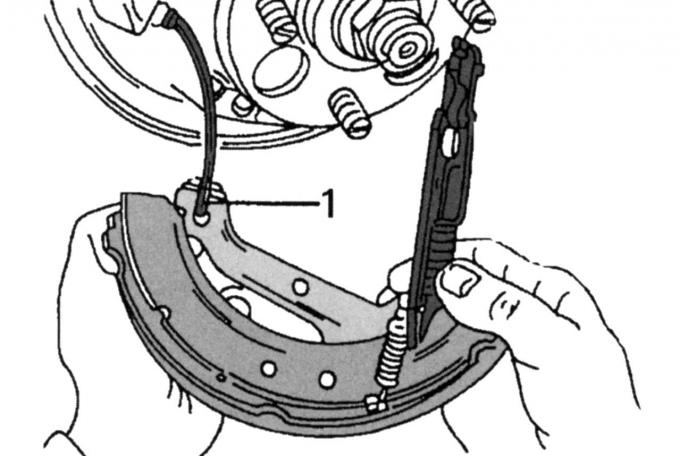
Fig. 261. Installing the brake shoe: 1 — parking brake cable
- install the pressure rod with the regulator on the passive (pressed) brake shoe and attach the parking brake cable 1 (Fig. 261) to the lever, as shown in the figure;
- when installing the brake pads, install the return springs in the pads according to their original position and place the pads on the brake shield plate;
- insert the ends of the shoe into the supports on the back side;
- carefully insert the other end of the shoe into the piston slot using a screwdriver (remove the rubber strip first), while trying not to damage the protective plug of the cylinder;
- center the brake pads on the brake shield plate;
- install the anchor pins by pressing on the pin from behind, compressing and inserting the spring and turning the pin head 90º to secure the part;
- install the brake drum; if the drum does not fit, then adjust the self-adjuster by means of a toothed engagement to bring the pads together, to do this, place a screwdriver against the adjusting element and hit it with your palm;
- take a test drive: brake the car several times to let the mechanism work in, then apply the parking brake. In this case, clicking sounds may appear in the brakes, which indicate that the brakes are self-adjusting. If the sounds no longer appear, the brakes are adjusted properly.
[Content was created using data from this website: fordbook.ru]