Contents: Removal ↳ Installation ↳
| Name | Specification |
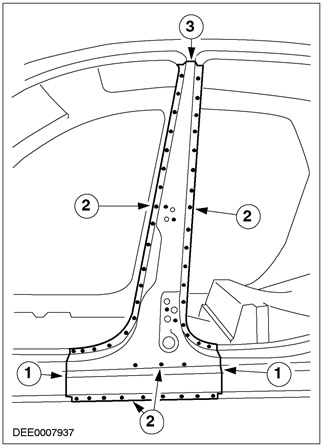
| External panel of the B-pillar | |
| Reinforcement panel of the "B" pillar | |
| Inner panel of the B-pillar |
Removal
1. General notes:
- Remove the following items: doors, lower trim panel and B-pillar trim, roof liner, front seat, lock striker, door seal, and seat belt.
- Move flooring and electrical wiring away from the work area.
- Please note the cut out replacement part.
2. External panel of the B-pillar
- Cut it.
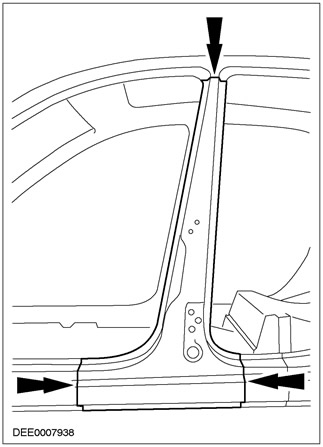
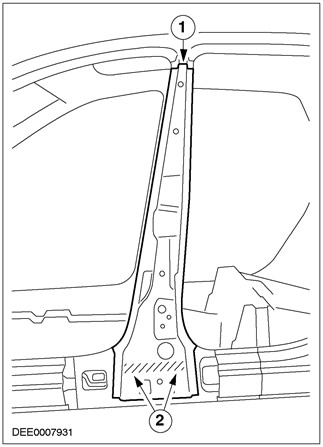
3. Reinforcement panel of the "B" pillar
- 1. Cut
- 2. To remove, heat the area using a hot air gun (foam filled area).
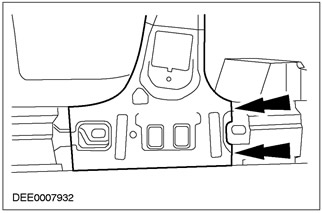
4. Inner panel of the B-pillar
- Cut it.
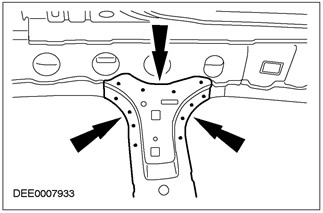
5. Inner panel of the B-pillar
- Mill spot welds.
Installation
1. Inner panel of the B-pillar
- 1. Perform a continuous weld along the cut edge - using MIG technology.
- 2. Perform puddling welding.
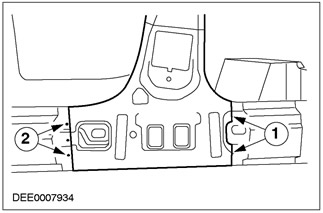
2. Inner panel of the B-pillar
- Perform puddling welding.
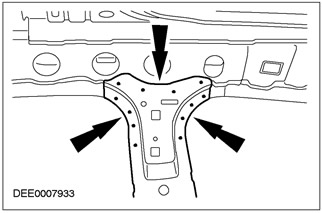
3.
NOTE: Before applying body sealant, lift the outer B-pillar panel and measure the gap width.
Reinforcement panel of the "B" pillar.
- 1. Apply body sealant to the connection area and install the NVH element.
- 2. Apply body sealant to the sides and at the joint with the B-pillar reinforcement according to the gap width.
- 3. After welding in the B-pillar area, apply body sealant only from the inside.
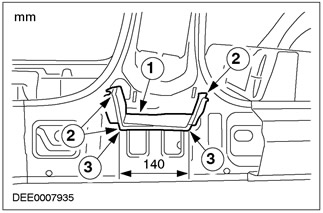
4. Reinforcement panel of the "B" pillar.
- 1. Perform a continuous weld along the cut edge - using MIG technology.
- 2. Perform puddling welding.
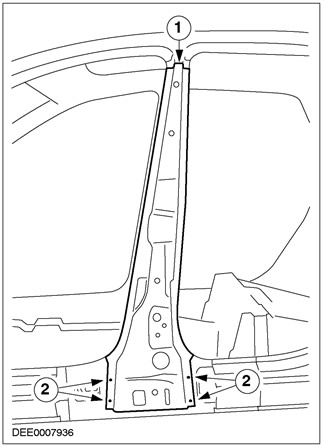
5. External panel of the B-pillar.
- 1. On the cut edge, spot weld a backing strip and weld using MIG technology.
- 2. Perform puddling welding.
- 3. Perform continuous welding using MIG technology.
(The original article is posted at: fordbook)