Connectors for electrical wires of the hydraulic control unit
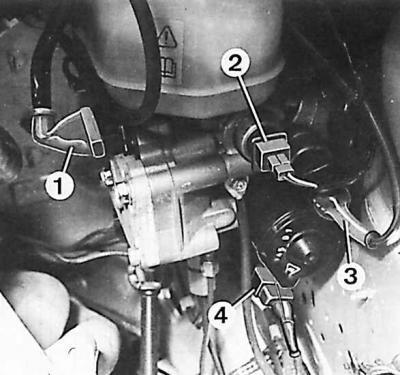
1 - solenoid assembly connector, 2 - main solenoid valve connector, 3 - brake light sensor connector, 4 - hydraulic pump connector
Withdrawal
1. Switch off the ignition.
2. Reduce the pressure in the hydraulic system.
3. Remove the sheet casing of the hydraulic control unit.
4. Disconnect the electrical wire connectors from the hydraulic control unit.
5. Remove the brake fluid from the reservoir with a syringe.
6. Disconnect hydraulic lines from control unit.
7. Close the openings in the pipelines and in the crankcase of the hydraulic control unit with appropriate plugs.
8. Remove the floor trim under the brake pedal.
9. Unscrew the bolts securing the hydraulic control unit.
10. Remove the hydraulic unit.
Attention! After removing the hydraulic control unit, do not touch the push rod.
Installation
To install the hydraulic control unit, follow the steps in reverse order with respect to the process of removing it. After installing the hydraulic control unit, it is necessary to remove air from the brake system (see subsection 3.1.4.10.4).
Visitor comments