Contents: Removal ↳ Installation ↳
Removal the generator
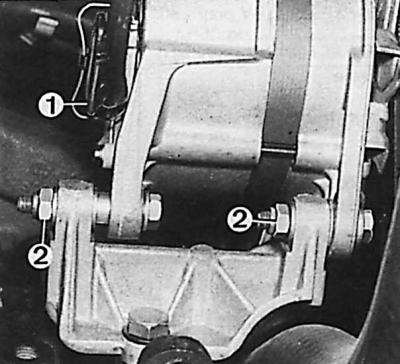
1 – wire connection, 2 – lower mounting bolts
Removal
1. Disconnect the ground wire from the battery and also the multi-pin connector on the back of the generator (after removing the safety clasp).
2. Loosen the generator mounting bolts.
3. Turn the generator towards the engine and remove the V-belt from the generator pulley.
4. Unscrew the mounting bolts and remove the generator.
Installation
1. Insert the generator, screw in the mounting bolts and tighten them by hand.
2. Connect and secure the multi-pin wire connector at the rear of the generator.
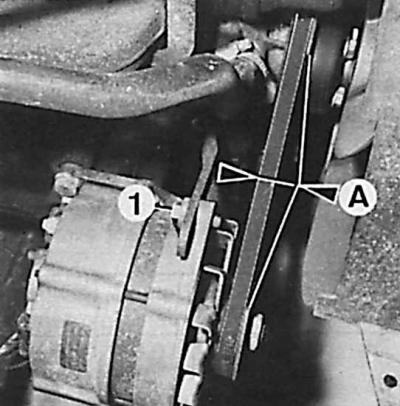
3. Install and tension the V-belt (1 – tensioner bolt, A – belt deflection (A = 10 mm)).
4. Tighten the tension adjustment bolt, then the front lower mount bolt, and finally the rear lower alternator mount bolt.
5. Connect the ground wire to the battery.
6. Check the tension of the V-belt. If necessary, loosen the generator mounting bolts, tighten the V-belt and tighten the bolts again, starting with the tension adjustment bolt, and then the front and rear generator mounting bolts.
[This article is a copy from the website: FORDBOOK.RU]