Contents: Removal ↳ Installation ↳
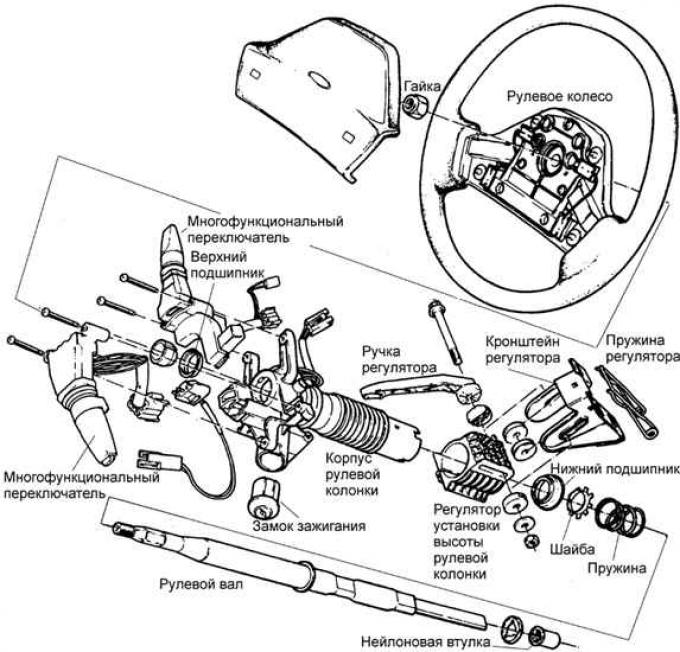
Steering column
Steering wheel height adjustment bracket mounting bolts
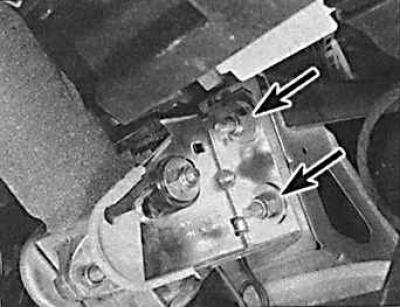
The mounting bolts are indicated by arrows.
Removal
1. Set the vehicle wheels to the forward position.
2. Remove the upper and lower steering column covers. To remove the upper part of the cover, set the steering column height adjustment device to the lower position.
3. Unscrew the steering shaft connecting flange tightening bolt.
4. Remove the hood release lever and disconnect the hood release cable from the steering column.
5. Disconnect the electrical wire connectors from the universal switch, ignition switch and horn.
6. Remove the central nozzle of the ventilation system.
7. Remove the left lower instrument panel trim.
8. Remove the auxiliary indicator lamp unit.
9. Unscrew the three bolts securing the steering column height adjustment bracket.
10. Remove the steering column assembly.
Installation
1. Check that the wheels are correctly positioned for forward movement.
2. Install the steering column in the appropriate place without tightening its mounting nuts.
3. Install the hood release lever.
4. Connect the electrical wire connectors.
5. Install the upper and lower steering column covers.
6. Connect the steering shaft to the drive pinion.
7. Check the symmetry of the steering wheel position when setting the wheels for forward movement.