Warning: Before you begin, read the warning in paragraph 1 this chapter.
Removal and installation of quick-release couplings
1. Quick-release couplings are installed on all fuel injection and drain line fittings.
2. Before removing a fuel system component, relieve any residual pressure (paragraph 2) and equalize the pressure in the fuel tank by removing the cap from its neck.
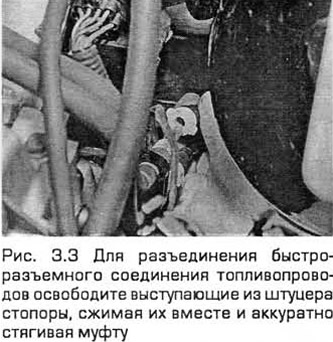
3. On early production models, release the tabs protruding from the nipple by squeezing them together and gently pulling the coupling together. On later production models, a special tool is used to disassemble the coupling. It is used to release the internal spring of the coupling. You can use a substitute for this tool by twisting a piece of plastic tape and inserting it under the coil spring of the quick-release coupling. Use rags to absorb fuel spills. The couplings may be color-coded to avoid confusion. If both couplings for connecting the fuel line are the same color, then remember the location of the fuel line for subsequent correct installation (see Fig. 3.3).
4. To connect the quick-release coupling parts, press them together until the protruding stoppers click into their groove. To restore pressure in the system, turn the ignition on and off five times. Before starting the engine, check for fuel leaks where the couplings were disconnected.
Examination
5. See Chapter 1.
Replacement of components
6. If you need to replace damaged sections, use original hoses or pipes made of the same material. Do not use anything else as a replacement.
7. Before disconnecting the fuel system components, pay attention to how the hoses and pipes are routed and how the clamps and fasteners are positioned. The new section of the system must be installed in exactly the same way.
8. Before disconnecting any part of the fuel system, make sure that there is no pressure in the system (paragraph 2) and equalize the pressure in the fuel tank by removing the fuel tank cap. Also disconnect the negative battery cable (Chapter 5, paragraph 1). Cover the connection to be disassembled with a rag to absorb any fuel spills.