Withdrawal
1.
CAUTION: To avoid damage, the overhead console trim panel may only be pulled down the distance necessary to disengage the mounting clips.
Detach the overhead console trim panel from the overhead console.
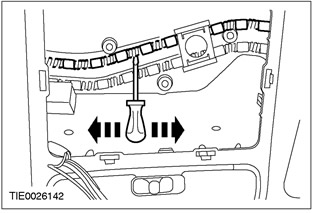
- 1. Using a suitable screwdriver, disconnect the front mounting clips.
- 2. Pull the overhead console trim panel down to release the side mounting clips.
- 3. Push the overhead console trim panel forward to disengage the rear mounting clips.
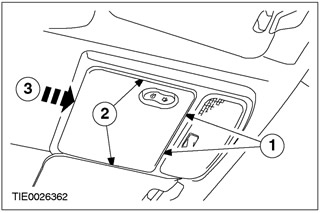
2. Remove the overhead console trim panel.
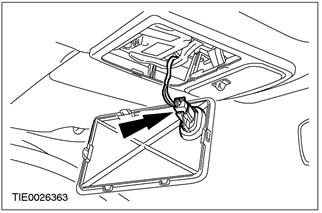
- Disconnect the sunroof power switch electrical connector.

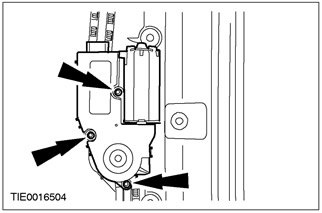
3. Disconnect the sunroof motor electrical connector (roof sheathing shown removed for clarity).

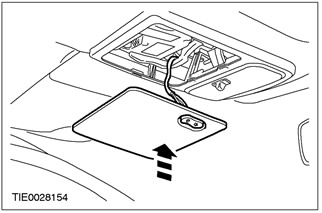
4. Remove the sunroof motor.
Installation
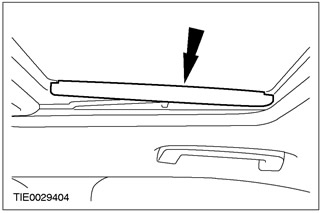
1. Remove the sliding sunroof guide arm covers.
2.
CAUTION: The drive pins must be centered between the tabs as shown.
Check alignment of left and right cable guide pins (left side shown). Click on the bar.

3. Adjust left cable guide pin.
- Using a suitable screwdriver, move the cable in the required direction.
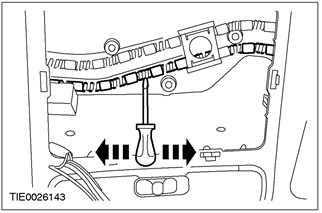
4. Adjust the right cable guide pin.
- Using a suitable screwdriver, move the cable in the required direction.
5. Install the sunroof guide arm covers.

6. Connect the electrical connector of the sunroof motor (roof sheathing shown removed for clarity).

7. Connect the sunroof motor switch electrical connector.
8.
CAUTION: This step is required when reinstalling a used sunroof motor.
NOTE: This step is not required when installing a new sunroof motor.
Perform the sunroof motor timing erase procedure. For more information, refer to the Sliding Sunroof Motor Timing chapter in this section.
9. Install the sunroof motor.

10. Perform the appropriate sunroof motor timing procedure. For more information, refer to the Sliding Sunroof Motor Timing chapter in this section.
11. Install the overhead console trim panel.
Visitor comments