Note: Camshaft drive chain slack increases with wear. The following will talk about the method of checking the circuit without disassembling the engine.
Checking the deflection of the camshaft drive chain
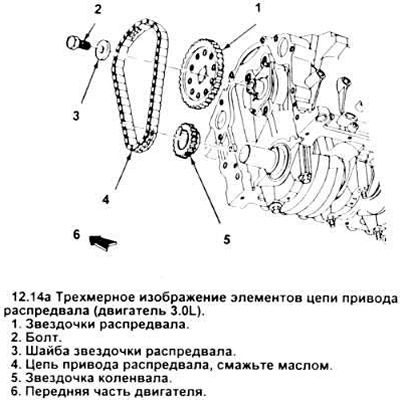
For 3.0L engines
1. Disconnect the negative battery cable.
2. Remove the front valve cover (section 3).
3. Loosen cylinder #5 exhaust valve lever bolt (central). This is the fourth valve lever on the left side of the engine (from the drive belt) Turn the valve lever.
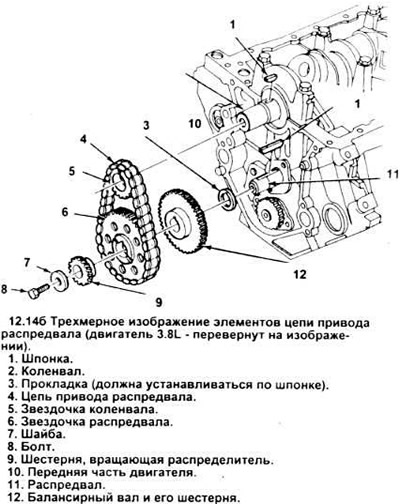
Only for 3.8L engines
4. Remove the rear valve cover (section 3).
5. Loosen the #3 cylinder exhaust valve lever bolt Turn the valve lever.
For milestone engines
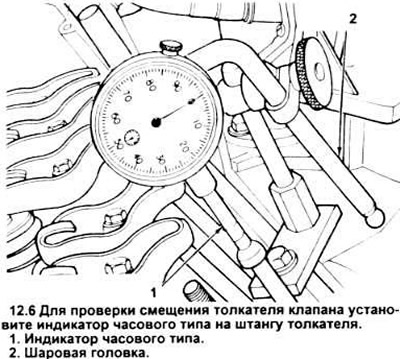
6. Connect a dial gauge to the end of the push rod (see picture).
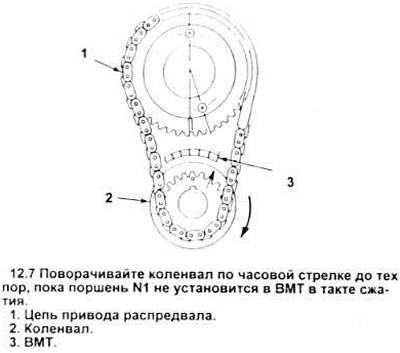
7. Turn the crankshaft clockwise to the TDC position (section 11) This will take up the slack on the right side of the chain (see picture).
8. Zero the indicator.
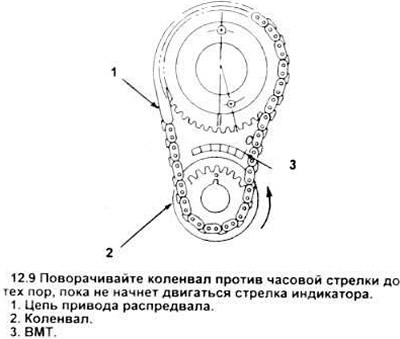
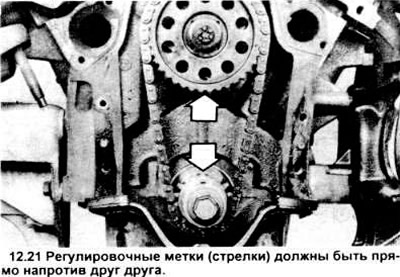
9. Slowly turn the crankshaft counterclockwise until you notice the movement of the arrow on the indicator (see picture). Stop and look at the adjustment marks to determine the angle of deviation from TDC.
10. If the value reaches 6 degrees, replace the camshaft drive target and sprocket.
Withdrawal
11. Set piston No. 1 to TDC (section 11).
12. Remove the camshaft drive chain cover (section 10). When removing the shock absorber, do not move the crankshaft.
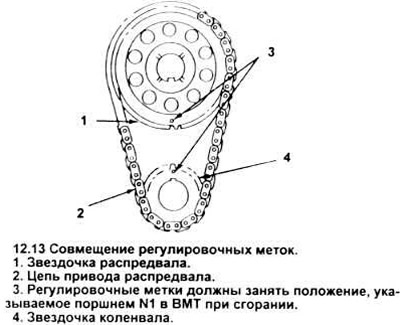
13. Check the coincidence of the labels of the upper and lower chain sprockets (see picture). If they do not match, screw in the shock absorber bolt and use it to turn the crankshaft clockwise until the marks line up.
14. Remove the bolt securing the camshaft sprocket (see picture) And. only for 3.8L, distributor gear (see picture).
15. Pull the camshaft sprocket out of the engine and slide it down slightly to release the chain from the crankshaft sprocket.
16. If the crankshaft sprocket cannot be removed by hand, carefully pry it out with two screwdrivers.
17. 3.8L engines are equipped with a balance shaft. It is not necessary to remove the balancer gear to remove the camshaft drive chain. If you need more access to the camshaft, remember the location of the adjustment marks on the balance shaft and subsequently install the gears on them.
Installation
18. Install the crankshaft sprocket (see picture), making sure that the keyway and shim are on top (position "12 hours").
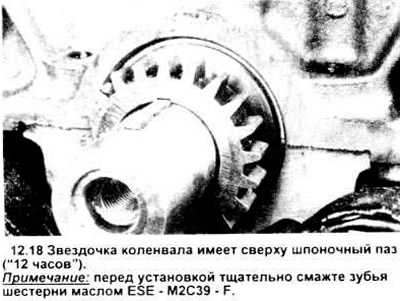
19. If the sprocket is difficult to move, slide the extension tube onto the shaft and use a small hammer to set the sprocket in place. Make sure the keyway is not warped.
20. Pull the chain over the camshaft sprocket so that the adjustment mark is exactly down (position "6 hours"). Put the chain on the crankshaft sprocket and put the camshaft sprocket on the camshaft.
21. In this position, the adjustment marks must be adjacent (camshaft sprocket mark at 6 o'clock and crankshaft mark at 12 o'clock), (see picture).
Caution: Incorrect installation and adjustment can cause serious engine damage.
22. Install timing gear (only in 3.8L engines) and tighten the camshaft sprocket bolt to specification.
23. Reassemble the remaining parts in the reverse order of disassembly. Make sure the spring and push button axial load (in early modifications 3.8L) properly installed and well lubricated.
24. If necessary, add oil and coolant, start the engine, check for leaks.
Visitor comments