2. On the side where you are dismantling, disconnect the ignition wires from the spark plugs.
3. Mark the location of the studs with the wiring brackets (see picture), pull the staples off the studs.

4. Remove the oil filler cap, and on 3.0L models, disconnect the suction line.
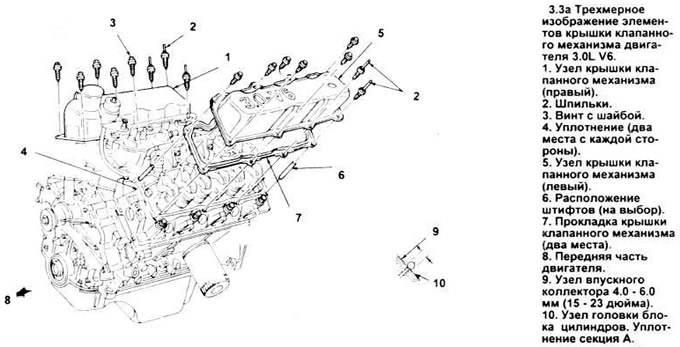
5. Before removing the back cover, remove the PCV valve (chapter 6), and on 3.8 L models, set the air cleaner aside. On 3.0L models, remove the EGR pipe from the exhaust manifold for better access. If you are removing the valve cover for any other service procedure, then remove the upper intake manifold as instructed in chapter 4.
6. Remove the bolts connecting the valve cover.
7. Carefully remove the cover. If she "stuck", tap it with a soft-faced hammer to dislodge it.
8. Remove any gasket residue from the head and cover. Wipe off oil and dirt with a cloth soaked in acetone or lacquer thinner.
9. Before screwing in the bolts, impregnate their threads with oil.
10. On 3.0L models, apply a coat ("pillow") RTV sealant on the cylinder head adjacent to the intake manifold guides (in two places on the guide).
11. Place a new gasket and install the cover.
Note: 1991 and later 3.0L engine models can reuse the old gasket if it is in good condition.
12. Tighten the bolts to specification torque by working around the cover in several steps.
13. Install the parts removed earlier for ease of operation. Add coolant if you have drained it.
Visitor comments